background image

3


5)


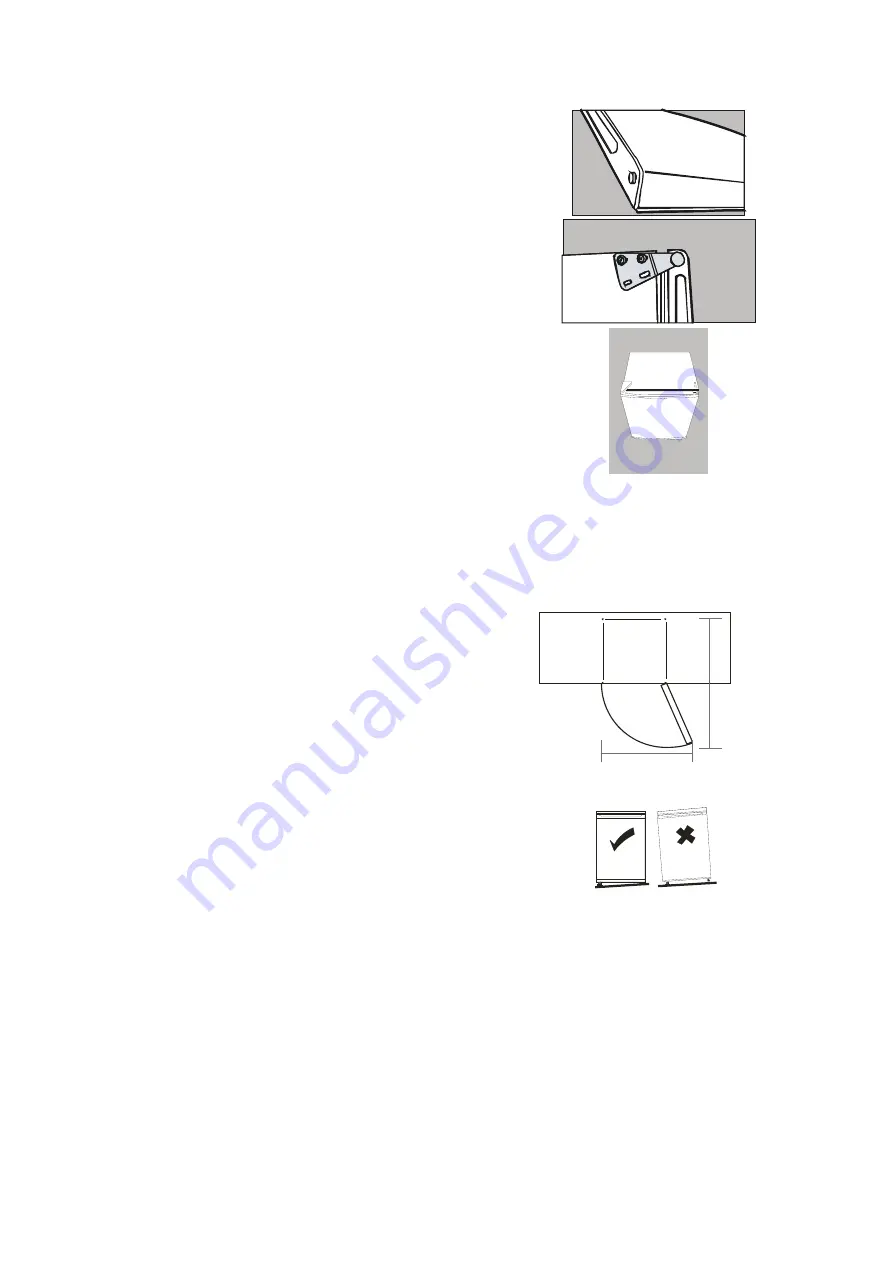
Slide


the


door


downwards


and


off


the


top


hinge


pin.


Lift


and


remove


door,


place


to


side.


6)


Remove


the


two


screws


from


top


bracket


and


transfer


to


the


other


side.


You


will


need


to


first


remove


the


plastic


caps


on


the


other


side.


7)


Slide


the


door


back


onto


the


top


hinge,


be


sure


the


door


is


the


right


way


up.


8)


Screw


the


bottom


hinge


into


place


on


the


new


side.


9)


Place


the


foot


on


the


other


side.


10)


Cover


the


top


of


door


hinge


with


plastic


cover


by


gently


pushing


into


position.


11)


Check


that


the


door


is


aligned


horizontally


and


vertically


and


that


the


seals


are


closed


on


all


sides


before


final


tightening


of


the


bottom


hinge.


12)


Adjust


the


leveling


feet


as


needed.


2.3


Door


Space


Requirements


The


unit's


door


must


be


able


to


open


fully


as


shown.


W

×

D

35.5


in.


×


31.5


in.


2.4


Levelling


the


Unit


Adjust


the


two


leveling


feet


at


the


front


of


the


unit.


If


the


unit


is


not


leveled,


the


door


and


magnetic


seal


alignments


will


not


be


covered


properly.


2.5


Cleaning


Before


Use


Wipe


the


inside


of


the


unit


with


a


weak


solution


of


bicarbonate


soda.


Then


wipe


with


a


“wrung

out”


sponge


or


cloth


with


warm


water.


Wash


the


shelves


and


salad


bin


in


warm


soapy


water


and


dry


completely


before


replacing


in


the


unit.


Clean


the


exterior


of


the


unit


with


a


damp


cloth.


If


you


require


more


information


refer


to


the


Cleaning


section.


W

D

Summary of Contents for FR-033RVBE

Page 1: ...FR 033RVBE FR 033RVWE ...

Page 2: ...Contents 1 SAFETY WARNINGS 1 2 INSTALLATION 2 3 PRODUCT OVERVIEW 4 4 OPERATION 5 5 CLEANING 6 6 MAINTENANCE 6 7 TROUBLESHOOTING 7 8 TIPS FOR ENERGY SAVING 7 9 DISPOSAL 8 ...

Page 3: ...ot be made by children without supervision 8 If the supply cord is damaged it must be replaced by the manufacturer its service agent or similar qualified persons in order to avoid a hazard 9 Please abandon the refrigerator according to local regulations as the unit contains flammable blowing gas and refrigerant 10 Follow local regulations regarding disposal of the appliance due to flammable refrigera...

Page 4: ...nd the refrigerator and improves the unit s cooling efficiency The door can be opened to the right or the left depending on what better suits the location Please ensure there is adequate space for the door to fully open 2 2 Reversing the Door Swing Tools Required Phillips style screwdriver Flat blade screwdriver Hexagonal spanner We recommend that 2 people handle the unit for door reversal Be sure t...

Page 5: ... seals are closed on all sides before final tightening of the bottom hinge 12 Adjust the leveling feet as needed 2 3 Door Space Requirements The unit s door must be able to open fully as shown W D 35 5 in 31 5 in 2 4 Levelling the Unit Adjust the two leveling feet at the front of the unit If the unit is not leveled the door and magnetic seal alignments will not be covered properly 2 5 Cleaning Bef...

Page 6: ... allowing the coolant to settle 2 7 Interior Accessories Various glass or plastic storage shelves are included with your appliance different models have different combinations In order to make the most of the storage volume you can remove shelves or drawer according to your usage needs It is recommended to place one of the full size shelves in the lowest set of guides and keep it in this position 3 ...

Page 7: ...akes some unusual noises Most of these are perfectly normal but you should be aware of them These noises are caused by the circulation of the refrigerant in the cooling system It has become more pronounced since the introduction of CFC free gases This is not a fault and will not affect the performance of your unit This is the compressor motor working as it pumps the refrigerant around the system 4 ...

Page 8: ...e the unit The condenser grille located at the back of the unit and the adjacent components can be vacuumed using a soft brush attachment 5 3 Cleaning Tips Condensation may appear on the outside of the unit This may be caused by change of room temperature Wipe off any moisture residue If the problem still exist please contact a qualified technician for assistance 6 MAINTENANCE 6 1 Care When Handling...

Page 9: ...is is caused by the radiation of the condenser and it is a normal phenomenon Condensation condensation may be detected on the exterior surface and door seals when the ambient humidity is high This is normal Simply wipe out the condensing water with a dry towel Buzz the compressor will buzz during starting up or shutting down 8 TIPS FOR ENERGY SAVING Try not to open the door too often especially wh...

Page 10: ... refrigerant used in your unit and insulation materials require special disposal procedures Ensure that none of the pipes on the back of the unit are damaged prior to disposal Up to date information concerning options of disposing of your old unit and packaging from the new one can be obtained from your local council office When disposing an old unit break off any locks or latches and remove the d...

Page 11: ...FR 033RVBE FR 033RVWE www daewooelecusa com ...

Reviews: