29
B. ADJUSTMENT OF THE A/C HEAD ASS'Y
(TILT ADJUSTMENT)
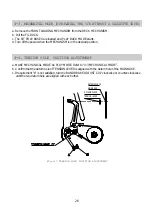
a. Play back a T-120 Tape and check the running condition of
the TAPE at the lower flanges of the T GUIDE POST
ASS'Y
¤æ
in Fig. 5-1.
b. Adjust the A/C HEAD TILT SCREW untill the TAPE runs
stable as shown in Fig. 5-2
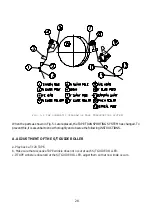
C. ADJUSTMENT OF THE AUDIO AZIMUTH
(See Fig.5-3)
a. Play back the ALIGNMENT CASSETTE TAPE
(NTSC: DN2 (SP, 7KHz), PAL: DP2 (SP, 6KHz))
b. Observe audio signals on an OSCILLOSCOPE.
c. Turn the A/C HEAD AZIMUTH SCREW to obtain the
maximum audio output signal (-9~-3dBm).
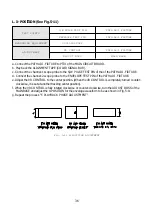
D. THE HEIGHT ADJUSTMENT OF A/C
HEAD
a. Play back a T-120 TAPE.
b. Make sure that the gap is 0.25mm between the lower end of TAPE and that of A/C HEAD.
c. When the gap is longer than 0.25mm, turn the A/C HEAD HEIGHT ADJUST NUT counter-clockwise.
When the gap is shorter than 0.25mm, turn it clockwise.
Repeat this procedure untill 0.25mm is obtained.
( )
( )
Fig. 5-2 A/C HEAD ASS’Y ADJUSTMENT
(TILT ADJUSTMENT)
Fig. 5-3 A/C HEAD ASS’Y
GAP
Fig. 5-4 A/C HEAD ASS’Y ADJUSTMENT (HEIGHT ADJUSTMENT)
TURN THE A/C HEAD TILT
S C R E W T O T H E
DIRECTION OF CW
TURN THE A/C HEAD TILT
S C R E W T O T H E
DIRECTION OF
C C W
Summary of Contents for K-MECHA DECK
Page 1: ......
Page 4: ...3 1 2 1 WIRE DIAGRAM 1 2 WIRE DIAGRAM ...
Page 8: ...7 2 1 2 PARTS LOCATION OF FRONT LOADING ASS Y A TOP VIEW B FRONT VIEW ...
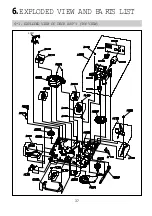
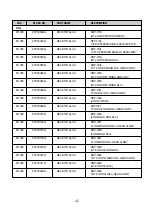
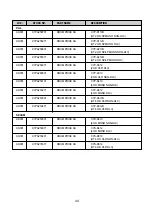
Page 38: ...37 6 EXPLODED VIEW AND PA RTS LIST 6 1 EXPLODED VIEW OF DECK ASS Y TOP VIEW AC001 ...
Page 39: ...38 6 2 EXPLODED VIEW OF DECK ASS Y BOTTOM VIEW ...
Page 40: ...39 6 3 EXPLODED VIEW OF F L ASS Y ...
Page 41: ...40 ...
Page 48: ...S022GBB ...


