7
8
The oven light is on when the microwave oven is
operating or the door is opened.
The oven door can be opened at any time during
operation by touching the door release button on
the control panel. The oven will automatically
shut off.
Each time a pad is touched, a BEEP will sound
to acknowledge the touch.
The oven automatically cooks on full power
unless set to a lower power level.
The display will show “ : 0” when the oven is
plugged in.
Time clock returns to the present time when the
cooking time ends.
When the STOP/CLEAR pad is touched during the
oven operation, the oven stops cooking and all
information retained. To erase all
information(except the present time), touch the
STOP/CLEAR pad once more. If the oven door is
opened during the oven operation, all information
is retained.
If the START pad is touched and the oven does
not operate, check the area between the door and
door seal for obstructions and make sure the door
is closed securely. The oven will not start cooking
until the door is completely closed or the program
has been reset.
OPERATION PROCEDURE
This section includes useful information about oven operation.
1. Plug power supply cord into a 230V 50Hz power outlet.
2. After placing the food in a suitable container, open the oven door and put it on the glass tray.
The glass tray and roller guide must always be in place during cooking.
3. Shut the door. Make sure that it is firmly closed.
1
2
3
4
5
6
7
8
Make sure the oven is properly installed and
plugged into the electrical outlet.
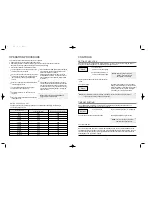
WATTAGE OUTPUT CHART
• The power-level is set by pressing the Power pad. The chart shows the display, the power level
and the percentage of power.
Power level (Display)
Approximate Percentage of Power
Touch Power pad
once
P-HI
100%
twice
P-90
90%
3 times
P-80
80%
4 times
P-70
70%
5 times
P-60
60%
6 times
P-50
50%
7 times
P-40
40%
8 times
P-30
30%
9 times
P-20
20%
10 times
P-10
10%
11 times
P-00
0%
CONTROLS
SETTING THE CLOCK
When the oven is first plugged in, the display will flash “ :0” and a tone will sound. If the AC power
ever goes off, the display shows “ :0” when the power comes back on.
1. Touch Clock pad.
This is a 12 hour clock system.
2. Touch Clock pad once more.
This is a 24 hour clock system.
3. Enter the correct time of day by touching the time set
pads.
4. Touch Clock pad.
NOTE: If you attempt to enter an incorrect time, the time will not be set and a error signal tone will
sound. Touch the Clock pad and re-enter the time.
The display stops blinking, and the colon starts
blinking. If you selected 12 hour clock system, this
digital clock allows you to set from 1:00 to 12:59. If
you selected 24 hour clock system, this digital
clock allows you to set from 0:00 to 23:59.
TIME DEFROSTING
When TIME Defrost is selected, the automatic cycle divides the defrosting time into periods of
alternating defrost and stand times by cycling on and off.
When you touch START pad, the Def. indicator starts blinking to show the oven is in the DEFROST mode.
The display counts down the time to show you how much defrosting time is left in the DEFROST mode. The
oven beeps during the defrosting cycle to signal that the food needs to be turned or rearranged. When the
defrosting time ends, you will hear 3 beeps.
NOTE : This oven has multiple clock
systems. If you want 12 hour
clock system, omit this step.
1. Touch Defrost pad.
2. Touch the time set pads for the desired time.
3. Touch START pad.
The Def. indicator lights and " : 0" is displayed.
The display will show what you touched.
Clock
Clock
Defrost
NOTE: Your oven can be programmed for
99 minutes 90 seconds.(99:90)


