S0605060K
Page 22
Air-Conditioner
2.
Check system for vacuum leak.
Allow system to sit for 10 minutes and
check whether the system is holding the
pressure. If the pressure has dropped, it
must be repaired before proceeding to the
next step.
3.
Vacuuming Procedure
If the system is holding the pressure and it
has not changed for 10 minutes, vacuum
out the system for an additional 20
minutes.
A.
Turn on the vacuum pump and slowly
open both valves.
B.
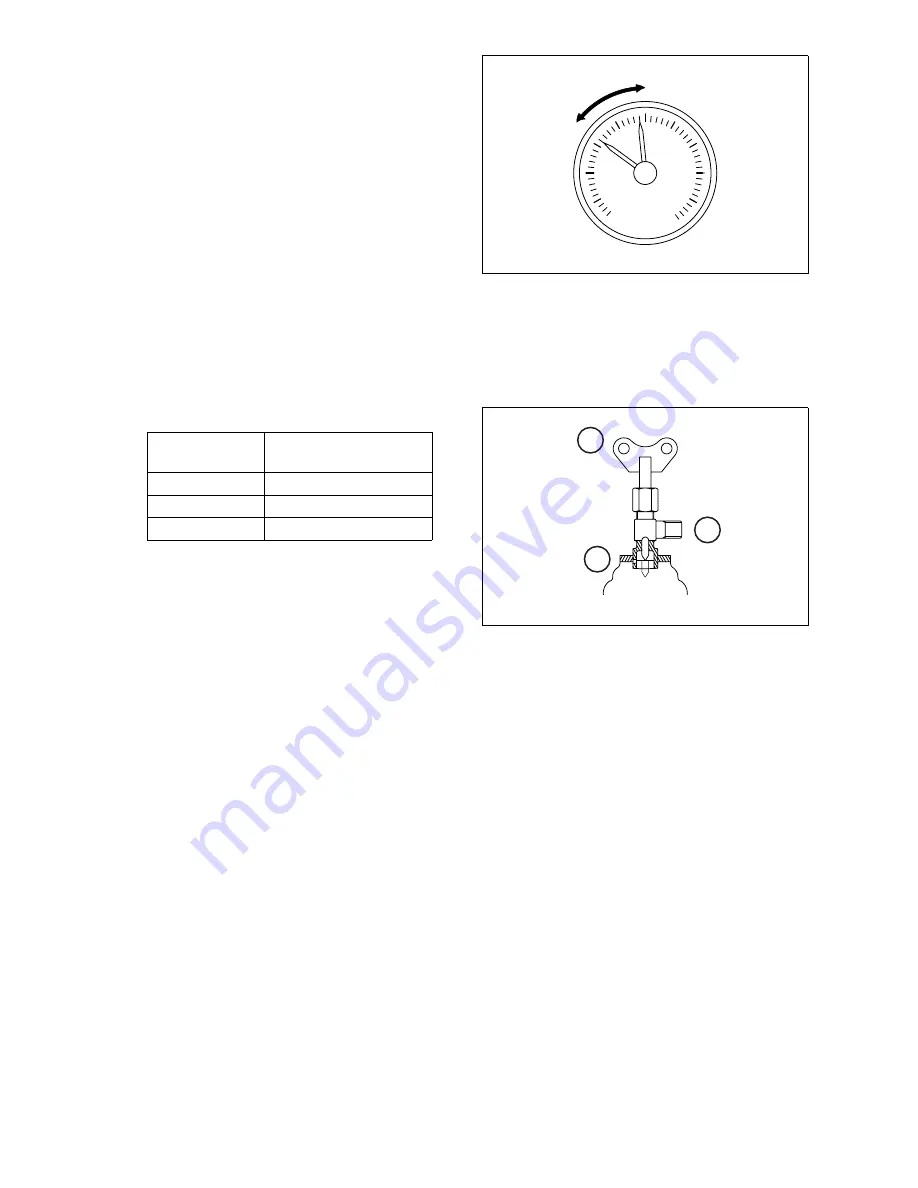
Allow vacuum pump to run for additional 20 minutes until the low pressure gauge dial reads
approximately 750 mmHg.
C.
Close both valves and stop the vacuum pump.
4.
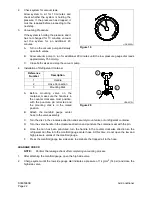
Installation of Refrigerant Container
A.
Before mounting valve on the
container, make sure the handle is in
the counter clockwise most position,
with the puncture pin retracted and
the mounting disk is in the raised
position.
B.
Attach the manifold gauge center
hose to the valve assembly.
C.
Turn the disc in the clockwise direction and securely mount valve onto refrigerant container.
D.
Turn the valve handle in the clockwise direction and puncture the container seal with the pin.
E.
Once the can has been punctured, turn the handle in the counter clockwise direction so the
refrigerant can flow into the manifold gauge center hose. At this time, do not open the low and
high pressure valves of the manifold gauge.
F.
Press the manifold gauge low side valve to eliminate the trapped air in the hose.
LEAKAGE CHECK
NOTE:
Perform the leakage check after completing vacuuming process.
1.
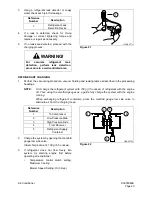
After attaching the manifold gauge, open the high side valve.
2.
Charge system until the low side gauge dial indicates a pressure of 1 kg/cm
2
(14 psi) and close the
high side valve.
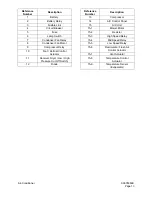
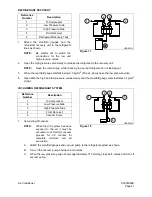
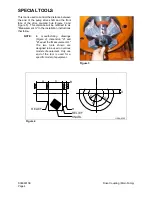
Reference
Number
Description
1
Handle
2
Hose Connection
3
Mounting Disk
HDA6069L
Figure 19
1
2
3
HDA6070L
Figure 20
Summary of Contents for Solar 470LC-V
Page 2: ......
Page 4: ......
Page 7: ...1SAFETY...
Page 8: ......
Page 46: ...S0102000 Page 38 Track Excavator Safety...
Page 47: ...1SPECIFICATIONS...
Page 48: ......
Page 54: ...S0202090K Page 6 Specifications for Solar 470LC V...
Page 70: ...S0202090K Page 22 Specifications for Solar 470LC V...
Page 71: ...1GENERAL MAINTENANCE...
Page 72: ......
Page 86: ...S0302000 Page 14 General Maintenance Procedures Return to Master Table of Contents...
Page 99: ...1UPPER STRUCTURE...
Page 100: ......
Page 102: ...S0402040K Page 2 Cab TABLE OF CONTENTS Removal 3 Installation 6...
Page 116: ...S0403050K Page 8 Counterweight Return to Master Table of Contents...
Page 140: ...S0407000 Page 6 Swing Bearing...
Page 155: ...S0408060 Page 15 Swing Reduction Gearbox...
Page 163: ...1LOWER STRUCTURE AND CHASSIS...
Page 164: ......
Page 190: ...S0505120 Page 26 Track Assembly Return to Master Table of Contents...
Page 191: ...1ENGINE AND DRIVE TRAIN...
Page 192: ......
Page 203: ...S0605060K Page 11 Air Conditioner Face and Defroster ARS1300L Figure 12...
Page 218: ...S0605060K Page 26 Air Conditioner...
Page 227: ...1HYDRAULICS...
Page 228: ......
Page 258: ...S0702190K Page 30 Hydraulic System Troubleshooting Testing and Adjustment...
Page 260: ...S0703010K Page 2 Accumulator TABLE OF CONTENTS General Description 3 Specifications 4...
Page 264: ...S0703010K Page 6 Accumulator...
Page 272: ...S0704090K Page 8 Center Joint Swivel...
Page 281: ...S0705000 Page 9 Cylinders...
Page 285: ...S0705000 Page 13 Cylinders...
Page 289: ...S0705000 Page 17 Cylinders...
Page 297: ...S0705000 Page 25 Cylinders...
Page 306: ...S0705000 Page 34 Cylinders 17 Force out pin bushing 1 from body of cylinder Figure 28...
Page 310: ...S0705000 Page 38 Cylinders...
Page 317: ...S0707260 Page 7 Swing Motor...
Page 321: ...S0707260 Page 11 Swing Motor SPECIAL TOOLS Figure 5...
Page 338: ...S0707260 Page 28 Swing Motor...
Page 350: ...S0707365 Page 12 Travel Motor With Gearbox A6V160HD PARTS LIST Travel Motor Figure 12 HTS6331...
Page 354: ...S0707365 Page 16 Travel Motor With Gearbox A6V160HD Travel Motor Control HTS6331 Figure 14...
Page 383: ...S0707365 Page 45 Travel Motor With Gearbox A6V160HD 29 Remove gasket Figure 91 Figure 91 3061...
Page 401: ...S0708325K Page 3 Main Pump Rexroth...
Page 402: ...S0708325K Page 4 Main Pump Rexroth SECTIONAL VIEW A8VO200LA1KH1 63 ASS0010L Figure 1...
Page 403: ...S0708325K Page 5 Main Pump Rexroth ASS0020L Figure 2...
Page 414: ...S0708325K Page 16 Main Pump Rexroth REMOVE THE CONTROL HOUSING ASS0280L Figure 29...
Page 450: ...S0708325K Page 52 Main Pump Rexroth INSTALLATION OF COVER AUXILIARY DRIVE ASS1100L Figure 111...
Page 454: ...S0708325K Page 56 Main Pump Rexroth...
Page 459: ...S0709402K Page 5 Control Valve Kayaba Model KVMG 400 DA...
Page 461: ...S0709402K Page 7 Control Valve Kayaba Model KVMG 400 DA Figure 1...
Page 463: ...S0709402K Page 9 Control Valve Kayaba Model KVMG 400 DA Figure 2...
Page 465: ...S0709402K Page 11 Control Valve Kayaba Model KVMG 400 DA Figure 3...
Page 475: ...S0709402K Page 21 Control Valve Kayaba Model KVMG 400 DA...
Page 477: ...S0709402K Page 23 Control Valve Kayaba Model KVMG 400 DA Figure 13...
Page 483: ...S0709402K Page 29 Control Valve Kayaba Model KVMG 400 DA PARTS LIST Figure 30...
Page 484: ...S0709402K Page 30 Control Valve Kayaba Model KVMG 400 DA Figure 31...
Page 485: ...S0709402K Page 31 Control Valve Kayaba Model KVMG 400 DA Figure 32...
Page 509: ...S0709402K Page 55 Control Valve Kayaba Model KVMG 400 DA Figure 57 S N 1051 and Up...
Page 512: ...S0709402K Page 58 Control Valve Kayaba Model KVMG 400 DA...
Page 560: ...S0792170K Page 4 Hydraulic Schematic S470LC V SOLAR 470LC V Figure 2...
Page 561: ...S0792170K Page 5 Hydraulic Schematic S470LC V...
Page 562: ...S0792170K Page 6 Hydraulic Schematic S470LC V...
Page 563: ...1ELECTRICAL SYSTEM...
Page 564: ......
Page 618: ...S0802220K Page 54 Electrical System...
Page 637: ...S0802220K Page 73 Electrical System...
Page 644: ...S0892170K Page 4 Electrical Schematic S470LC V SOLAR 470LC V Figure 2...
Page 646: ...S0892170K Page 6 Electrical Schematic S470LC V...
Page 647: ...1ATTACHMENTS...
Page 648: ......
Page 668: ......

