EN - 11
3. INSTALLATION
3.1
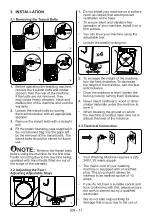
Removing the Transit Bolts
X
X
4
4
X
4
1
3
2
4
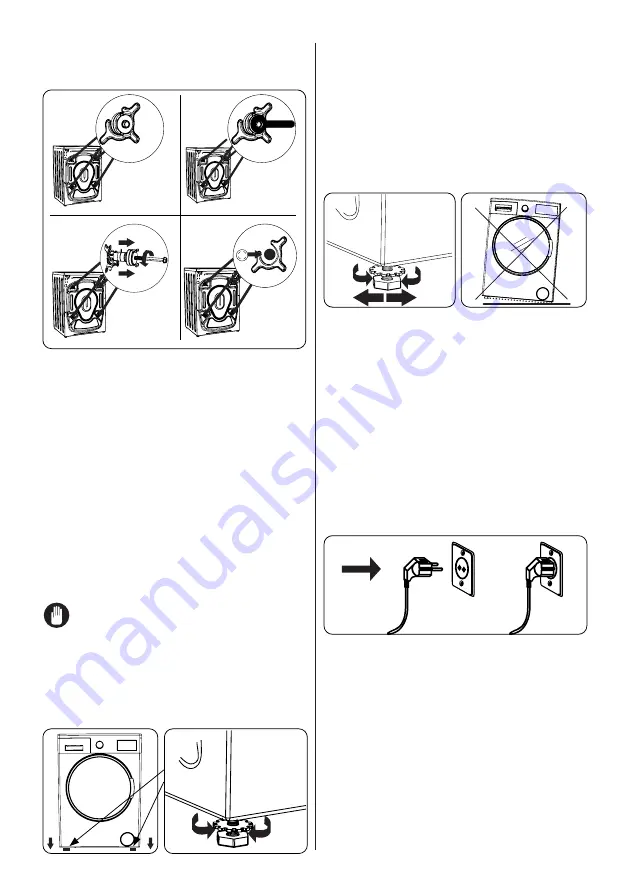
1.
Before operating the washing machine,
remove the 4 transit bolts and rubber
spacers from the rear of the machine.
If the bolts are not removed, they
may cause heavy vibration, noise and
malfunction of the machine and void the
warranty.
2.
Loosen the transit bolts by turning
them anticlockwise with an appropriate
spanner.
3.
Remove the transit bolts with a straight
pull.
4.
Fit the plastic blanking caps supplied in
the accessories bag into the gaps left
by the removal of the transit bolts. The
transit bolts should be stored for future
use.
NOTE:
Remove the transit bolts
before using the machine for the first time.
Faults occurring due to the machine being
operated with transit bolts fitted are out of
the scope of the warranty.
3.2
Adjusting the Feet /
Adjusting Adjustable Stays
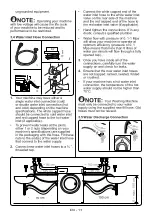
1
1.
Do not install your machine on a surface
(such as carpet) that would prevent
ventilation at the base.
•
To ensure silent and vibration-free
operation of your machine, install it on a
firm surface.
•
You can level your machine using the
adjustable feet.
•
Loosen the plastic locking nut.
X
4
2
3
2.
To increase the height of the machine,
turn the feet clockwise. To decrease
the height of the machine, turn the feet
anticlockwise.
•
Once the machine is level, tighten the
locking nuts by turning them clockwise.
3.
Never insert cardboard, wood or other
similar materials under the machine to
level it.
•
When cleaning the ground on which
the machine is located, take care not to
disturb the level of the machine.
3.3
Electrical Connection
•
Your Washing Machine requires a 220-
240V, 50
mains supply.
•
The mains cord of your washing
machine is equipped with an earthed
plug. This plug should always be
inserted to an earthed socket of 10
amps.
•
If you do not have a suitable socket and
fuse conforming with this, please ensure
the work is carried out by a qualified
electrician.
•
We do not take responsibility for
damage that occurs due to the use of


