background image

Chapter 17 Compile the Packed Pattern and Embroidering Pattern 

Chapter 17  

Compile the Packed Pattern and Embroidering Pattern 

17-1 Compile the Packed Pattern 

Operation: 

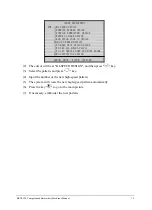
(1) 


Press "

" key, and then press"

" key, the menu appears as following: 


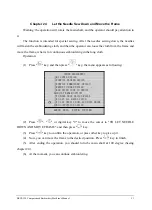
OTHER MANAGEMENT 


①HI-SPEED DESIGN 
②COMPILE PACKED DESIGN 
③COMPILE EMBROIDER. DESIGN 


      ARROW:MOVE, ENTER:CONFIRM 

④FRAME TO MAKE DESIGN 
⑤ADD PATCH CODE TO DESIGN 

ADJUST BRAKE(OPTION) 

⑦TO MAKE TRUE DESIGN RANGE 
⑧TO SET ALL HEADS PATCH 
⑨TO LET NEEDLE DOWN AND MOVE FRAME 
⑩NO OUTPUTTING DESIGN


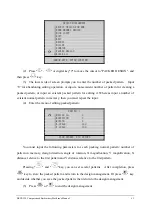
(2) 


Press "

"

"

" or digital key "2" to move the cursor to "COMPILE PACKED 

DESIGN", and then press "

" key. 

(3) 


Select the packed pattern which extension name is "PAR", and press "

" key. 

(4) 


Press "

" key to confirm compiling the packed pattern, or press other key to exit. 

(5) 


Input the number of new pattern, and the system will create the new normal pattern 

automatically, which is identical with the packed pattern. 

(6) 


Press "

" key to go to the main picture. 

17-2 Compile the Embroidering Pattern 

Operation: 

(1) 


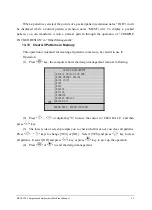
Press "

" key, and then press "

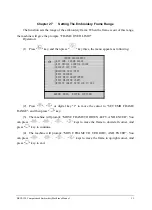
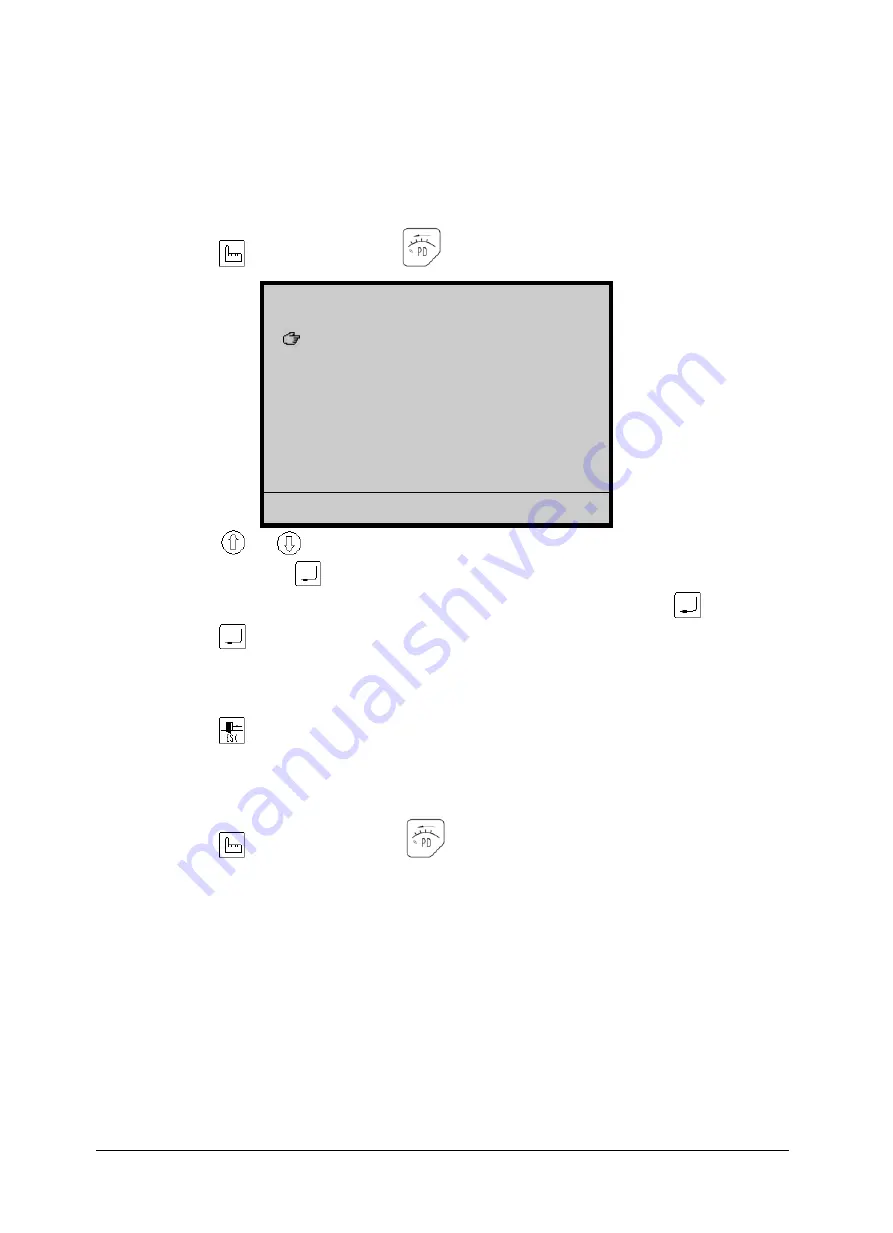
" key, the menu appears as following: 

BECS-328 Computerized Embroidery Machine's Manual 

79


Summary of Contents for BECS-328

Page 1: ...B E C S 328 Version 2008 03...

Page 2: ...m of Beijing Xingdahao Technology Co Ltd Is in conformity with GB T 19001 2000 idt ISO 9001 2000 Standard This certificate is valid to the following product s service Design and manufacture of compute...

Page 3: ...RELEASE EMBROIDERY CONFIRMATION STATUS 18 CHAPTER 4 NORMAL EMBROIDERY AND IDLING 20 4 1 RELATIONS BETWEEN NORMAL EMBROIDERY AND IDLING 20 4 2 LOW SPEED IDLING 20 4 3 HIGH SPEED IDLING 20 4 4 RELEASE O...

Page 4: ...TRIMMING THREAD 37 CHAPTER 10 DISK OPERATIONS 38 10 1 DIRECTORY LISTING OF DISK 38 10 2 INPUT PATTERN FROM DISK TO MEMORY 38 10 3 OUTPUT PATTERN FROM MEMORY TO DISK 39 10 4 DELETING THE PATTERN IN FL...

Page 5: ...INESE ENGLISH SPANISH 58 12 11 SET CYCLIC EMBROIDERY 59 12 12 SET DATE TIME 59 CHAPTER 13 MANAGEMENT OF PATTERN IN MEMORY 60 13 1 SELECT A PATTERN FOR EMBROIDERY 60 13 2 LIST THE PATTERN IN MEMORY 60...

Page 6: ...84 20 2 LET NEEDLE DOWN 84 20 3 SWITCHING THE VALVES IN QUILT EMBROIDERY 85 CHAPTER 21 SHIFT THE FRAME TO MAKE A NEW DESIGN 86 CHAPTER 22 SETTING THE CYCLIC EMBROIDERING 87 CHAPTER 23 ADJUST THE MACH...

Page 7: ...COLORS 97 CHAPTER 30 MANUAL OF EMBCOM SOFTWARE 98 30 1 INSTALLATION 98 30 2 UNINSTALL 99 30 3 RUN AND USE THE EMBCOM SOFTWARE 101 30 4 COMMUNICATION OPERATION OF EMBROIDERY MACHINE 103 CHAPTER 31 SEQ...

Page 8: ...tion which may cause trouble to the machine Notice Please abide all the warnings and safety requirements to save life Notice LCD belongs to fragile goods Do not use hard materials to click on the scre...

Page 9: ...han 10 Operation direction Danger Don t operating the machine when there is any damage on the surface Forbidding When machine is running do not touch any running part Notice Make sure the configuratio...

Page 10: ...200 The maximum is 190 when the machine has been installed with letter design library 5 Design Storage Capacity The system memory can store 2 000 000 stitches 1 3 Main Functions 1 Design Input and out...

Page 11: ...ing stitch the machine can change color manually or change color automatically according to the preset color line 7 Repetition Embroidery The machine can increase embroidery productivity by repetition...

Page 12: ...ly which means that the main shaft stops at 100 degree 14 Save and store the origin point of design This function can save and store the start embroidering point of each pattern instead of repeating m...

Page 13: ...e the machine s status switch among high and low speed idling and embroider 4 Color changing and start mode Press this key can change color changing and start mode 5 Manual color changing When the mac...

Page 14: ...Change number sign when you input number 12 Delete Press the key to clear inputting or embroider register 13 Blank or adding 10 Press the key to add blank or add 10 to number 14 Turn Shaft Button To...

Page 15: ...itch 1 Thread Break Detecting Device of 3 place There is a switch on every head of machine When the switch is up this head is in normal embroidering mode and when it is in the middle this head is in d...

Page 16: ...Working Statuses The working statuses of computer embroidery machine can be divided into 3 statuses 1 Preparation status 2 Embroidery confirmation status features machine stops and the icon appears f...

Page 17: ...the machine is in embroidery confirmation status Again pull the bar to right the machine goes into embroidery running status 3 In embroidery confirmation status first press key and then press key to...

Page 18: ...roidering the design The machine is changing color which means changing needle 8 The number is the pre embroidery design 9 The machine stops The machine is running 10 The machine is set cyclic embroid...

Page 19: ...sign into Memory from Floppy Disk Reading pattern into memory from floppy USB disk can be performed both in the operations of Disk USB Management and Design Management Disk design is input using USB d...

Page 20: ...hen begin reading If not then press numeric keys to input the selected design number if the number you input conflicts with the number in memory then you should input a new number and press key to con...

Page 21: ...nfirm 6 There will be promotion To expand satin press key to select YES or NO and press key to confirm 7 If you select YES you must input the expanded value of X and Y for all of satin stitches of des...

Page 22: ...means the pattern has been saved and if the current position is not accordant with the position been saved then there will be a prompt PRESS HOME TO RESTORE ORIGIN and the pattern s origin point can...

Page 23: ...inputting parameters and reduce the operation mistakes 3 Select a pattern for embroidery Operation 1 Press key in embroidery preparation status the computer shows as following DESIGN MANAGEMENT DISK...

Page 24: ...or press other key to escape 3 If the design origin point is not saved or the saved origin point is not the same with the frame position the computer will prompts PRESS HOME KEY TO SAVE ORIGIN users c...

Page 25: ...sly the frame can return continuously even when you release the bar This may be different according to different machine types When the frame return continuously release the bar and pull the bar to th...

Page 26: ...BECS 328 Computerized Embroidery Machine s Manual 19 2 Press key to release embroidery confirmation status according to the prompt or press other keys to abandon and then enter into the embroidery pr...

Page 27: ...g returning and positioning idling returning 4 2 Low speed Idling Operation Press key when machine stops until the following display appears The icon appears After setting low speed idling the main sh...

Page 28: ...lling bar for returning the main shaft and frame keep inactive but the count decreases After pulling the bar for halting the frame returns directly to the actual position of the current count 4 4 Rele...

Page 29: ...or to FRAME TO POINT OPTIONAL and then press key The positioning idling menu displays as following OTHER MANAGEMENT SET DESIGN PARAS FRAME TO POINT OPTIONAL DESIGN RANGE S OPERATIONS OFFSET SET POWER...

Page 30: ...press key until the main screen shows as follows The icon appears If the machine is set into manual color changing and manual start manually perform the color changing and select the first needle pos...

Page 31: ...omatic color changing and manual start press key under the embroidery preparation or confirmation status until the main screen shows as follows The icon appears The icon appears If the machine is set...

Page 32: ...borders upon color changing in the pattern then the over0frame and color changing can be operated at the same time 5 4 Setting Automatic Color changing Sequence or Color Line The automatic color chan...

Page 33: ...ecute the manual color changing and then the computer will automatically store the correct number into color line B If you embroider a new design first time and you can not decide the color line you c...

Page 34: ...SET MACHINE PARAS INITIALIZE SYSTEM BORING N HOOK ANGLE BY MOTOR 0 ARROW MOVE ENTER CONFIRM OTHER MANAGEMENT SET BRAKE PARA 9 STORE MANUAL COLOR Y ACTION AFTER TRIM FRAME TO Y SET RUN SPEED 80 MAIN M...

Page 35: ...OR CHANGE SPEED 0 ADJUST HEAD SOLENOID 0 ARROW MOVE ENTER CONFIRM PARA OF NEEDLE DOWN 15 RATIO OF AC INDUCTION 0 DIP1 0 DIP2 0 DIP3 0 DIP4 0 DISPLAY STI NUM OR NOT N 4 Press or digital key 2 to move t...

Page 36: ...ction is P the design embroidering direction is identical to its original direction Take the embroidering of letter F as an example to explain the relations between the embroidered pattern and the des...

Page 37: ...hine stops halfway or embroidering finished the frame can return back to the starting point of pattern with this function Operation A Press key the menu frame appears as follows B Press key to confirm...

Page 38: ...ORDER NDL DOWN ORIGIN B Press or 3 key to move the cursor to SAVE ORIGIN and then press key to continue C The computer will prompts PRESS HOME KEY TO SAVE ORIGIN and you can press to save the origin p...

Page 39: ...er it exceeds the limits Operation A Press key the menu frame appears as follows BACK TO ORIGIN RESTORE ORIGIN SAVE ORIGIN AUTO SET ORIGIN FRAME TO BORDER NDL DOWN ORIGIN BACK TO ORIGIN RESTORE ORIGIN...

Page 40: ...rigin point in Y direction no change in X direction The screen will show To Turn Axis 6 Press and the needles will be lift up and the main shaft will return to the stop position 100 7 Pull the bar to...

Page 41: ...Chapter 7 Frame Operations BECS 328 Computerized Embroidery Machine s Manual 34 3 Press key to confirm the operation or press any other key to quit...

Page 42: ...pm Some types may have difference for example 1000rpm type User can select the limit speed and don not need superabundance For example in normal using is 750rpm then set in 750rpm 8 1 Setting the Limi...

Page 43: ...password and press 5 Press key to select the speed value and press key 6 Press to end the setting 7 Press to quit the main setting NOTE The default value is recommended for the maximum speed 8 2 Sett...

Page 44: ...matically In the event of user wants to cut thread at other moment he can do it by manual trimming thread 9 2 Manual Trimming Thread This function can be executed by pressing several keys Operation 1...

Page 45: ...floppy USB disk driver and press key the disk operation menu appears as following DSISK MANAGEMENT OUTPUT DSB DISK DIR INPUT ARROW MOVE ENTER CONFIRM DEL FILE FORMAT 720K FORMAT 1 44M INSTALL LETTER...

Page 46: ...ant In the event of having error in entering numeral press key to clear it After entering the pattern number press key for setting When there is any conflict between the entered pattern number and the...

Page 47: ...g the Pattern in Floppy Disk Operation 1 Insert the pattern disk into floppy USB disk driver and press key the disk operation menu appears as following DSISK MANAGEMENT DISK DIR INPUT ARROW MOVE ENTER...

Page 48: ...CONFIRM OUTPUT DSB DEL FILE FORMAT 720K FORMAT 1 44M INSTALL LETTER LIBS DELETE LETTER LIBS DESIGN A LETTER PATTERN INPUT DESIGN FROM PC DISK DIR INPUT 2 Press key or digital key 5 to move the cursor...

Page 49: ...to move the cursor at FORMAT 1 44M press key 3 Press key to format disk or press to give up after finishing the operation the disk operation menu will appear 4 Press or key to quit the disk operation...

Page 50: ...aying Parameters and Frame Picture 11 1 Viewing the Common Parameters and Setting the Showing Parameters Operation embroidery preparation 1 Press key to change the main picture as one of the four foll...

Page 51: ...cture will be showed in real time 11 2 Display Embroidery Statistics Operation 1 Press to display the first page of embroidery information EMBROIDERY T B NUM 10 T T TIME 0 20 TOTAL WORKS 22 POWER NUM...

Page 52: ...such operations 1 power on the computer 2 begin embroidering from stop state 3 stop from embroidering state 4 confirm to embroider 5 release embroidery confirmation status 6 finish embroidering one p...

Page 53: ...give another information list Design Number is the number of the design that has been embroidered Design Count is the amount of normal designs within embroidering parameters Design Stitches are the to...

Page 54: ...Machine s Manual 47 ENGLISH SPANISH Press to move the cursor to ENGLISH SPANISH and then press key When the system language is in certain state press this key to shift to the next language main screen...

Page 55: ...OTHER MANAGEMENT SET DESIGN PARAS FRAME TO POINT OPTIONAL ARROW MOVE ENTER CONFIRM SET DESIGN PARAS DESIGN RANGE S OPERATIONS OFFSET SET POWER RESUME POWER RESUME SET MACHINE PARAS COMPENSATION ENGLIS...

Page 56: ...titches of one color the embroidery will be continued in the corresponding position of the next pattern with the same color stitches until this color repetition is completed and then the embroidering...

Page 57: ...ation priority and rotation priority can give different embroidery results 4 Press or key to end setting the parameters 5 Press or key to go to the main picture 12 2 Frame to Point For details please...

Page 58: ...idery which can produce a peripheral pattern of the current pattern The peripheral pattern can be embroidered separately In case user s embroidering periphery can be achieved by embroidering the perip...

Page 59: ...the preparation status automatically 7 Embroider design s quadrate range Operation the system will create a quadrate design and return to the main picture automatically you can pull the bar directly...

Page 60: ...OTHER MANAGEMENT SET DESIGN PARAS FRAME TO POINT OPTIONAL DESIGN RANGE S OPERATIONS OFFSET ARROW MOVE ENTER CONFIRM SET POWER RESUME POWER RESUME SET MACHINE PARAS COMPENSATION ENGLISH SPANISH TO SET...

Page 61: ...int automatically or Setting frame zero point manually all can set the base of saving and restoring the pattern s origin point Note 3 The operation of this function can only be done with one of two op...

Page 62: ...ALLY SET ZERO POINT then select YES with keys and press key 5 Do as prompting mark the frame zero point when the frame has been moved to the selected zero point then finish the setting by pressing key...

Page 63: ...performance of this operation is based on the SET POWER RESUME ZERO POINT In addition if the power is off in the process of embroidering operation and the frame has not been shifted you also can direc...

Page 64: ...anually setting frame zero point the icon before POWER RESUME in the OTHER MANAGEMENT will be not changed and it still be 12 8 Setting the Machine Parameters Operation 1 Press key under the embroidery...

Page 65: ...ESIGN PARAS FRAME TO POINT OPTIONAL DESIGN RANGE S OPERATIONS OFFSET SET POWER RESUME POWER RESUME SET MACHINE PARAS COMPENSATION ENGLISH SPANISH ARROW MOVE ENTER CONFIRM TO SET CYCLIC EMB 2 Press or...

Page 66: ...e Time Date Time of the system can be changed The operation is as follows 1 Press key the menu appears OTHER MANAGEMENT 2 Press or key to turn to the correspond page then press or to move the cursor t...

Page 67: ...color changing times stitch count X range Y range Operation 1 Press key the computer shows the design management menu as following DESIGN MANAGEMENT SELECT DESIGN FOR EMB SHOW MEMORY DESIGN DISK INPU...

Page 68: ...ng 7 Press or to end the design management 13 3 Input a Design into Memory from Floppy Disk This operation can be seen in section 3 2 13 4 Copy the Pattern Operation 1 Press key the computer shows the...

Page 69: ...the design management menu as following DESIGN MANAGEMENT SELECT DESIGN FOR EMB SHOW MEMORY DESIGN DISK INPUT COPY EDIT DELETE DIVIDE COMBINE PACKED DESIGN ARROW MOVE ENTER CONFIRM CLEAR ALL 2 Press...

Page 70: ...press key 3 Press and key to select the source pattern and then press key to go to next step or press key to quit 4 After the prompt input a stitch count the first divided pattern has the stitches of...

Page 71: ...he prompt input the distance between the end stitch of first pattern and the beginning stitch of second pattern 6 Input the number of destination pattern 7 The computer does the splicing and then will...

Page 72: ...SK INPUT ARROW MOVE ENTER CONFIRM SERIES 1 COPY EDIT DELETE DIVIDE COMBINE PACKED DESIGN CLEAR ALL DESIGN No 0 DIRECTION P ROTATE 0 PAGE OTHERS ESC RETURN X SCALE 100 Y SCALE 100 You must input the fo...

Page 73: ...ed for clearing all patterns in memory be careful to use it Operation 1 Press key the computer shows the design management menu as following DESIGN MANAGEMENT SELECT DESIGN FOR EMB SHOW MEMORY DESIGN...

Page 74: ...terns appear seldom therefore the contradiction between editing speed and editing oversize pattern will be solved easily 14 1 Entering the Edit of Pattern in Memory Operation in embroidery preparation...

Page 75: ...d the following will be displayed PRESS KEY TO DO 0 0 0 GO TO STI GO TO CODE BLOCK HELP SAVE EXIT QUIT NUMBER 1 In the above picture every line of data represents a stitch The first row is the code of...

Page 76: ...in each line and press key Then the stitch number displayed on the bottom of the screen is the stitch number has been edited After editing press key and select then press key The new pattern has been...

Page 77: ...to enter into the following menu 2 Press or digital key 1 to move the cursor to GO TO STI and then press key 3 Input the stitch number to which the cursor will go 4 The cursor will directly go to the...

Page 78: ...ration menu is as following figure PRESS KEY TO DO GO TO STI PRESS KEY TO DO GO TO CODE BLOCK HELP SAVE EXIT QUIT MARK BEGIN MARK END CANCEL COPY MOVE DELETE READ These functions interpret as followin...

Page 79: ...s to save the pattern and then exit the editing 14 8 Quitting the Editing Operation 1 Press key to enter into the following menu PRESS KEY TO DO GO TO STI GO TO CODE BLOCK HELP SAVE EXIT QUIT PRESS KE...

Page 80: ...Chapter 14 Edit of the Pattern in Memory BECS 328 Computerized Embroidery Machine s Manual 73 4 The computer exits the editing...

Page 81: ...is function helps users to perform the operations and displays prompting message Operation 1 At the main picture press key to enter the help show frames 2 Press any key to turn to other frames until e...

Page 82: ...g the letter library 1 Installing the letter library Operation 1 Press key in embroidery preparation status the following figure appears DISK USB MANAGEMENT INPUT OUTPUT DSB DEL FILE FORMAT 720K FORMA...

Page 83: ...IR INPUT ARROW MOVE ENTER CONFIRM DISK USB MANAGEMENT OUTPUT DSB DEL FILE FORMAT 720K FORMAT 1 44M INSTALL LETTER LIBS DELETE LETTER LIBS DESIGN A LETTER PATTERN INPUT DESIGN FROM PC DISK DIR INPUT AR...

Page 84: ...nd you can adjust the letters about their positions forms angles scales etc Press key to go on 7 The system asks you to select YES to create the letter pattern or select NO to exit 8 The system shows...

Page 85: ...PATCH CODE TO DESIGN ADJUST BRAKE OPTION TO MAKE TRUE DESIGN RANGE TO SET ALL HEADS PATCH TO LET NEEDLE DOWN AND MOVE FRAME NO OUTPUTTING DESIGN 2 The cursor will be at HI SPEED DESIGN and then press...

Page 86: ...S PATCH TO LET NEEDLE DOWN AND MOVE FRAME NO OUTPUTTING DESIGN 2 Press or digital key 2 to move the cursor to COMPILE PACKED DESIGN and then press key 3 Select the packed pattern which extension name...

Page 87: ...E TRUE DESIGN RANGE TO SET ALL HEADS PATCH TO LET NEEDLE DOWN AND MOVE FRAME NO OUTPUTTING DESIGN 2 Press or digital key 3 to move the cursor to COMPILE EMBROIDER DESIGN and then press key 3 Press key...

Page 88: ...de interference or by software bugs the machine may not work after power on To solve this problem you can initialize the system parameters during electrifying as following Operation 1 Press and hold k...

Page 89: ......

Page 90: ...nfirmation status Again you set the offset point for this design Finally you pull the bar and start to embroider The machine will pause at a stitch of patch code and automatically shift the frame to t...

Page 91: ...SEQUIN SEND SEQUIN 2 Press key to turn the main axis at 100 degree or press other key to quit 20 2 Let Needle Down This function is for quilt embroidery When the needle is in the down position the em...

Page 92: ...r can turn the main shaft at 100 degree manually Refer to the last chapter 20 3 Switching the Valves in Quilt Embroidery This function is for quilt embroidery The user can switch the four valves on of...

Page 93: ...FRAME TO MAKE DESIGN ADD PATCH CODE TO DESIGN ADJUST BRAKE OPTION TO MAKE TRUE DESIGN RANGE TO SET ALL HEADS PATCH TO LET NEEDLE DOWN AND MOVE FRAME NO OUTPUTTING DESIGN 3 Press or digital key 4 to m...

Page 94: ...ng 1 Press key the menu appears as following OTHER MANAGEMENT SET DESIGN PARAS FRAME TO POINT OPTIONAL DESIGN RANGE S OPERATIONS ARROW MOVE ENTER CONFIRM OFFSET SET POWER RESUME POWER RESUME SET MACHI...

Page 95: ...er SET BRAKE PARA This is to adjust the stop position of main shaft If the stop position is less than 100 degree increase the parameter value If the stop position is larger than 100 degree decrease th...

Page 96: ...rameter is effective only when the main shaft motor is electromagnetic motor This setting is use for adjusting the match of the main motor and the mechanical parts The range of the parameter is form 0...

Page 97: ...0 SET RUN SPEED 80 STARTUP STITCHES 1 ARROW MOVE ENTER CONFIRM STATUP ACCE 15 4 Press key to move the cursor to MAIN MOTOR PARA then press key 5 Press or key to change the parameter value 6 Press key...

Page 98: ...lowing OTHER MANAGEMENT HI SPEED DESIGN COMPILE PACKED DESIGN COMPILE EMBROIDER DESIGN ARROW MOVE ENTER CONFIRM FRAME TO MAKE DESIGN ADD PATCH CODE TO DESIGN ADJUST BRAKE OPTION TO MAKE TRUE DESIGN RA...

Page 99: ...DESIGN COMPILE EMBROIDER DESIGN ARROW MOVE ENTER CONFIRM FRAME TO MAKE DESIGN ADD PATCH CODE TO DESIGN ADJUST BRAKE OPTION TO MAKE TRUE DESIGN RANGE TO SET ALL HEADS PATCH TO LET NEEDLE DOWN AND MOVE...

Page 100: ...ain Shaft Speed Testing This operation is to display the set speed and real speed comparatively by turning the main shaft to debug the main shaft board conveniently 26 4 Mechanical Testing This operat...

Page 101: ...COLOR SELECT LCD TYPE ARROW MOVE ENTER CONFIRM MACHINE SEIF TEST TEST ENCODER TEST MAIN SHAFTSPEED TEST MACHINE PARTS ROTATE SHAFT FROM 100 TO ANY 2 Press or digital key 1 to move the cursor to SET EM...

Page 102: ...peration 1 Press key and enter Mode Management 2 Press key the following menu is prompted OTHER MANAGEMENT HI SPEED DESIGN COMPILE PACKED DESIGN COMPILE EMBROIDER DESIGN FRAME TO MAKE DESIGN ADD PATCH...

Page 103: ...e Outline Design BECS 328 Computerized Embroidery Machine s Manual 96 press key 4 Select one normal design and press 5 Input the design No of outline design 6 The outline design is generated automatic...

Page 104: ...MENT SET EMB FRAME RANGE SET DESIGN SHOWING COLOR SELECT LCD TYPE MACHINE SEIF TEST TEST ENCODER TEST MAIN SHAFTSPEED TEST MACHINE PARTS ROTATE SHAFT FROM 100 TO ANY ARROW MOVE ENTER CONFIRM 3 Press 2...

Page 105: ...are 30 1 Installation Installation procedure 1 Run the file SETUP EXE in the Embcom Setup Disk Click Next to continue or click Cancel to exit 2 Click Next to select the default destination folder 3 Cl...

Page 106: ...Chapter 30 Manual of Embcom Software 4 Click Finish to complete the installation 30 2 Uninstall 1 Run Start Setup Control Panel Add Remove Programs BECS 328 Computerized Embroidery Machine s Manual 99...

Page 107: ...Chapter 30 Manual of Embcom Software 2 Select EMBCOM and click the button Add Remove 3 Select Automatic and then Next BECS 328 Computerized Embroidery Machine s Manual 100...

Page 108: ...h to delete the software Embcom 30 3 Run and Use the Embcom software Run the software EMBCOM by double clicking its icon 1 Note When this software is run for the first time the machine type has to BEC...

Page 109: ...ompatible TAJIMA 560000 is for a machine of BECS C18 6C18 C88 C98 BECS XX9 is for a machine of BECS 19 1X9 59 2 Click Open Design button to open one design 3 Click the button Send Design to Machine an...

Page 110: ...you want to quit the operation during the process please press Space Key or Enter Key the mouse is forbidden at the moment 6 Repeat the above steps to send another design 30 4 Communication Operation...

Page 111: ...sign and prompt Processing now INPUT DESIGN FROM PC DISK USB MANAGEMENT PROCESS NOW DISK DIR INPUT OUTPUT DSB DEL FILE FORMAT 720K FORMAT 1 44M INSTALL LETTER LIBS DELETE LETTER LIBS DESIGN A LETTER P...

Page 112: ...ER RESUME ZERO POINT POWER RESUME SET MACHINE PARAS COMPENSATION ENGLISH SPANISH ARROW MOVE ENTER CONFIRM TO SET CYCLIC EMB 3 In the following sub menu turn to the seventh and eighth pages which are p...

Page 113: ...operation of sequin embroidery is as follows 1 Press the key and the following menu will appear TO TURN AXIS LET NEEDLE DOWN V1 4 ON OFF SET SEQUIN CANCEL SEQUIN SEND SEQUIN 2 Press the key or the dig...

Page 114: ...ling the bar after thread break detection 5 T B BACK STI 0 How many stitches to move backward automatically after thread break detect Choice 0 7 stitches 6 PATCH COUNT darning 1 In repairing stitch ho...

Page 115: ...e needle position in color changing order No Manual start it may be used for patching 18 STORE MANUAL COLOR No Store the manual color change value into the color change order 19 SEWING EMPTY STITCH Ye...

Page 116: ...titch 32 SPEED WHEN TRIMMING 80 Main shaft speed when trimming Choice 80 250 rpm 33 HOOK ANGLE BY MOTOR Choice 100 100 The angle increases with the set value 34 Hook Ratio by Motor Choice 1 9 1 10 1 1...

Page 117: ...OWN 15 Choice 0 30 stopping angle of main shaft 45 RATIO OF AC INDUCTION 0 Choice 15 15 46 49 DIP1 DIP4 For future use 50 DISPLAY STI OR NOT Yes Display stitch count 51 OVERFRAME BY STEP No By step or...

Page 118: ...not be taken up at the time of startup 64 DETECT T B MODE 1 Choice 1 2 Mode 1 uses the common take up spring Mode 2 uses the chopping wheel 65 STI FOR FILTER T B 3 Choice 0 2 66 SLOW STI AFTER PATCH C...

Page 119: ...tup or manual startup pulling bar 79 TIME OF SEQUIN ACTION 3 Choice 0 15 2 3 for air valve presser foot 4 5 for stepping motor presser foot 80 SEQUIN OFF AFTER T B No Control the sequin device positio...

Page 120: ...nging and beginning 9 9 6 Set design direction 9 7 Set the sequence of automatic color changing 9 9 8 See the options help 9 9 9 Normal or reverse display of status line 9 9 10 Frame returning to the...

Page 121: ...on 9 21 Release embroidery confirmation 9 22 Disk directory 22 30 DISK MANAGEMENT 9 23 INPUT Input pattern from disk to memory 9 24 OUTPUT DSB Output patterns from memory to disk 9 25 DEL FILE Deletin...

Page 122: ...oppy USB disk 9 34 COPY Copy the patterns in memory 9 35 EDIT Edit the patterns in memory 9 36 DELETE Delete the patterns in memory 9 37 DIVIDE Divide the pattern in memory 9 38 COMBINE Combine the pa...

Page 123: ...tantly Preparing Mode Confirm Mode Running Mode 46 POWER RESUME 9 9 47 SET MACHINE PARAS 9 9 48 COMPENSATION 9 49 DHINESE ENGLISH 9 9 50 TO SET CYCLE EMB ON OFF 9 9 51 HI SPEED DESIGN 9 9 52 COMPILE P...

Page 124: ...328GK00I1E11 ROM...

Reviews: