Chapter 2 Embroidery Guide
2.
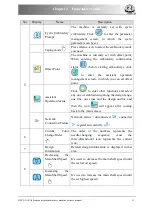
Set the color-changing order
——
click
and then needle (color) changing to
enter the color-changing screen
3.
Set patching embroidery
——
click
to enter the design management screen.
Then click “More Functions” to set patching according to prompts.
4.
Show the range of embroidery design, move frame along the design range, embroider
along the design range, embroider one cross, embroider one line, embroider the design
outline——click
to enter the other functions screen.
5.
Move frame to let design be central——click
to enter the other functions
screen. Note: this function is to place the design at the centre of the design range set by
software (soft range of design).
6.
Save the design’s start point
——
click
to enter the assistant operation screen.
Note: The origin point has to be set before saving the start point. To set the origin point,
click
to enter the “Other Function”.
7.
Set cyclic embroidery
——
click
→
to enter the parameter management
screen. Then click “Sewing Para1” and set according to prompts.
IV.
Embroidery Confirmation
1.
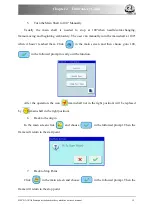
The user can click
after finishing assistant operations. Choose
in the
followed prompt and
(embroidery preparation) will change into
(embroidery
confirmation), which means that the machine has entered the embroidery confirmation
status.
If
is chosen, the machine will remain in the preparation status. Pull the bar and
the machine will not run and a prompt will appear to ask the user to confirm embroidery.
2.
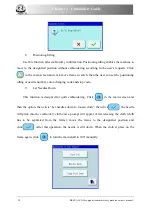
Setting Off-Set Point
After embroidery confirmation, if needed, click
to set off-set point according to
the prompts. Note: It’s of no effect to set off-set point after starting embroidery.
3.
Setting the Way for Color-Changing and Starting
16 BECS-A18/A58 computerized embroidery machine owner’s manual
Summary of Contents for BECS-A18
Page 2: ......

