Chapter 7 Memory Design Edit
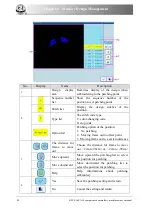
: enter the stitch number navigation mode. In this mode press the direction keys to
position the stitch number for editing.
: move back.
: move forward.
: go to the
first stitch.
: go the last stitch. Press
to switch the stitches for each moving
forward/backward among 1, 10, 100 and 1000 stitches (note: it’s showed in position 5 of the
edit window).
: enter the stitch code navigation mode. In this mode, look for the stitch according to
the stitch code type. Press
to switch the stitch code type. Press the direction keys to
navigate among the stitches of the set stitch code type. The detailed usage of the direction keys
is the same to the above.
: search by the stitch number. Press this key to enter the stitch number searching
window. Input the stitch number, and press
to confirm or press
to abandon.
: move the current stitch position. Press the direction keys of the panel to move.
Press
to switch the moving speed among 1mm, 10mm, 100mm and 1000mm.
: enter the continuous stitch adding mode. Press this key to activate continuous stitch
adding function. “Current Stitch” will automatically be relocated to the last stitch.
Users need to locate cursor to the right point by clicking direction keys. Press
to
insert a stitch to that point; move the cursor to the next point you want to insert, press the key
again, etc.
By pressing
, one can adjust the moving speed of cursor.
: convert stitch code. Press this key to enter the converting stitch code window.
: insert one stitch. Press this key to enter the window for selecting the inserted stitch
code type. Once you select, one stitch will be inserted. If the inserted stitch is at the end of the
design, it will follow the direction of the stitch before it. If the inserted stitch is in the middle of
design, the new stitch will be inserted between the stitches before and after it.
72 BECS-A18/A58 computerized embroidery machine owner’s manual
Summary of Contents for BECS-A18
Page 2: ......

