

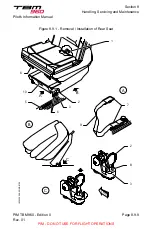
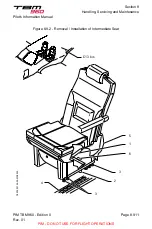


4) Position the seat, fold it forward, refer to detail B, and insert pads
into rail apertures.
5) Move the seat so that locks are in front of the color mark made
on rail bottom.
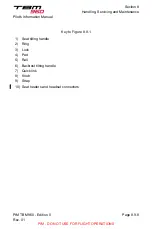
6) Pull up and hold left-side and right-side rings and turn knobs by
90° in order to insert locks into rail apertures.
7) Make sure the seat is correctly locked on rails.
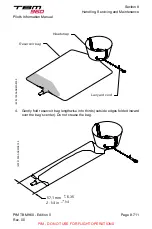
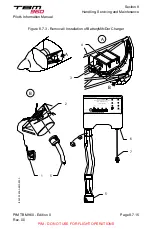
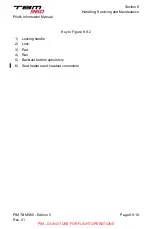
8) Tilt seat forward, hold it and slip strap around the locking control
hinge pin. Screw quick links.
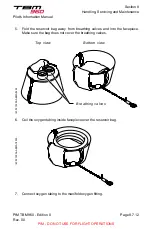
9) Open the floor hatch and remove clip from holder located under
floor panel and connect heating system harness. Clip connectors
on the holder located on the seat structure.
10) Tilt the seat rearward and lock it using seat tilting handle.
11) Fold up the backrest and lock it using backrest tilting handle.
12) Slide properly the carpet under the seat.
13) Remove protective covers.
F. Reconditioning
1) Make sure the work area is clean and free from debris.
2) Determine weight and balance – refer to
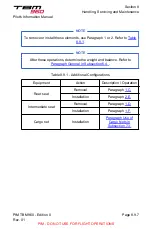
3. Additional configurations
NOTE
Removed seats can only be reinstalled at their original locations. Rear
seats (left or right) are the only ones that can be installed in the rear seat
zone along the cabin axis on both central rails – refer to
Seats, Belts and Harnesses in Subsection 7.3.
.
NOTE
Numerous cabin layout combinations involving the seats (rear and
intermediate) are authorized, and can be performed by the pilot or
service centers; installation arrangements with cabinet(s) are to be
performed by service centers only.
However, it is the pilot's responsibility to ensure that all necessary
authorizations are obtained from the appropriate regulatory authority.
Section 8
Handling, Servicing and Maintenance
Pilot's Information Manual
PIM TBM 960 - Edition 0
Rev. 01
Page 8.9.6
PIM - DO NOT USE FOR FLIGHT OPERATIONS