User's Manual
10
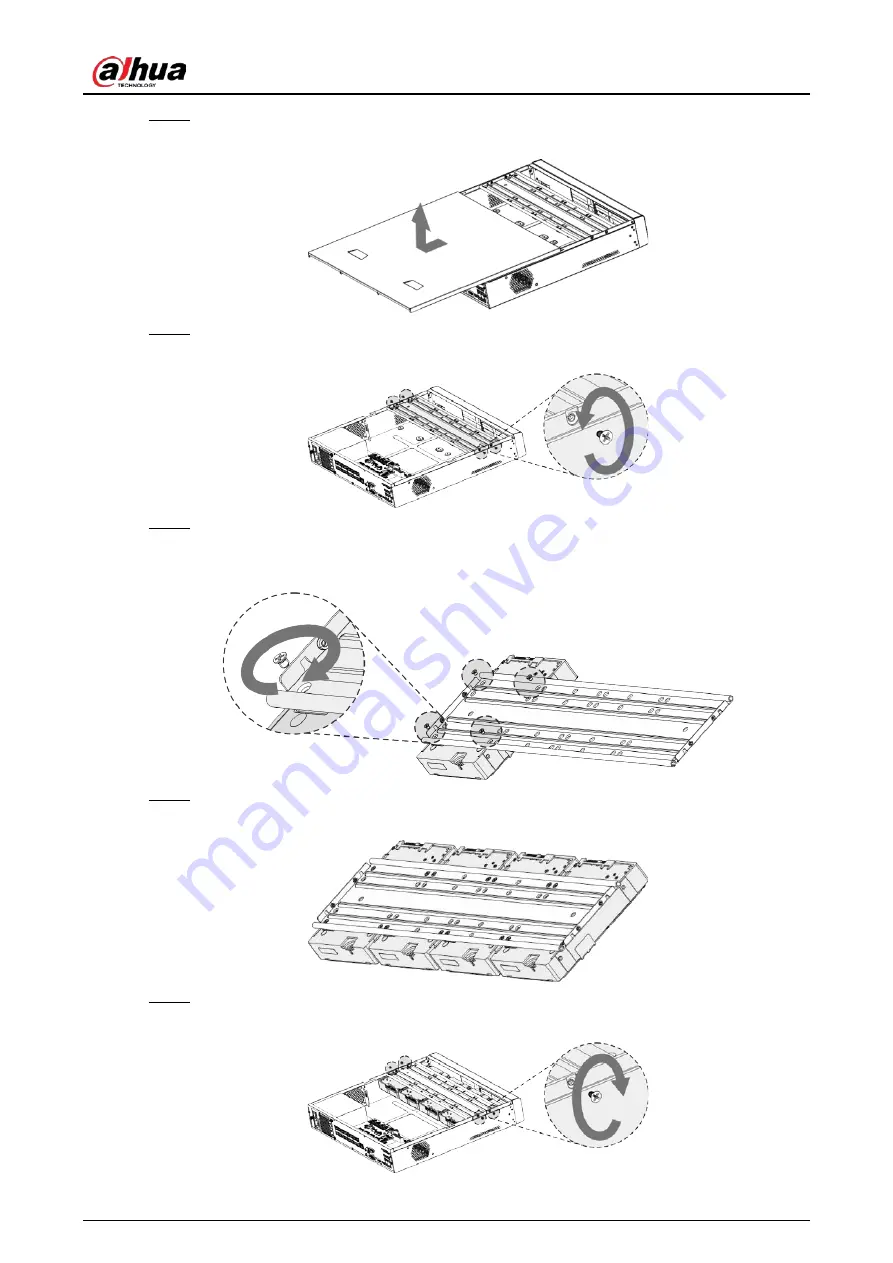
Step 2
Remove the cover along the direction shown in the following arrow.
Figure 2-17 Remove cover
Step 3
Remove the screws on the sides of HDD bracket to take out the bracket.
Figure 2-18 Remove bracket
Step 4
Match the four screw holes on the HDD with the four holes on the bracket and then fasten
the screws. The HDD is fixed to the bracket.
Figure 2-19 Fix HDD
Step 5
Install the other HDDs.
Figure 2-20 Install other HDDs
Step 6
Place the bracket to the device and then fasten the screws on the sides of the bracket.
Figure 2-21 Fasten screws
Summary of Contents for DH-XVR Series
Page 1: ...AI Digital Video Recorder User s Manual ZHEJIANG DAHUA VISION TECHNOLOGY CO LTD V2 3 1...
Page 33: ...User s Manual 17 Figure 2 35 Fasten screws...
Page 110: ...User s Manual 94 Figure 5 50 Main menu...
Page 213: ...User s Manual 197 Figure 5 154 Smart search 4 Click the picture that you want to play back...
Page 218: ...User s Manual 202 Figure 5 160 Search results...
Page 307: ...User s Manual 291 Figure 5 263 Version 1 Figure 5 264 Version 2 Step 3 Click Apply...
Page 350: ...User s Manual 334 Figure 6 3 Legal information...
Page 378: ...User s Manual 362 Appendix Figure 7 7 Check neutral cable connection...
Page 384: ...User s Manual...


