User’s Manual
69
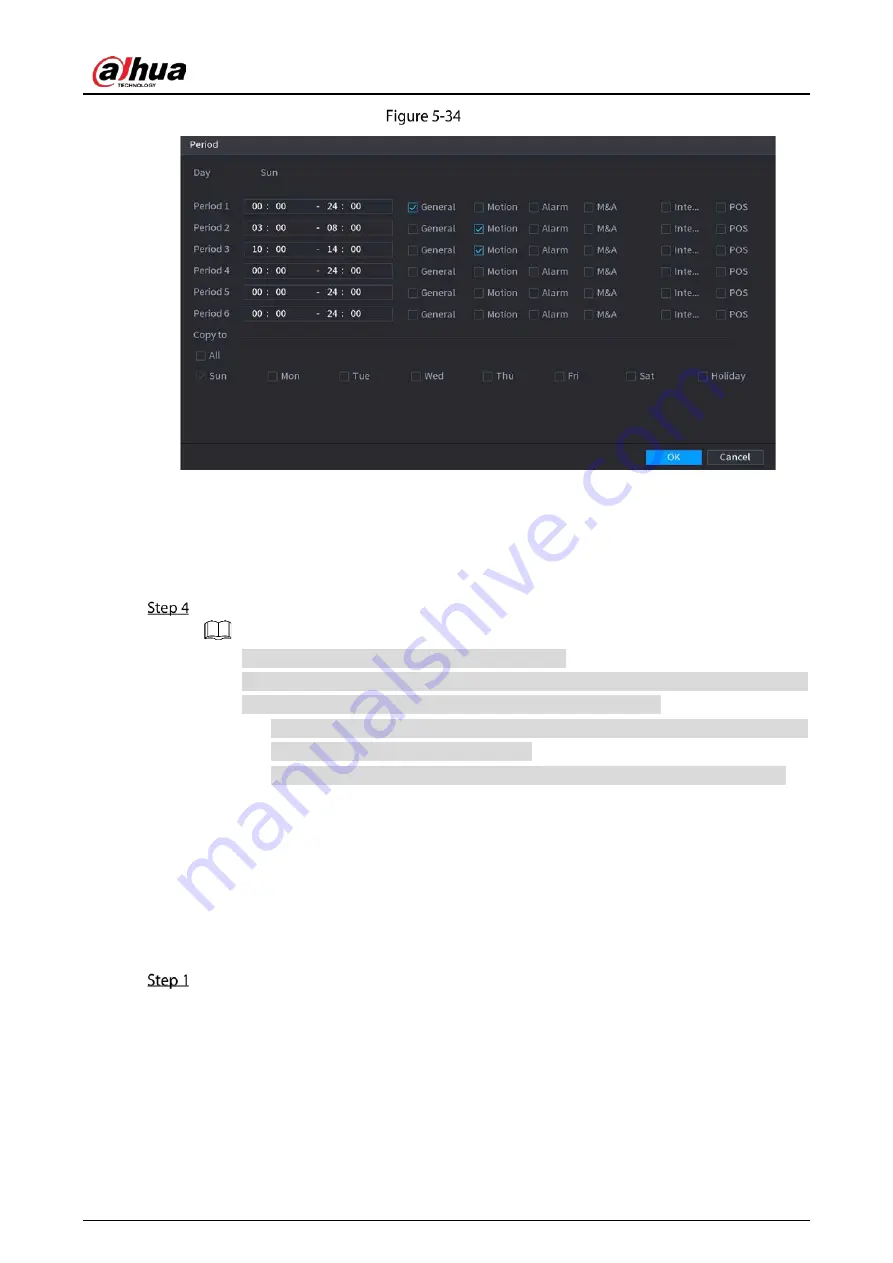
Period
5)
Enter the time frame for the period and select the event checkbox.
There are six periods for you to set for each day.
Under Copy to, select All to apply the settings to all the days of a week, or select
specific day(s) that you want to apply the settings to.
6)
Click OK to save the settings.
Click OK to complete the settings.
Click Copy to copy the settings to other channels.
After configuring the recording schedule settings, you need to perform the following
operations to start recording according to the defined schedule.
Enable the alarm event and cofigure the settings for the recording channel. For
details, see "5.10 Alarm Events Settings."
You need to enable the recording function, see "5.9.1 Enabling Record Control."
5.1.4.10
Configuring Snapshot Storage Schedule
You can configure the storage schedule for the snapshot such as channels to take snapshot, alarm
settings, and the armed period.
You can also configure snapshot storage settings by selecting Main Menu > STORAGE > Schedule >
Snapshot.
After you have configured the video recording settings, on the Record page, click Next.
Summary of Contents for DH-XVR71 H-4K-I2 Series
Page 24: ...User s Manual 15 Fasten screws...
Page 67: ...User s Manual 58 TCP IP Configure the settings for network parameters...
Page 103: ...User s Manual 94 Main menu...
Page 189: ...User s Manual 180 Details Click Register ID Register ID Click to add a face picture...
Page 212: ...User s Manual 203 Search results Click the picture that you want to play back Playback...
Page 239: ...User s Manual 230 Details Click Register ID Register ID Click to add a face picture...
Page 314: ...User s Manual 305 Main stream Sub stream...
Page 347: ...User s Manual 338 Update Click Update Browse Click the file that you want to upgrade Click OK...
Page 362: ...User s Manual 353 Legal information...
Page 388: ...User s Manual 379 Appendix Figure 7 7 Check neutral cable connection...
Page 394: ...User s Manual...


