Local Configurations
76
6) Tap
> Device Manager
.
The
Device Manager
interface is displayed. See
Device manager
Figure 4-59
7) Click
, follow the onscreen instructions to initialize device if needed, and then
add the device by wired connection or wirelessly by scanning the QR code.
After the Device is added, click
Start Live Preview
to see the live view interface of
Step 3
Device.
4.3.2.5 Configuring Switch Settings
After IP address for Switch is configured, when connecting IP camera to PoE port of Device, the
Switch will automatically allocate IP address to the IP camera, and then the Device can get
connected to this IP camera.
This function is supported only by the Device with PoE port.
The Switch cannot be connected to PoE port; otherwise the connection will fail.
By default, the Switch Settings check box is enabled. The network segment is 10.1.1.1. It is
recommended to keep the default setting.
If the IP camera is from the third party, it must support the Onvif protocol and has enabled
DHCP.
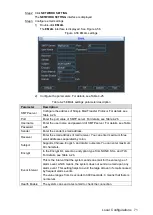
Select
Main Menu > SETTING > NETWORK
.
Step 1
The
NETWORK
interface is displayed.
Click
NETWORK SETTING
.
Step 2
The
NETWORK SETTING
interface is displayed.
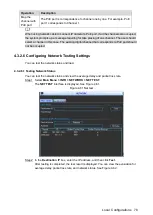
Configure Switch settings.
Step 3


