10
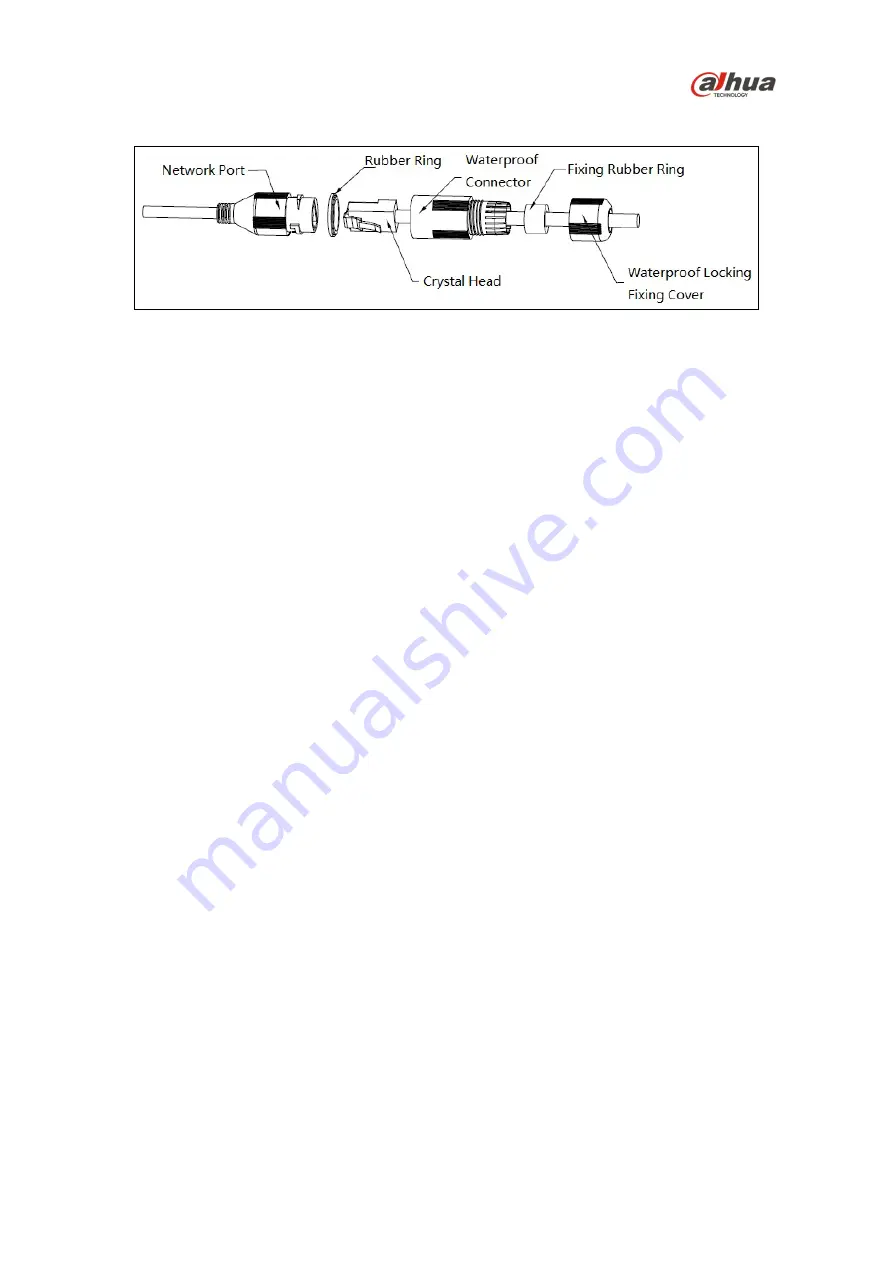
7. Attach the waterproof network connector if the camera is used outdoors.
Figure 4-3
a) Place the wide side of the rubber ring onto the end of the network cable extending out
from the camera.
b) Pull the waterproof cable end without the Ethernet connector through the body of the
Waterproof Connector. Thread the cable through the Fixing Rubber Ring and the
Waterproof Locking Cover.
c) Attach the male Ethernet connector to the network cable coming from the camera. Ensure
the Waterproof Connector shroud covers the Ethernet connection.
d) Connect the other end of the waterproof connector to the network port and rotate it
clockwise to lock the network port and waterproof connector firmly.
e) Slide the Waterproof Locking Cover over the main body of waterproof connector and
rotate it clockwise to seal the connection.
8. Route the cables from the back of the camera through the installation medium and align the
four (4) holes on the base of the camera with the expansion bolts.
9. Secure the camera to the installation medium with the four screws.
10. Adjust the sunshield, if necessary. Loosen the screw on the top of the camera and slide the
sunshield back and forth to the desired location, then tighten the screw.
11. Connect the external cables from the camera to the appropriate cables for Ethernet, power,
alarm I/O, and audio.
12. Supply power to the camera.


