Web Operations
261
6.4
Introducing Web Main Menu
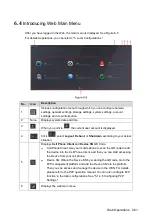
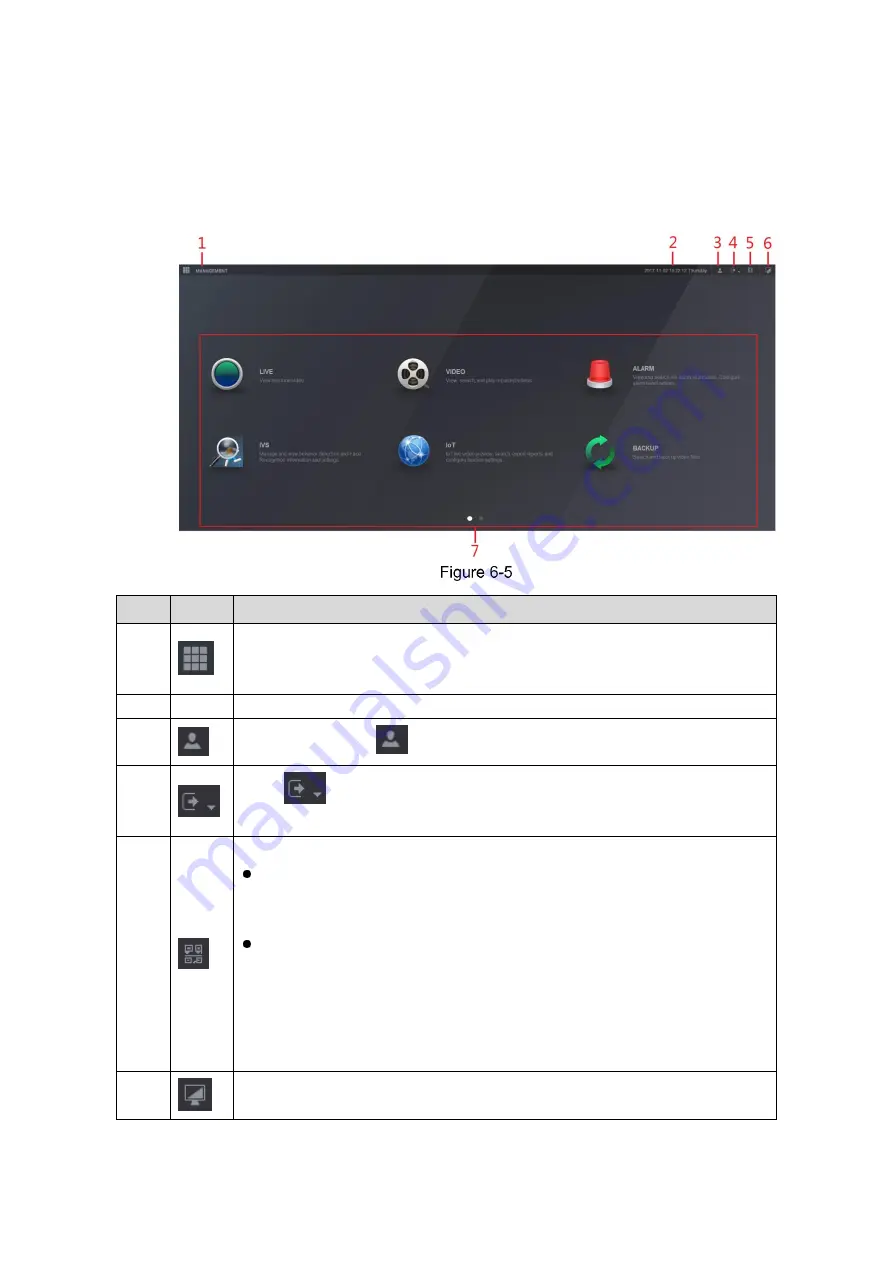
After you have logged in the Web, the main menu is displayed. See Figure 6-5.
For detailed operations, you can refer to "5 Local Configurations."
No.
Icon
Description
1
Includes configuration menu through which you can configure camera
settings, network settings, storage settings, system settings, account
settings, and view information.
2
None
Displays system date and time.
3
When you point to
, the current user account is displayed.
4
Click
, select
Logout
,
Reboot
, or
Shutdown
according to your actual
situation.
5
Displays
Cell Phone Client
and
Device SN
QR Code.
Cell Phone Client: Use your mobile phone to scan the QR code to add
the device into the Cell Phone Client, and then you can start accessing
the Device from your cell phone.
Device SN: Obtain the Device SN by scanning the QR code. Go to the
P2P management platform and add the Device SN into the platform.
Then you can access and manage the device in the WAN. For details,
please refer to the P2P operation manual. You can also configure P2P
function in the local configurations. See "5.1.4.5 Configuring P2P
Settings."
6
Displays the web main menu.
Summary of Contents for Smart 1U
Page 1: ...DIGITAL VIDEO RECORDER User s Manual V1 0 0...
Page 30: ...Connecting Basics 20...
Page 80: ...Local Configurations 70 No Icon Description...
Page 181: ...Local Configurations 171 Select the Enable check boxes to enable IoT function See Figure 5 152...
Page 234: ...Local Configurations 224...
Page 280: ...Glossary 270 Abbreviations Full term VGA Video Graphics Array WAN Wide Area Network...
Page 298: ...Earthing 288...


