Local Configurations
89
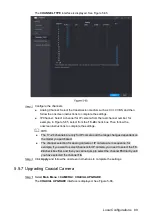
The
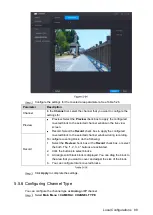
CHANNEL TYPE
interface is displayed. See Figure 5-65.
Configure the channels.
Analog Channel: Select the transmission medium such as CVI, CVBS, and then
follow the onscreen instructions to complete the settings.
IP Channel: Select a channel for IP camera from the last channel number, for
example, in Figure 5-65, select from the
17–24
check box. Then follow the
onscreen instructions to complete the settings.
The 17–24 channels are only for IP camera and the range changes dependent on
the model you purchased.
The channel selection for analog camera or IP camera are in sequence, for
example, if you want to select channels for IP camera, you need to select the
17–
24
check box first, and then you cannot jump to select the channel
15
directly until
you have selected the channel
16
.
Click
Apply
and
follow the
onscreen instructions to complete the settings.
5.5.7
Upgrading Coaxial Camera
Select
Main Menu > CAMERA > COAXIAL UPGRADE
.
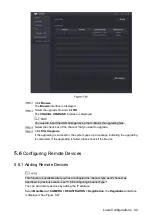
The
COAXIAL UPGRADE
interface is displayed. See Figure 5-66.
Summary of Contents for Smart 1U
Page 1: ...DIGITAL VIDEO RECORDER User s Manual V1 0 0...
Page 30: ...Connecting Basics 20...
Page 80: ...Local Configurations 70 No Icon Description...
Page 181: ...Local Configurations 171 Select the Enable check boxes to enable IoT function See Figure 5 152...
Page 234: ...Local Configurations 224...
Page 280: ...Glossary 270 Abbreviations Full term VGA Video Graphics Array WAN Wide Area Network...
Page 298: ...Earthing 288...

