122
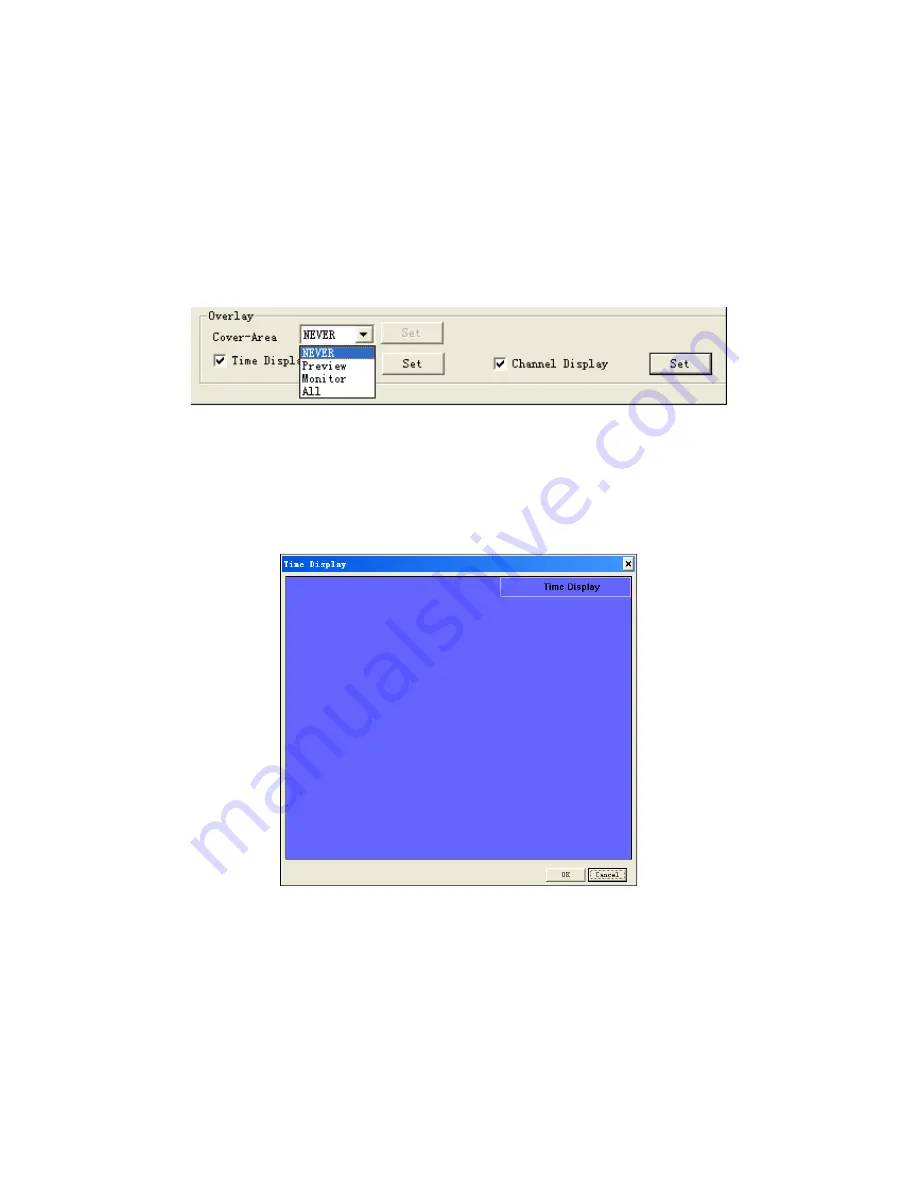
Cover-Area: Select monitor option, and click the setup button to enter corresponding channel
image. User can select area to be covered via mouse. One channel supports a max of 4 covered
blocks. Select one covered block, click delete or right click to delete it. Single click to delete all
covered blocks. When you finish setup, click Save.
There are four types of covers:
Never: Never cover block.
Preview: Set preview mode, no one can preview covered area.
Monitor: Set monitor mode, no one can monitor covered area.
All:
” Set preview and monitor modes, no one can preview or monitor covered area. See Figure 4-
51.
Figure 4- 51
Time title and channel title: Click setup button. Drag time title or channel title to designated
position and save it. Title and channel info are shown in WEB live preview interface, local
preview and record file playback interface. See Figure 4- 52 and Figure 4- 53.
Figure 4- 52
Summary of Contents for VEC0404HD-M70
Page 1: ...Video Matrix Platform User s Manual V 1 0 0 Dahua Technology CO LTD ...
Page 29: ...24 Figure 3 9 Switch to input device list Please see Figure 3 9 ...
Page 32: ...27 Figure 3 12 Step 2 Click add You will see Figure 3 13 Figure 3 13 ...
Page 65: ...60 Figure 3 54 Buzzer Buzzer rings when motion detection alarms 3 2 4 6 2 Video Loss ...
Page 69: ...64 Display is shown below as in Figure 3 59 Figure 3 60 and Figure 3 61 Figure 3 59 ...
Page 70: ...65 Figure 3 60 ...
Page 83: ...78 Figure 3 80 Click Add to add new Raid Select corresponding level Figure 3 81 ...
Page 91: ...86 Figure 4 7 Hide PTZ Console ...
Page 101: ...96 Figure 4 23 4 2 2 5 Sub Card Status View sub card fan and power status ...
Page 102: ...97 Figure 4 24 4 2 3 System Config 4 2 3 1 General ...
Page 110: ...105 Figure 4 33 4 2 3 8 NTP ...
Page 122: ...117 Figure 4 45 ...
Page 131: ...126 Figure 4 56 Group setting is as follows please see Figure 4 57 and Figure 4 58 ...
Page 137: ...132 Figure 4 65 ...
Page 140: ...135 Figure 4 69 4 2 4 7 Snapshot ...
Page 143: ...138 Figure 4 72 Figure 4 73 ...
Page 149: ...144 Figure 4 82 Step 4 Click Add See Figure 4 83 Figure 4 83 ...


