background image

Local Configurations


285


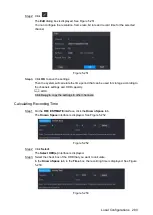
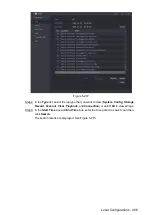
Figure 5-259

5.19.2 Configuring RS232 Settings 

You can configure serial port function, Baud rate and so on. 


Only some series products support this RS232. 

Select 

Main Menu > SYSTEM > RS232

The 

RS232 

interface is displayed. See Figure 5-260. 

Summary of Contents for -XVR5408L-X

Page 1: ...DIGITAL VIDEO RECORDER User s Manual V1 4 0 ZHEJIANG DAHUA VISION TECHNOLOGY CO LTD ...

Page 2: ... be changed to any set of numbers between 1025 65535 Avoiding the default ports reduces the risk of outsiders being able to guess which ports you are using 3 Enable HTTPS SSL Set up an SSL Certificate to enable HTTPS This will encrypt all communication between your devices and recorder 4 Enable IP Filter Enabling your IP filter will prevent everyone except those with specified IP addresses from ac...

Page 3: ... forwarded the HTTP and TCP ports in your router modem this feature should be turned off regardless Disabling UPnP is recommended when the function is not used in real applications 11 SNMP Disable SNMP if you are not using it If you are using SNMP you should do so only temporarily for tracing and testing purposes only 12 Multicast Multicast is used to share video streams between two recorders Curr...

Page 4: ... the guide may cause harmful interference to radio communication For class A device these limits are designed to provide reasonable protection against harmful interference in a commercial environment Operation of this equipment in a residential area is likely to cause harmful interference in which case the user will be required to correct the interference at his own expense For class B device thes...

Page 5: ...08HS 4KL X DH XVR5104HS X DH XVR5104H X DH XVR5104HE X DH XVR5104HS X1 DH XVR5104C X1 DH XVR5216AN X DH XVR5232AN X DH XVR5104H X1 DH XVR5104HE X1 DH XVR5208AN 4KL X DH XVR5216AN 4KL X DH XVR 5216A X DH XVR5432L X DH XVR5832S X DH XVR5108H 4KL X 8P DH XVR5208AN 4KL X 8P DH XVR5216AN 4KL X 16P DH XVR5416L X DH XVR5408L X DH XVR5816S X DH XVR5808S X DH XVR5104H X 4P DH XVR5108H X 8P DH XVR5216AN X 1...

Page 6: ...injury Indicates a potential risk which if not avoided could result in property damage data loss lower performance or unpredictable result Provides methods to help you solve a problem or save you time Provides additional information as the emphasis and supplement to the text Revision History No Version Revision Content Release Time ...

Page 7: ...board Configuring White Light Configuring Siren Viewing PoC Information 3 Update following sections About the Manual Important Safeguards and Warnings Configuring IVS Function Configuring Face Detection June 10 2018 4 V1 2 0 1 Add fourteen models 2 Update following sections Important Safeguards and Warnings Initializing the Device Configuring POS Settings July 20 2018 5 V1 2 1 Add one model Septem...

Page 8: ...ce user or data controller you might collect personal data of others such as face fingerprints car plate number Email address phone number GPS and so on You need to be in compliance with the local privacy protection laws and regulations to protect the legitimate rights and interests of other people by implementing measures include but not limited to providing clear and visible identification to in...

Page 9: ...functions and operations description or errors in print If there is any doubt or dispute please refer to our final explanation Upgrade the reader software or try other mainstream reader software if the Manual in PDF format cannot be opened All trademarks registered trademarks and the company names in the Manual are the properties of their respective owners Please visit our website contact the supp...

Page 10: ...f power input and output Do not dissemble the Device Transport use and store the Device under the allowed humidity and temperature conditions Electrical Safety Use the battery of specified manufacturer otherwise there might result in explosion When replacing battery make sure the same type is used Improper battery use might result in fire explosion or inflammation Follow the instructions to dispos...

Page 11: ... 4KL X DH XVR7108HE 4K L X DH XVR7116HE 4KL X DH XVR7108HE 4K X DH XVR5104HS X DH XVR4104HS X DH XVR5104H X DH XVR5104HE X DH XVR4108HS X DH XVR5104HS X1 DH XVR4104HS X1 DH XVR4108HS X1 DH XVR5104H X1 DH XVR5104HE X1 DH XVR5104H X 4P DH XVR51 08H X 8P 6 2 2 4 DH XVR4216AN X DH XVR4232AN X DH XVR5216AN X DH XVR5232AN X DH XVR5208A N 4KL X DH XVR5216AN 4KL X DH XVR5216A X DH XVR7208A 4KL X DH XVR721...

Page 12: ...R5808S X DH XVR5816S X 15 3 1 11 DH XVR1B04 DH XVR1B04H DH XVR1B08 DH XVR1B08H DH XVR1B16 DH XVR1B16H 16 3 2 Rear Panel 16 3 2 1 DH XVR5108C X DH XVR5104C 4KL X DH XVR5104C X DH XVR4104C X DH XVR4108C X DH XVR5104C X1 DH XVR4104C X1 DH XVR4108C X1 16 3 2 2 DH XVR7104E 4KL X DH XVR7108E 4KL X DH XVR7104E 4KL B X DH XVR7108E 4KL B X 17 3 2 3 DH XVR4116HS X DH XVR5108HS X DH XVR5116HS X DH XVR5104HS ...

Page 13: ...S 485 Port 45 5 Local Configurations 46 5 1 Initial Settings 46 5 1 1 Booting up 46 5 1 2 Initializing the Device 46 5 1 3 Resetting Password 51 5 1 4 Setting Up with the Startup Wizard 57 5 2 Live View 76 5 2 1 Live View Screen 77 5 2 2 Live View Control Bar 77 5 2 3 Navigation Bar 81 5 2 4 Shortcut Menu 82 5 2 5 Color Setting 84 5 2 6 Live View Display 86 5 2 7 Configuring Tour Settings 91 5 3 E...

Page 14: ...9 8 Using the File List 150 5 10 Alarm Events Settings 151 5 10 1 Alarm Information 151 5 10 2 Alarm Input Settings 152 5 10 3 Alarm Output Settings 159 5 10 4 Video Detection 162 5 10 5 System Events 171 5 11 Smart Detection 177 5 11 1 SMD 178 5 11 2 Configuring Face Detection 180 5 11 3 Configuring IVS Function 185 5 12 IoT Function 207 5 12 1 Configuring Sensor Settings 207 5 12 2 Configuring T...

Page 15: ... 289 5 19 5 Exporting and Importing System Settings 290 5 19 6 Restoring Default Settings 292 5 19 7 Upgrading the Device 293 5 20 Viewing Information 296 5 20 1 Viewing Version Details 296 5 20 2 Viewing Log Information 297 5 20 3 Viewing Event Information 299 5 20 4 Viewing Network Information 300 5 20 5 Viewing HDD Information 302 5 20 6 Viewing Channel Information 303 5 20 7 Viewing Data Strea...

Page 16: ...ndix 5 Compatible Switcher 335 Appendix 6 Earthing 336 Appendix 7 Appendix 7 1 What Is the Surge 336 Appendix 7 2 The Earthing Modes 337 Appendix 7 3 Thunder Proof Ground Method in the Monitor System 338 Appendix 7 4 The Shortcut Way to Check the Electric System by Digital Multimeter 339 RJ45 RS 232 Connection Cable Definition 342 Appendix 8 ...

Page 17: ... monitoring function The Device is applicable to the areas such as bank telecom electricity traffic intelligent residential district factory warehouse resources and water conservancy facilities 1 2 Functions The functions might be different depending on the software and hardware version of the model you purchased Smart Detection Smart detection Effectively detect persons and motor vehicles in the ...

Page 18: ... frame by frame play Support time title overlay so that you can view event accurate occurred time Support zooming in the selected area in the live view Network Operation Support network remote real time monitor remote record search and remote PTZ control Alarm Activation Several relay alarm outputs to realize alarm activation and on site light control The alarm input port and output port have the ...

Page 19: ...rted positions that could be caused by hit 2 Labels Labels on the device Not torn up Do not tear up or throw away the labels otherwise the warranty services are not ensured You need to provide the serial number of the product when you call the after sales service 3 Device Appearance No obvious damage Data cables power cables fan cables mainboard No connection loose 2 2 Installing HDD Please check ...

Page 20: ...108C X1 1 Remove the screws to take off the cover 2 Fix the screws on the HDD but do not fasten them 3 Match the screws with the holes on the DVR to place the HDD 4 Turn the DVR upside down to see the screws and then fasten them 5 Use the HDD cable and power cable to connect HDD and mainboard 6 Put back the cover and fasten the screws ...

Page 21: ...to the cable into the port 2 2 2 2 Installing HDD Skip step 6 if the battery is not equipped with the model you purchased 1 Remove the screws to take off the cover 2 Remove the screws to take off the bracket 3 Put the HDD onto the bracket 4 Match the holes on the bracket with the screw holes on HDD 5 Use screws to fix the HDD onto the bracket 6 Optional Pull the battery cable through the hole to c...

Page 22: ...DH XVR5116H X DH XVR5104H 4KL X DH XVR 5108H 4KL X DH XVR5116H 4KL X DH XVR5108HE X DH XVR51 16HE X DH XVR7104HE 4KL X DH XVR7108HE 4KL X DH XVR7 116HE 4KL X DH XVR7108HE 4K X DH XVR5104HS X DH XVR4104HS X DH XVR5104H X DH XVR5104HE X DH XVR4 108HS X DH XVR5104HS X1 DH XVR4104HS X1 DH XVR4108HS X1 DH XVR5104H X1 DH XVR5104HE X1 DH X VR5104H X 4P DH XVR5108H X 8P 1 Remove the screws on the rear pan...

Page 23: ...8AN 4KL X DH XVR5216AN 4KL X DH XVR5216A X DH XVR7208A 4KL X DH XVR7216A 4KL X DH XVR7208A 4K X DH XVR5108H 4KL X 8P DH XVR5208AN 4KL X 8P DH XVR5216AN 4KL X 16P DH XVR5216AN X 16P 1 Remove the screws on the cover 2 Fix the screws onto the HDD but do not be fastened 3 Put the HDD into the Device 4 Turn the device to see the back side of it Align the screws of the HDD with the holes on the back of ...

Page 24: ...ower cable to connect HDD and mainboard 6 Put back the cover and fix the screws 2 2 6 DH XVR7816S 4KL X DH XVR5832S X DH XVR7816S 4KL X LP 1 Remove the screws on the cover 2 Fix the HDD s onto the bracket Remove the top bracket if you want to install HDD to the bottom bracket 3 Connect one end of HDD cable to the HDD 4 Connect the other end of HDD cable to the 5 Use the power cable to connect HDD ...

Page 25: ...ut back the cover and fasten the screws 2 3 Installing Device into Rack Only DH XVR7416L 4KL X DH XVR5432L X DH XVR7816S 4KL X DH XVR5832S X models support this installation To install the DVR into rack do the following Check whether the in house temperature is lower than 35 95 and make sure the Step 1 15 cm 6 inches spacing around the Device for ventilation Use six screws to fix the DVR on each s...

Page 26: ...X1 Figure 3 1 Icon Name Function HDD status indicator The indicator is off when the HDD is running normally The indicator glows blue when the HDD is in malfunction Power status indicator The indicator is off when the power is connected abnormally The indicator glows blue when the power is connected normally Network status indicator The indicator is off when the network connection is correct The in...

Page 27: ...6 Battery status indicator When the battery remains full or no less than sixty percent the No 4 indicator is on and the No 5 and No 6 are out When the battery remains between thirty percent and sixty percent the No 5 indicator is on and the others are out When the battery remains between one percent and thirty percent the No 6 indicator is on and the others are out When the battery is exhausted th...

Page 28: ...XVR4108HS X DH XVR 5104H X DH XVR5104HE X DH XVR5108H 4KL X 8P DH XVR5104HS X1 DH XVR4104HS X1 DH XVR4108HS X1 DH XVR5104H X1 DH XVR5104HE X1 DH XVR5104H X 4P DH XVR5108H X 8P Figure 3 3 No Port Name Function 1 HDD Glows blue when HDD status is abnormal 2 NET Glows blue when network status is abnormal 3 POWER Glows blue when the power is connected properly 4 USB port Connects to peripheral devices...

Page 29: ... H XVR5232AN X DH XVR5208AN 4KL X DH XVR5216AN 4KL X DH XVR5216A X DH XVR5208AN 4KL X 8P DH XVR5216AN 4KL X 16P DH XVR5216AN X 16P Figure 3 5 No Port Name Function 1 Status indicator light Glows blue when the device is working properly 2 HDD Glows blue when HDD status is abnormal 3 NET Glows blue when network status is abnormal 4 POWER Glows blue when the power is connected properly 5 USB port Con...

Page 30: ...operly 2 USB port Connects to the external devices such as keyboard mouse and USB storage device Table 3 6 3 1 7 DH XVR7416L 4KL X Figure 3 7 No Port Name Function 1 IR receiver Receives infrared signal from remote control 2 USB port Connects to peripheral devices such as USB storage device keyboard and mouse Table 3 7 3 1 8 DH XVR7816S 4KL X DH XVR7816S 4KL X LP Figure 3 8 ...

Page 31: ...2 HDD Glows blue when HDD status is abnormal 3 NET Glows blue when network status is abnormal 4 POWER Glows blue when the power is connected properly 5 USB port Connects to peripheral devices such as USB storage device keyboard and mouse Table 3 9 3 1 10 DH XVR5832S X DH XVR5808S X DH XVR5816S X Figure 3 10 No Port Name Function 1 Status indicator light Glows blue when the device is working proper...

Page 32: ...4108C X DH XVR5104C X1 DH XVR4104C X1 DH XVR4108C X1 Figure 3 11 No Port Name Function 1 Video input port Connects to analog camera to input video signal 2 USB port Connects to external devices such as USB storage device keyboard and mouse 3 VGA port Outputs analog video data to the connected display with VGA port 4 HDMI port High definition audio and video signal output port The port outputs the ...

Page 33: ...nput video signal 2 Audio input port Receives audio signal output from the devices such as microphone 3 Audio output port Outputs audio signal to the devices such as the sound box 4 RS 485 communication port Connects to the control devices such as speed dome PTZ RS 485_A port is connected by the cable A and RS 485_B is connected to the cable B 5 HDMI port High definition audio and video signal out...

Page 34: ...108HS X1 Figure 3 14 No Port Name Function 1 Video input port Connects to analog camera to input video signal 2 Audio input port Receives audio signal output from the devices such as microphone 3 Audio output port Outputs audio signal to the devices such as the sound box 4 HDMI port High definition audio and video signal output port The port outputs the uncompressed high definition video and multi...

Page 35: ... Figure 3 15 No Port Name Function 1 Alarm input port 1 16 Four groups of alarm input ports Group 1 port 1 to port 4 Group 2 port 5 to port 8 Group 3 port 9 to port 12 Group 4 port 13 to port 16 These ports receive the signal from the external alarm source There are two types NO Normally Open and NC Normally Closed When your alarm input device is using external power please make sure the alarm inp...

Page 36: ...inition audio and video signal output port The port outputs the uncompressed high definition video and multi channel audio data to the connected display with HDMI port 7 USB port Connects to external devices such as USB storage device keyboard and mouse 8 Network port Connects to Ethernet port 9 RS 485 communication port Connects to the control devices such as speed dome PTZ RS 485_A port is conne...

Page 37: ...VR connect to the same ground Alarm output port 1 3 NO1 NO3 C1 C3 Three groups of alarm output ports Group 1 port NO1 C1 Group 2 port NO2 C2 Group 3 port NO3 C3 These ports output alarm signal to the alarm device Please make sure power supply to the external alarm device NO Normally open alarm output port C Alarm output public end Ground 3 Video input port Connects to analog camera to input video ...

Page 38: ...AN 4KL X 16P Figure 3 17 No Port Name Function 1 Video input port Connects to analog camera to input video signal 2 Video output port Connects to video output devices such as TV 3 Audio input port Receives audio signal output from the devices such as microphone 4 Audio output port Outputs audio signal to the devices such as the sound box 5 VGA port Outputs analog video data to the connected displa...

Page 39: ...signal output from the devices such as microphone and pickup 6 Audio output port MIC OUT Tow way talk output port which outputs the analog audio signal to the devices such as the sound box 7 Audio output port Outputs audio signal to the devices such as the sound box 8 Video output port Connects to video output devices such as TV 9 Video input port Connects to analog camera to input video signal 10...

Page 40: ...RL 12V Controls the 6th channel power output for alarm Turns off power output when there is alarm output Turns on power output when the alarm is cleared 12V power output port Provides power to external devices such as camera and alarm device Please note the power supply shall be below 1A Ground 10 Network port Connects to Ethernet port 12 VGA port Outputs analog video data to the connected display...

Page 41: ... Connect to video output devices such as TV 9 Alarm input port 1 16 Four groups of alarm output ports Group 1 port 1 to port 4 Group 2 port 5 to port 8 Group 3 port 9 to port 12 Group 4 port 13 to port 16 These ports receive the signal from the external alarm source There are two types NO Normally Open and NC Normally Closed When your alarm input device is using external power please make sure the...

Page 42: ...0 Video input port Connect to analog camera to input video signal 11 Network port Connects to Ethernet port 12 VGA video output Outputs analog video signal It can connect to the monitor to view analog video 13 RS 232 debug COM It is for general COM debug to configure IP address or transfer transparent COM data 14 HDMI port High definition audio and video signal output port It outputs the same vide...

Page 43: ... make sure the device and the NVR have the same ground Alarm output port 1 5 NO1 NO5 C1 C5 NC5 Five groups of alarm output ports Group 1 port NO1 C1 Group 2 port NO2 C2 Group 3 port NO3 C3 Group 4 port NO4 C4 Group 5 port NO5 C5 NC5 These ports output alarm signal to the alarm device Please make sure power supply to the external alarm device NO Normally open alarm output port C Alarm output public...

Page 44: ...rnal SATA port which connects to the device with SATA port Perform the jumper configuration when connecting HDD Table 3 19 3 2 10 DH XVR7816S 4KL X DH XVR5832S X DH XVR5816S X Figure 3 21 No Port Name Function 1 GND Ground 2 Power input port Inputs power 3 Power button Turns on off the Device 4 Audio input port Receives the analog audio signal output from the devices such as microphone 5 Audio inp...

Page 45: ...plex RS 485 port T T R R Four wire full duplex 485 port T and T is the output wire R and R is the input wire Control power output CTRL 12V Controls the 6th channel power output for alarm Turns off power output when there is alarm output Turns on power output when the alarm is cleared 12V power output port Provides power to external devices such as camera and alarm device Please note the supplying ...

Page 46: ...o port 4 Group 2 port 5 to port 8 Group 3 port 9 to port 12 Group 4 port 13 to port 16 These ports receive the signal from the external alarm source There are two types NO Normally Open and NC Normally Closed When your alarm input device is using external power please make sure the device and the NVR have the same ground Alarm output port 1 5 NO1 NO5 C1 C5 NC5 Five groups of alarm output ports Gro...

Page 47: ...ct to the monitor to view analog video 9 Power button Turns on off the Device 10 Power input port Inputs power 11 Loop out Outputs the video signal of the corresponding video input port 12 Video input port Connect to analog camera to input video signal 13 Network port Connects to Ethernet port 14 USB port Connects to the external devices such as keyboard mouse and USB storage device 15 eSATA port ...

Page 48: ...when the HDMI output resolution is 4K the VGA output stops 6 USB port Connects to the external devices such as keyboard mouse and USB storage device 7 Network port Connects to Ethernet port 8 Power input port Inputs power 9 GND Ground Table 3 22 3 2 13 DH XVR1B08H DH XVR1B16 DH XVR1B16H Figure 3 24 No Port Name Function 1 Video input port Connect to analog camera to input video signal 2 Audio inpu...

Page 49: ...to the external devices such as keyboard mouse and USB storage device 9 Network port Connects to Ethernet port 10 Power input port Inputs power Table 3 23 3 2 14 DH XVR5104H X 4P DH XVR5108H X 8P Figure 3 25 Figure 3 26 No Port Name Function 1 Video input port Connect to general analog camera PoC camera to input video signal 2 Audio input port Receives the analog audio signal output from the devic...

Page 50: ...evices such as USB storage device keyboard and mouse 8 VGA port Outputs analog video data to the connected display with VGA port 9 Network port Connects to Ethernet port 10 Ground terminal 11 Power input port Inputs 12V DC power 12 Power cable fastener Use clamp to secure the power cable on the DVR in case there is any loss Table 3 24 3 2 15 DH XVR5216AN X 16P Figure 3 27 No Port Name Function 1 V...

Page 51: ...he monitor to view analog video 7 Network port Connects to Ethernet port 8 RS 485 communication port Connects to the control devices such as speed dome PTZ RS 485_A port is connected by the cable A and RS 485_B is connected to the cable B 9 Ground terminal 10 USB port Connects to external devices such as USB storage device keyboard and mouse Table 3 25 3 3 Remote Control Operations Please note the...

Page 52: ... control 10 Record Start or stop record manually In record interface use the direction buttons to select the channel that you want to record Press this button for at least 1 5 seconds and the manual record interface will be displayed 11 Direction keys Switch between current activated controls by going left or right In playback state the keys control the playback progress bar Aux function such as o...

Page 53: ...ick to delete the previous character In numeral input mode Click to clear and click to delete the previous character Double click left mouse button Implement special control operations such as double click one item in the file list to play back the video In multiple window mode double click one channel to view in full window Double click current video again to go back to previous multiple window m...

Page 54: ...The Grand Tour 38 Operation Function selection box with left mouse button Select privacy mask zone Table 3 27 ...

Page 55: ... 39 4 Connecting Basics This chapter introduces the typical connection diagrams and ports connections 4 1 Typical Connection Diagram The following figure is for reference only The actual product shall govern Figure 4 1 ...

Page 56: ...Connecting Basics 40 Figure 4 2 ...

Page 57: ...se twisted pair cable and you can add video compensation devices or use optical fiber to ensure video quality You should keep the video signal away from the strong electromagnetic interference especially the high tension current Keep connection lugs in well contact The signal line and shielded wire should be fixed firmly and in well connection Avoid dry joint lap welding and oxidation 4 2 2 Video ...

Page 58: ...e connecting Alarm input Make sure alarm input mode is grounding alarm input Grounding signal is needed for alarm input Alarm input needs the low level voltage signal Alarm input mode can be either NC Normally Closed or NO Normally Open When you are connecting two DVRs or you are connecting one DVR and one other device use a relay to separate them Alarm output The alarm output port should not be c...

Page 59: ...nel 6 Electric current 500mA When there is an alarm output close the power output When the alarm is cancelled open the power output 12V Rated power supply Electric current 500mA Ground cable 485 A B 485 communication port They are used to control devices such as decoder 120Ω should be parallel connected between A B lines if there are too many PTZ decoders T T R R Four wire full duplex RS 485 port ...

Page 60: ...on Model HFD23 005 1ZS HRB1 S DC5V Material of the touch AgNi gold plating AuAg10 AgNi10 CuNi30 Rating Resistance Load Rated switch capacity 30V DC 1A 125V AC 0 5A 24V DC 1A 125V AC 2A Maximum switch power 62 5VA 30W 250VA 48W Maximum switch voltage 125V AC 60V DC 125V AC 60V DC Maximum switch currency 2A 2A Insulation Between touches 400VAC 1 minute 500VAC 1 minute Between touch and winding 1000V...

Page 61: ...Port Connect the RS 485 cable of the PTZ camera to the RS 485 port on the Device Step 1 Ensure the match of A and B interfaces Connect the video out cable of the PTZ camera to the video input port on the Device Step 2 Turn on the PTZ camera Step 3 ...

Page 62: ...e power requirement of the Device Power on the Device after the power cable is properly connected To protect the Device connect the Device with the power cable first and then connect to the power source To ensure the stable work of the Device and the external devices connected to the Device and to prolong the HDD life it is recommended to refer to the national related standard to use the power sou...

Page 63: ...ep 1 The Location Language and Video Standard interface is displayed See Figure 5 1 Figure 5 1 Select your location from the drop down list then language and video standard will Step 2 match your location automatically You can change the language and video standard manually Click Next Step 3 The Dahua Software License Agreement interface is displayed See Figure 5 2 ...

Page 64: ... 4 The System Zone and System Time interface is displayed See Figure 5 3 Figure 5 3 Select system zone configure system time and then click Next Step 5 The Enter Password interface is displayed See Figure 5 4 Figure 5 4 Configure the password information for admin For details see Table 5 1 Step 6 Parameter Description ...

Page 65: ...gin interface click the prompt will display to help you find back the password Click to turn off the Device Table 5 1 Click Next Step 7 The Unlock Pattern interface is displayed See Figure 5 5 Figure 5 5 Draw an unlock pattern Step 8 After the setting is completed the Password Protection interface is displayed See Figure 5 6 The pattern that you want to set must cross at least four points If you d...

Page 66: ...email address for password reset If you forget the password enter the security code that you will get from this reserved email address to reset the password of admin Security Questions Configure the security questions and answers If you forget the password enter the answers to the questions can make you reset the password If you want to configure the email or security questions fucntion later or y...

Page 67: ...d security questions you can find back the password by the security questions If you did not configure the security questions you can only use the reset button on the mainboard to restore the Device to factory default For details see 5 1 3 3 Using Reset Button on the Mainboard Not all models are provided with reset button 5 1 3 1 Enabling Password Reset Function Select Main Menu SYSTEM SECURITY Sy...

Page 68: ... Forgot Pattern the password login interface is displayed See Figure 5 9 If you did not configure unlock pattern the password login interface is displayed See Figure 5 9 Click to display the password with plaintext To login from other user account on the unlock pattern login interface click Switch User or on the password login interface in the User Name list select other users to login Figure 5 8 ...

Page 69: ...message interface is displayed See Figure 5 10 If you did not set the reserved email address the email entering interface is displayed See Figure 5 11 Enter the email address and then click Next the Prompt message interface is displayed See Figure 5 10 Figure 5 10 Figure 5 11 Click OK Step 3 ...

Page 70: ...rity code box enter the security code You can get the security code twice by scanning the same QR code If you need to get the security code once again refresh the interface Use the security code received in your email box to reset the password within 24 hours otherwise the security code becomes invalid Security questions On the Reset password interface as shown in Figure 5 11 in the Reset Type lis...

Page 71: ...g interface is displayed See Figure 5 14 Figure 5 14 In the New Password box enter the new password and enter it again in the Confirm Step 6 Password box Click Save The password resetting is started Step 7 After resetting is completed a pop up message is displayed Click OK Step 8 ...

Page 72: ...to sync the password with the remote devices see Figure 5 15 Click Cancel the resetting is finished Click OK the Sync Info interface is displayed See Figure 5 15 Figure 5 15 This message appears only when there are digital channels instead of only analog channels Figure 5 16 ...

Page 73: ... reset button on the mainboard and then press and hold the reset button for 5 Step 2 seconds to 10 seconds See Figure 5 17 for the location of the reset button Figure 5 17 Reboot the Device Step 3 After the Device is rebooted the settings have been restored to the factory default You can start resetting the password 5 1 4 Setting Up with the Startup Wizard 5 1 4 1 Entering Startup Wizard The Start...

Page 74: ...er The collected information is only used to verify the legality of the Device and push upgrade notices If you clear the Auto check for updates check box the system will not perform automatic checks 5 1 4 2 Configuring General Settings You can configure the general settings for the Device such as Device name language and settings for instant playback You can also configure general settings by sele...

Page 75: ...hin the configured time Auto Logout Min In the Auto Logout box enter the standby time for the Device The Device automatically logs out when it is not working for the configured time period You need to login the Device again The value ranges from 0 to 60 0 indicates there is not standby time for the Device Click Monitor Channel s when logout You can select the channels that you want to continue mon...

Page 76: ...for date and time parameters See Table 5 4 Step 2 Parameter Description System Time In the System Time box enter time for the system Click the time zone list you can select a time zone for the system and the time in adjust automatically Do not change the system time randomly otherwise the recorded video cannot be searched It is recommended to avoid the recoding period or stop recording first befor...

Page 77: ...date the Device starts syncing with the server immediately Port The system supports TCP protocol only and the default setting is 123 Interval Min In the Interval box enter the amount of time that you want the Device to sync time with the NTP server The value ranges from 0 to 65535 Table 5 4 5 1 4 4 Configuring Network Settings You can configure the basic network settings such as net mode IP versio...

Page 78: ...thernet ports share one IP address Normally only one Ethernet port is working and when this port fails the other port will start working automatically to ensure the network connection When testing the network status the network is regarded as offline only when both of the two Ethernet ports are disconnected The two Ethernet ports are used under the same LAN Load Balance Two network cards share one...

Page 79: ...gateway IP address and default gateway must be in the same network segment Subnet Mask Default Gateway DNS DHCP Enable the DHCP function to get the DNS address from router Preferred DNS In the Preferred DNS box enter the IP address of DNS Alternate DNS In the Alternate DNS box enter the IP address of alternate DNS MTU In the MTU box enter a value for network card The value ranges from 1280 byte th...

Page 80: ...one Client Use your mobile phone to scan the QR code to add the device into the Cell Phone Client and then you can start accessing the Device Platform Obtain the Device SN by scanning the QR code Go to the P2P management platform and add the Device SN into the platform Then you can access and manage the device in the WAN For details refer to the P2P operation manual You can also enter the QR code ...

Page 81: ... download the Step 1 application On your cell phone open the application and then tap Step 2 The menu is displayed You can start adding the device Tap Device Manager 1 The Device Manager interface is displayed See Figure 5 24 Figure 5 24 Tap on the top right corner 2 The interface requiring device initialization is displayed A pop up message reminding you to make sure the Device is initialized is ...

Page 82: ...the onscreen instructions If the Device has been initialized you can start adding it directly Tap Add Device 4 The Add Device interface is displayed See Figure 5 25 You can add wireless device or wired device The Manual takes adding wired device as an example Figure 5 25 Tap P2P 5 The P2P interface is displayed See Figure 5 26 ...

Page 83: ...gure 5 26 Enter a name for the DVR the username and password scan the QR code under 6 Device SN Tap Start Live Preview 7 The Device is added and displayed on the live view interface of the cell phone See Figure 5 27 Figure 5 27 ...

Page 84: ...for Smart Codec Enable the smart codec function This function can reduce the video bit stream for non important recorded video to maximize the storage space Type Main Stream In the Type list select General MD Motion Detect or Alarm Sub Stream This setting is not configurable Compression In the Compression list select the encode mode H 265 Main profile encoding This setting is recommended H 264H Hi...

Page 85: ... The bigger the value is the better the image will become Video Enable the function for sub stream Audio Encode Click More Setting the More Setting interface is displayed Audio Encode This function is enabled by default for main stream You need to manually enable it for sub stream 1 Once this function is enabled the recorded video file is composite audio and video stream Audio Source In the Audio ...

Page 86: ...as motion detection event video loss and local alarms Human Face The snapshot is taken when the face is detected The face detection function is support only with the Channel 1 Image Size In the Image Size list select a value for the image The bigger the value is the better the image will become Image Quality Configure the image quality by 6 levels The higher the level is the better the image will ...

Page 87: ...deo files will not be overwritten Pack Mode Configure the time length and file length for each recorded video Auto Delete Old Files Configure whether to delete the old files and if yes in the Auto Delete Old Files list select Customized to configure the time length for how long you want to keep the old files Table 5 8 5 1 4 9 Configuring Recorded Video Storage Schedule You can configure the schedu...

Page 88: ...ER and then set a HDD as redundant HDD Select Main Menu STORAGE SCHEDUE Record and then select the Redundancy check box If the selected channel is not recording the redundancy function takes effect next time you record no matter you select the check box or not If the selected channel is recording the current recorded files will be packed and then start recording according to the new schedule Not a...

Page 89: ...Define a period The system supports maximum six periods 2 Define for the whole week Click next to All all the icon switches to you can define the period for all the days simultaneously Define for several days of a week Click before each day one by one the icon switches to You can define the period for the selected days simultaneously On the timeline drag to define a period The Device starts recodi...

Page 90: ...ettings to Click Apply to save the settings 3 Click Apply to complete the settings Step 4 Click Copy to copy the settings to other channels After configuring the recording schedule settings you need to perform the following operations to start recording according to the defined schedule Enable the alarm event and cofigure the settings for the recording channel For details see 5 10 Alarm Events Set...

Page 91: ...od Define a period during which the configured snapshot setting is active For details about defining a period see 5 1 4 9 Configuring Recorded Video Storage Schedule Copy Click Copy to copy the settings to other channels Table 5 10 Click Finished Step 3 A pop up message is displayed Click OK Step 4 The live view screen is displayed The setting with startup wizard is completed You can start using t...

Page 92: ... Live View After you logged in the Device the live view is displayed See Figure 5 37 The number of channels displayed depends on your model To enter the live view screen from other interfaces click on the top right of the screen Figure 5 37 ...

Page 93: ... icon displays when the video is being recorded This icon displays when the motion detection occurs in the scene This icon displays when the video loss is detected This icon displays when the channel monitoring is locked Table 5 11 To switch the position of two channels point to one of the two channels and then drag the window to the other channel 5 2 2 Live View Control Bar The live view control ...

Page 94: ...igurations 78 Figure 5 38 Figure 5 39 No Function No Function No Function 1 Instant Play 4 Manual Snap 7 Siren 2 Digital Zoom 5 Mute 8 Audio Talk 3 Real time Backup 6 White Light 9 Camera Registration Table 5 12 ...

Page 95: ...yout switch is not allowed To change the playback time select Main Menu SYSTEM GENERAL in the Instant Play box enter the time you want to play back See Figure 5 40 Figure 5 40 5 2 2 2 Digital Zoom You can enlarge a specific area of the image to view the details by either of the following two ways Click the icon switches to Hold down the left mouse button to select the area you want to enlarge The ...

Page 96: ... PC To change the quantity of snapshots select Main Menu CAMERA ENCODE Snapshot in the Manual Snap list select the snapshot quantity 5 2 2 5 Mute Analog channel only You can mute the video sound by clicking This function is supported in single channel view 5 2 2 6 White Light Supported on camera with white light function Click to manually control the camera to turn on the white light function 5 2 ...

Page 97: ...he function icons on the navigation bar For example you can access Main Menu and switch window split mode See Figure 5 41 The navigation bar is disabled by default It does not appear in the live view screen until it is enabled To enable it select Main Menu SYSTEM GENERAL enable the Navigation Bar and then click Apply Figure 5 41 Icon Function Open Main Menu Expand or condense the navigation bar Se...

Page 98: ... details see 5 18 3 Configuring HDD Manager Open the USB MANAGER interface For details about USB operations see 5 14 2 Backing up Files 5 20 2 Viewing Log Information 5 19 5 Exporting and Importing System Settings 5 19 7 Upgrading the Device Table 5 13 5 2 4 Shortcut Menu You can quickly access some function interfaces such as main menu record search PTZ setting color setting and select the view s...

Page 99: ...he first screen is displaying the channel 1 4 click Next screen you can view channel 5 8 Next Screen Camera Registration Open the CAMERA REGISTRATION interface For details see 5 6 Configuring Remote Devices Adding Remote Devices Manual Select Record you can configure the recording mode as Auto or Manual or stop the recording You can also enable or disable snapshot function Select Alarm Out you can...

Page 100: ... You can adjust the video image color effect such as sharpness brightness and contrast The parameters are different according to the connected camera type Take analog channel as an example In the live view screen right click on the analog channel to see the shortcut menu and then select Color Setting the COLOR interface is displayed See Figure 5 43 For details see 5 5 1 Configuring Image Settings ...

Page 101: ...likely to become darker and the light area over exposed If the value is too small the image is likely to become dim The value ranges from 0 to 100 The default value is 50 The recommended range is between 40 and 60 Saturation Adjust the color shades The bigger the value the lighter the color will become This value does not influence the general image lightness The value ranges from 0 to 100 The def...

Page 102: ...o all four customized color modes 3 Click OK 4 On the COLOR interface in the Color Mode list you can select the customized color mode Table 5 15 5 2 6 Live View Display 5 2 6 1 Configuring Display Settings You can configure the display effect such as displaying time title and channel title adjusting image transparency and selecting the resolution Select Main Menu DISPLAY Display Step 1 The DISPLAY...

Page 103: ...he slider to adjust the volume of live audio Live Audio Volume Transparency Configure the transparency of the graphical user interface GUI The higher the value the more transparent the GUI becomes Resolution Select resolution for the video The default resolution for VGA port and HDMI port is 1280 1024 Some of the resolution options might not be supported on the HDMI port Preview Mode General No in...

Page 104: ... the VGA port and HDMI port display the same image Table 5 16 5 2 6 2 Configuring Viewing Layout You can configure the view layout in the live view screen Select Main Menu DISPLAY VIEW Step 1 The View Setting interface is displayed See Figure 5 45 Figure 5 45 Configure the view layout by clicking the layout buttons on the bottom See Figure 5 46 Step 2 Figure 5 46 For example click and select 9 16 ...

Page 105: ...channel 9 and channel 10 exchange positions Click Apply to complete the settings Step 4 The live view screen displays the same layout as configured in this section 5 2 6 3 Configuring Zero Channel Settings You can view several video sources on one channel on the web end Select Main Menu DISPLAY ZERO CHANNEL Step 1 The ZERO CHANNEL interface is displayed See Figure 5 48 ...

Page 106: ...ault is 704 576 D1 Frame Rate FPS Select a value between 1 and 25 for PAL standard and between 1 and 30 for NTSC standard The actual arrange is decided and selected dependent on the Device capability Bit Rate Kb S The default value is 1024Kb S The actual arrange is decided and selected dependent on the Device capability and frame rate Table 5 17 Click Apply to save the settings Step 3 In the live ...

Page 107: ... Display mode can be Step 2 Main Screen or Extra Screen Click Apply to complete the settings Step 3 5 2 7 Configuring Tour Settings You can configure a tour of selected channels to repeat playing videos The videos display in turn according to the channel group configured in tour settings The system displays one channel group for a certain period and then automatically changes to the next channel g...

Page 108: ...Local Configurations 92 Figure 5 50 Figure 5 51 Configure the settings for the tour parameters for both Main Screen and Extra Screen Step 2 See Table 5 18 ...

Page 109: ...t the channels to form a group and then click Save Delete a channel group Select the check box of any channel group and then click Delete Edit a channel group Select the check box of any channel group and then click Modify or double click on the group The Modify Channel Group dialog box is displayed You can regroup the channels Click Move up or Move down to adjust the position of channel group Tab...

Page 110: ...K to complete the settings Step 3 Modifying a Channel Group Double click on a channel group the Modify Channel Group interface is displayed See Figure 5 54 You can modify channel group and click OK to complete the settings Figure 5 54 5 3 Entering Main Menu Right click on the live view screen the shortcut menu is displayed Click Main Menu and then login the system The Main Menu is displayed see Fi...

Page 111: ...VS information and configure related settings POS You can connect the Device to the POS Point of Sale machine and receive the information from it IoT IoT live video preview search export reports and configure function settings BACKUP Search and back up the video files to the external storage device such as USB storage device 2 Switch icon indicates the current page of main menu Click to switch to ...

Page 112: ...ce in the WAN For details refer to the P2P operation manual You can also configure P2P function in the local configurations See 5 1 4 5 Configuring P2P Settings Table 5 19 5 4 Controlling PTZ Cameras PTZ is a mechanical platform that carries a camera and a protective cover and performs overall control remotely A PTZ can move in both horizontal and vertical direction to provide all around view to t...

Page 113: ...lect HDCVI The control signal is sent to the PTZ through the coaxial cable For the serial mode the control signal is sent to the PTZ through the RS 485 port Protocol In the Protocol list select the protocol for the PTZ camera for example select HDCVI3 0 Address In the Address box enter the address for PTZ camera The default is 1 The entered address must be the same with the address configured on t...

Page 114: ...ttings and quick positioning Basic PTZ Control Panel Right click on the live view screen and then select PTZ The PTZ control panel is displayed See Figure 5 57 Figure 5 57 The functions with buttons in gray are not supported by the system Parameter Description Speed Controls the movement speed The bigger the value is the faster the movement will be Zoom Zoom out Zoom in Focus Focus far Focus near ...

Page 115: ...uare the larger the zoom effect Not all models support this function and can only be controlled through mouse operations Click you can control the four directions left right up and down PTZ movement through mouse operation Click to open the expanded PTZ control panel Table 5 21 Expanded PTZ Control Panel On the basic PTZ control panel click to open the expanded PTZ control panel to find more optio...

Page 116: ...xpanded PTZ Control Panel click Step 1 The Preset interface is displayed See Figure 5 59 Figure 5 59 Click the direction arrows to the required position Step 2 In the Preset box enter the value to represent the required position Step 3 Click Setting to complete the preset settings Step 4 5 4 3 2 Configuring Tours On the Expanded PTZ Control Panel click Step 1 The PTZ interface is displayed Click t...

Page 117: ...e more presets Some protocols do not support deleting 5 4 3 3 Configuring Patterns On the Expanded PTZ Control Panel click Step 1 The PTZ interface is displayed Click the Pattern tab Step 2 The Pattern interface is displayed See Figure 5 61 Figure 5 61 In the Pattern box enter the value for pattern Step 3 Click Start to perform the directions operations You can also go to the PTZ Control Step 4 Pa...

Page 118: ... arrows to position the left and right borders Step 3 5 4 4 Calling PTZ Functions After you have configured the PTZ settings you can call the PTZ functions for monitoring from the Expanded PTZ Control Panel See Figure 5 63 Figure 5 63 5 4 4 1 Calling Presets On the Expanded PTZ Control Panel in the No box enter the value of the preset that Step 1 you want to call Click to call the preset Step 2 Cl...

Page 119: ...rn Step 3 5 4 4 4 Calling AutoScan On the Expanded PTZ Control Panel in the No box enter the value of the border that Step 1 you want to call Click Step 2 The PTZ camera performs scanning according to the configured borders Click again to stop auto scanning Step 3 5 4 4 5 Calling AutoPan On the Expanded PTZ Control Panel click to start moving in horizontal direction Step 1 Click again to stop movi...

Page 120: ...l See Figure 5 63 On the Expanded PTZ Control Panel click Step 1 The MENU OPERATION interface is displayed See Figure 5 65 Figure 5 65 Click Enter Step 2 The OSD menu is displayed See Figure 5 66 Figure 5 66 On the MENU OPERATION interface click the arrow button to select the onscreen Step 3 parameters Click Enter to complete the settings Step 4 ...

Page 121: ...mage Settings You can configure the image settings such as saturation contrast brightness sharpness for each connected camera Select Main Menu CAMERA IMAGE Step 1 The IMAGE interface is displayed See Figure 5 67 for analog channel and Figure 5 68 for digital channel Figure 5 67 ...

Page 122: ...uses Not all models support this function Period In the Period list select a time period for the image settings The image settings will be only used during the selected period Effective Time Enable the effective function In the Effective Time box enter the start time and end time for the period you selected Saturation Adjusts the color shades The bigger the value the lighter the color will become ...

Page 123: ... and the noise is also greater The value ranges from 1 to 15 The default value is 1 Image Enhance Adjusts the image definition The bigger the value is the clearer the image will become but there will be more noises NR Reduces the noises from image The bigger the value is the better the image will become Config File In the Config File list select Day Night Normal or Switch By Period The system conf...

Page 124: ...r and black white mode of the image This setting is not affected by the configuration files The default setting is Auto Color The camera outputs color image only Auto Depends on the camera such as overall brightness and whether there is an IR light either color image or black white image is output B W The camera outputs Black and white image only By Time The camera outputs image according to the c...

Page 125: ...in Stream In the Type list select General MD Motion Detect or Alarm Sub Stream This setting is not configurable Compression In the Compression list select the encode mode H 265 Main profile encoding This setting is recommended H 264H High profile encoding Low bit stream with high definition H 264 General profile encoding H 264B Baseline profile encoding This setting requires higher bit stream comp...

Page 126: ...ized value to change the image quality The bigger the value is the better the image will become Video Enable the function for sub stream Audio Encode Click More Setting the More Setting interface is displayed Audio Encode This function is enabled by default for main stream You need to manually enable it for sub stream 1 Once this function is enabled the recorded video file is composite audio and v...

Page 127: ...t The snapshot is taken when there is an alarm event occurs such as motion detection event video loss and local alarms Human Face The snapshot is taken when the face is detected The face detection function is support only with the Channel 1 Image Size In the Image Size list select a value for the image The bigger the value is the better the image will become Image Quality Configures the image qual...

Page 128: ... when main stream resolution is 4K the frame rate can be 10 fps Select Main Menu CAMERA ENCODE Encode Enhancement Step 1 The Encode Enhancement interface is displayed See Figure 5 71 Figure 5 71 Click behind Encode Enhancement to enable this function Step 2 5 5 3 Configuring Overlay Settings You can configure to display system time and channel name on each channel window in the live view screen Se...

Page 129: ...window in the live view screen In the Time Display list select time display style Channel Title Select the Channel Title check box to display the channel name on each channel window in the live view screen In the Channel Title box enter the name for the selected channel Table 5 26 Click Apply to complete the settings Step 3 Click Copy to copy the settings to other channels 5 5 4 Configuring Covere...

Page 130: ...ured covered block to the selected channel window during recording To configure covering block do the following 1 Select the Preview check box or the Record check box or select the both The 1 2 3 4 buttons are activated 2 Click the buttons to select blocks A triangle solid black block is displayed 3 Drag the block to the area that you want to cover and adjust the size of the block You can configur...

Page 131: ...s in Figure 5 74 The 17 24 channels are only for IP camera and the range changes dependent on the model you purchased The channel selection for analog camera or IP camera are in sequence for example if you want to select channels for IP camera you need to select from the last channel number Channel 16 first which means you cannot jump to select the channel 15 directly until you have selected the c...

Page 132: ...to upgrade Step 4 Click Start Upgrade Step 5 If the upgrading is successful the system pops up a message indicating the upgrading is completed 5 6 Configuring Remote Devices 5 6 1 Adding Remote Devices This function is available after you have configured the channel type as IP channel as described in previous section see 5 5 5 Configuring Channel Type You can add remote devices by adding the IP ad...

Page 133: ...devices IPC Display the front end devices DVR Display all storage devices such as NVR DVR and HCVR OTHER Display the devices that do not belong to IPC or DVR type Searched Device List Displays the searched devices You can view the device information such as status IP address Device Search Click Device Search the searched devices display in the searched device list To adjust the display sequence in...

Page 134: ...elete to delete the added device Import Select the searched devices and then click Import to import the devices in batches Export Select the added devices and then click Export The exported devices information is saved into the USB storage device Table 5 28 5 6 1 1 Initializing Remote Devices You can reset the password and IP address of the remote devices through initializing Click Device Search S...

Page 135: ...e the password and email information Step 5 If you select the Using current device password and email info check box the remote device automatically uses the current password and email information so you do not need to set the password and email address again and can go to Step 6 Clear the Using current device password and email info check box 1 The password setting interface is displayed See Figu...

Page 136: ...two types from number letter and special characters excluding and Please enter a strong password according to the password strength bar indication Confirm Password Table 5 29 Click Next 3 The Password Protection interface is displayed See Figure 5 81 Figure 5 81 Select the Email Address box and enter the email address that you want to 4 reserve for password reset in the future If you do not want t...

Page 137: ...to enter the IP address subnet mast default gateway and incremental value The system will allocate the IP address to the remote devices by progressively increasing the last part of the IP address when initializing devices in batches When configuring IP address for multiple remote devices which were not in the same network segment these remote devices will belong to the same network segment after c...

Page 138: ...2 Figure 5 83 Click Finished to complete the settings Step 9 5 6 1 2 Adding Remote Devices Automatically On the Registration interface click Device Search Step 1 The searched devices are displayed See Figure 5 84 Figure 5 84 ...

Page 139: ...re the settings for the manual adding device parameters See Table 5 30 Step 2 Parameter Description Channel In the Channel list select the channel that you want use on the Device to connect the remote device Manufacturer In the Manufacturer list select the manufacturer of the remote device IP Address In the IP Address box enter the IP address of remote device The default is 192 168 0 0 which the s...

Page 140: ... added through ONVIF protocol the system supports Auto TCP UDP or MULTICAST If the remote device is added through other manufacturers the system supports TCP and UDP Encrypt If the remote device is added through ONVIF protocol selecting the Encrypt check box will provide encryption protection to the data being transmitted To use this function the HTTPS function should be enabled for the remote IP ...

Page 141: ...dded devices do the following Click to delete one device Select the check box of the devices that you want to delete and then click Delete 5 6 1 5 Modifying IP Address You can modify a single IP address or multiple IP addresses of remote devices at one time To modify a single IP address do the following In the Searched Device list area click for the device that you want to modify IP Step 1 The Mod...

Page 142: ...llowing In the Searched Device list area select the devices that you want to modify IP address Step 1 in batches Click Step 2 The Modify IP interface is displayed See Figure 5 88 Figure 5 88 Enable the Batch Modify function Step 3 Configure the settings for start IP address the IP address is allocated in sequence Step 4 subnet mask default gateway user name and password Enable the Add function to ...

Page 143: ...ssage indicating Successfully exported is displayed Click OK Step 5 When exporting IP address the File Backup Encryption check box is selected by default The file information includes IP address port channel number manufacturer user name and password If you select the File Backup Encryption check box the file format is backup If you clear the File Backup Encryption check box the file format is csv...

Page 144: ...vice in the Added Device area You can edit the exported csv file and be cautious not to change the file format otherwise the file cannot be imported as it will be judged as invalid The language of csv file must match the Device language The import and export through customized protocol is not supported 5 6 2 Managing Remote Devices You can view the status of remote devices and upgrade 5 6 2 1 View...

Page 145: ...ware Information You can view the device firmware information such as channel number IP address manufacturer system version video input audio input and alarm in Select Main Menu CAMERA REGISTRATION Firmware the Firmware interface is displayed See Figure 5 92 ...

Page 146: ...Local Configurations 130 Figure 5 92 5 6 2 3 Upgrading Remote Devices Select Main Menu CAMERA REGISTRATION Upgrade Step 1 The Upgrade interface is displayed See Figure 5 93 ...

Page 147: ...he check box the device that you want to upgrade and click 1 Manual Check The system starts detecting if there is a new version on the online server Select the check box of all the devices that have new version 2 Click Online Upgrade 3 The system will pop up a message to indicate if the upgrading is successful You can use the Type list to filter the devices so that you can find the devices quickly...

Page 148: ...ORD interface is displayed see Figure 5 94 Figure 5 94 Configure the settings for the record control parameters See Table 5 31 Step 2 Parameter Description Channel Displays all the analog channels and the connected digital channels You can select a single channel or select All Record status Auto Automatically record according to the record type and recording time as configured in the recording sch...

Page 149: ...event triggered snapshot has the priority If there is no alarm event the system performs scheduled snapshot If there is any alarm event the system performs event triggered snapshot 5 8 1 1 Configuring Scheduled Snapshot Right click on the live view screen the shortcut menu is displayed Step 1 On the shortcut menu select Manual Record Control Step 2 The RECORD interface is displayed In the Snapshot...

Page 150: ...on has been completed If you have not configured the snapshot schedule see 5 1 4 10 Configuring Snapshot Storage Schedule 5 8 1 2 Configuring Event Triggered Snapshot Select Main Menu CAMERA ENCODE Snapshot Step 1 The Snapshot interface is displayed In the Mode list select Event and then configure other parameters See Figure 5 97 Step 2 ...

Page 151: ...Local Configurations 135 Figure 5 97 Select Main Menu ALARM VIDEO DETECT and select the event type to configure Step 3 for example select the Motion Detect tab See Figure 5 98 Figure 5 98 ...

Page 152: ...g Face Detection Triggered Snapshot Select Main Menu CAMERA ENCODE Snapshot Step 1 The Snapshot interface is displayed In the Mode list select Human Face and then configure other parameters See Figure Step 2 5 99 Figure 5 99 Select Main Menu FACE DETECT PARAMETERS Human Face Step 3 The Human Face interface is displayed See Figure 5 100 ...

Page 153: ...Step 5 5 8 2 Configuring Snapshot Storage Schedule You need to configure the storage schedule for the snapshot so that the snapshot can be saved For details see 5 1 4 10 Configuring Snapshot Storage Schedule 5 8 3 Backing up Snapshots to FTP Select Main Menu STORAGE FTP Step 1 The FTP interface is displayed See Figure 5 101 ...

Page 154: ...5 9 1 Enabling Record Control Manual recording operation requires the user have the permission to access STORAGE settings Check to ensure the HDD installed in the Device has been formatted properly To enter the record control interface do the following Right click on the live view screen the shortcut menu is displayed On the shortcut Step 1 menu select Manual Record Control The RECORD interface is...

Page 155: ...eep general recording for 24 hours for the selected channel Stop Do not record Snapshot status Enable or disable the scheduled snapshot for the corresponding channels Table 5 32 5 9 2 Instant Playback You can use the instant playback function to play back the previous five minutes to sixty minutes of the recorded video in any channel For details about instant playback function see 5 2 2 1 Instant ...

Page 156: ... 16 channel simultaneously When playing back in a single channel mode hold down the left mouse button to select the area that you want to enlarge The area is enlarged after the left mouse button is released To exit the enlarged status right click on the image 2 Playback Controls Bar Playback control buttons For details about the control buttons see 5 9 3 1 Introducing Playback Controls ...

Page 157: ...e Sync check box to simultaneously play recorded videos of different channels in the same period in multi channel view 6 Record type Select the check box to define the recording type to search for 7 Search type Select the content to play back Record PIC Splice Playback For details about the selecting search type see 5 9 3 2 Selecting Search Type 8 Calendar Click the date that you want to search th...

Page 158: ...ll screen mode 14 Time Bar Unit You can select 24hr 2hr 1hr or 30min as the unit of time bar The time bar display changes with the setting Table 5 33 5 9 3 1 Introducing Playback Controls Bar You can perform the operations such as control the speed of playback add mark and take snapshots through the playback controls bar See Figure 5 104 and Table 5 34 Figure 5 104 The play backward function and p...

Page 159: ...wX1 4 SlowX1 8 or SlowX1 16 During fast playback click to slow down the speed of fast playback Fast Playback During playing back click to set the speed of fast playback as FastX2 FastX4 FastX8 or FastX16 During slow playback click to speed up slow playback Previous Day Next Day Click or click to play the previous day or next day of the current recorded video Adjust volume of playback Smart Search ...

Page 160: ...gure 5 105 From I O Device Recorded videos playback from external storage device See Figure 5 106 Click Browse select the save path of recorded video file that you want to play Double click the video file or click to start playing Figure 5 106 5 9 3 3 Clipping Recorded Video During playback clip sections of recorded video and save to the USB storage device For the video clip interface see Figure 5...

Page 161: ...cking up Recorded Video You can back up the recorded video file or splice video file into the USB storage device Select the recorded video file that you want to back up You can select the following two Step 1 types of files Recorded video file Click the File List area is displayed Select the file s that you want to back up Splice video file For details about splicing video file see 5 9 3 3 Clippin...

Page 162: ...start playback Step 3 Click Step 4 The grid is displayed on the screen Only single channel supports smart search If multi channels are selected double click on the channel window to display this channel only on the screen and then you can start using smart search function Drag the pointer to select the searching area Step 5 The grid area supports 22 18 PAL and 22 15 NTSC Click Step 6 The screen st...

Page 163: ...ed Video This function is supported on single channel playback In the CAME NAME list select one channel Step 1 Click Step 2 The Mark List interface is displayed See Figure 5 110 Figure 5 110 Double click the file that you want to play back Step 3 To search the marked video by time in the SEARCH box on the top of the interface enter the time and then click ...

Page 164: ...List interface click the Manager interface is displayed See Figure 5 111 Figure 5 111 Be default it manages all the marked videos of the selected channel To search the marked video select channel number from the Channel list enter time in Start Time box and End Time box and then click Search All the marked videos display in time order To modify the name of marked video double click a marked video ...

Page 165: ...e is displayed Step 1 In the Search Type list select Splice Playback In the Split Mode list select 4 9 or Step 2 16 See Figure 5 112 Figure 5 112 In the Calendar area select a date Step 3 In the CAM NAME list select a channel Step 4 Only single channel supports this function Start playing back splices See Figure 5 113 Step 5 Click the playback starts from the beginning Double click anywhere on the...

Page 166: ...s from the first file by default Click any file the system plays back this file In the time box on the top of the file list interface you can enter the specific time to search the file that you want to view In the File List area there are 128 files can be displayed File type R indicates general recorded video A indicates recorded video with external alarms M indicates recorded video with motion de...

Page 167: ...D interface is displayed The recorded video that is under writing or overwriting cannot be locked To unlock the recorded video in the FILE LOCKED interface select the video and then click Unlock See Figure 5 115 Figure 5 115 5 10 Alarm Events Settings 5 10 1 Alarm Information You can search view and back up the alarm information Select Main Menu ALARM ALARM INFO Step 1 The ALARM INFO interface is ...

Page 168: ...ettings Connect the alarm input and output ports by referring to 4 3 Connecting to Alarm Input and Output You can configure the alarm settings for each channel individually or apply the settings to all channels and then save the settings 5 10 2 1 Configuring Local Alarms You can connect the alarm device to the alarm input port of the Device When the alarm is activated on the alarm device the alarm...

Page 169: ...otion Detect Settings Anti Dither Configure the time period from end of event detection to the stop of alarm Alarm Out Click Setting to display setting interface General Alarm Enable alarm activation through the alarm devices connected to the selected output port External Alarm Enable alarm activation through the connected alarm box Wireless Siren Enable alarm activation through devices connected ...

Page 170: ... turning off recording after the alarm is cancelled The value ranges from 10 seconds to 300 seconds and the default value is 10 seconds Tour Select the Tour check box to enable a tour of the selected channels Snapshot Select the Snapshot check box to take a snapshot of the selected channel To use this function select Main Menu CAMERA ENCODE Snapshot in the Mode list select Event Extra Screen Selec...

Page 171: ... way that you configure in this section Select Main Menu ALARM ALARM INPUT Alarm Box Step 1 The Alarm Box interface is displayed See Figure 5 118 Figure 5 118 In the Alarm Box list select the alarm box number corresponding to the address Step 2 number configured by the DIP switch on the Alarm Box In the Alarm In list select the alarm input port on the Alarm Box Step 3 Configure the settings for ot...

Page 172: ... the settings Step 3 Click Default to restore the default setting Click Copy to copy the settings to other channels Click Refresh to refresh configured settings 5 10 2 4 Configuring Alarms for IP Camera Offline You can configure the alarm settings for the situation when the IP camera is offline Select Main Menu ALARM ALARM INPUT IPC Offline Step 1 The IPC Offline interface is displayed See Figure ...

Page 173: ...able 5 35 Step 2 Click Apply to complete the settings Step 3 Click Default to restore the default setting Click Copy to copy the settings to other channels 5 10 2 5 Configuring Alarms from HDCVI Devices Select Main Menu ALARM ALARM INPUT HDCVI Alarm Step 1 The HDCVI Alarm interface is displayed See Figure 5 121 ...

Page 174: ...nnel list select a channel or all Step 2 Click Step 3 The Setting interface is displayed See Figure 5 122 Figure 5 122 Configure the settings for other parameters of the Alarm Box For details see Table Step 4 5 35 Click OK to save the settings Step 5 ...

Page 175: ...o keep generating alarms Stop The alarm output function is not enabled Select Main Menu ALARM ALARM OUTPUT ALARM Out Step 1 The ALARM OUTPUT interface is displayed See Figure 5 123 Figure 5 123 Configure the settings for the alarm output For details see Table 5 36 Step 2 Parameter Description General Alarm Alarm Type Select alarm type for each alarm output port Status Indicates the status of each ...

Page 176: ...r Device Select Main Menu ALARM ALARM OUTPUT White Light Step 1 The White Light interface is displayed See Figure 5 124 Figure 5 124 Configure the settings for the white light parameters See Table 5 37 Step 2 Parameter Description Channel In the Channel list select a channel that is connected to a white light camera Latch Set a length of time for the Device to delay turning off alarm after the ala...

Page 177: ...elect Main Menu ALARM ALARM OUTPUT Siren Step 1 The Siren interface is displayed See Figure 5 125 Figure 5 125 Configure the settings for the siren parameters See Table 5 38 Step 2 Parameter Description Channel In the Channel list select a channel that is connected to a camera that supports audio function Play Click Play to manually trigger the IP camera to play audio file Latch Set a length of ti...

Page 178: ...nto the Device Step 1 Click Browse Step 2 The Browse interface is displayed See Figure 5 126 Figure 5 126 Select the upgrade audio file bin Step 3 Click OK to return to the Siren interface Step 4 Click Start Upgrade to upgrade the alarm audio file of the camera Step 5 5 10 4 Video Detection Video detection adopts computer vision and image processing technology The technology analyzes the video ima...

Page 179: ...motion detect It can filter the meaningless alarms that are activated by the objects such as falling leaves flies The detection range by PIR is smaller than the field angle PIR function is enabled by default if it is supported by the cameras Enabling PIR function will get the motion detect to be enabled automatically to generate motion detection alarms if the PIR function is not enabled the motion...

Page 180: ...mail Select the Send Email check box to enable the system to send an email notification when an alarm event occurs To use this function make sure the email function is enabled in Main Menu NETWORK EMAIL Record Channel Select the channel s that you want to record The selected channel s starts recording after an alarm event occurs The recording for motion detection and auto recording function must b...

Page 181: ...io broadcast voice prompts in response to a motion detection event White Light Select the check box to enable the white light alarm of the camera Siren Select the check box to enable the sound alarm of the camera Table 5 39 Click Apply to save the settings Step 3 Click Default to restore the default setting Click Copy in the Copy dialog box select the additional channel s that you want to copy the...

Page 182: ... Right click on the screen to exit the region setting interface Step 4 On the Motion Detect interface click Apply to complete the settings Step 5 Setting Motion Detection Period The system only activates the alarm in the defined period Next to Period click Setting Step 1 The Setting interface is displayed See Figure 5 130 Figure 5 130 Define the motion detection period By default it is active all ...

Page 183: ... period and then select the check box to enable the 2 settings There are six periods for you to set for each day Under Copy select All to apply the settings to all the days of a week or select specific day s that you want to apply the settings to Click OK to save the settings 3 On the Motion Detect interface click Apply to complete the settings Step 3 5 10 4 2 Configuring Video Loss Settings When ...

Page 184: ...the default setting Click Copy in the Copy dialog box select the additional channel s that you want to copy the motion detection settings to and then click Apply 5 10 4 3 Configuring Tampering Settings When the camera lens is covered or the video is displayed in a single color because of the causes such as sunlight status the monitoring cannot be continued normally To avoid such situations you can...

Page 185: ...3 Click Default to restore the default setting Click Copy in the Copy dialog box select the additional channel s that you want to copy the motion detection settings to and then click Apply 5 10 4 4 Configuring Diagnosis Settings This function can be used only when it is supported by the camera When the video appear the conditions such as blurry overexposed or the color changes the system activates...

Page 186: ...Settings Click Apply to complete the settings Step 3 Click Default to restore the default setting Setting the Types for Diagnosing Targets Next to Rule click Setting Step 1 The Diagnosis interface is displayed See Figure 5 135 Figure 5 135 Select the items that you want to diagnose and set the threshold 30 by default See Step 2 Table 5 40 ...

Page 187: ...he range is between 0 the darkest black and 255 the brightest white If the brightness exceeds the threshold the image is over exposed Threshold The range is from 1 through 100 If the value after diagnosing is higher than what you set the system activates the alarm to the corresponding diagnosing types such as stripe Table 5 40 Click Apply to save the settings Step 3 The system returns to the Diagn...

Page 188: ...t port External Alarm Enable alarm activation through the connected alarm box Wireless Siren Enable alarm activation through devices connected by USB gateway or camera gateway Latch Set a length of time for the Device to delay turning off alarm after the external alarm is cancelled The value ranges from 10 seconds to 300 seconds and the default value is 10 seconds Show Message Select the Show Mess...

Page 189: ...a local alarm log Voice Prompts Select to enable audio broadcast voice prompts in response to a HDD alarm event Table 5 41 Click Apply to complete the settings Step 3 5 10 5 2 Configuring Network Event Settings Select Main Menu ALARM ABNORMITY Network Step 1 The Network interface is displayed See Figure 5 137 Figure 5 137 Configure the settings for the Network event See Table 5 42 Step 2 Parameter...

Page 190: ...x to enable a pop up message in your local host PC Send Email Select the Send Email check box to enable the system to send an email notification when an alarm event occurs To use this function make sure the email function is enabled in Main Menu NETWORK EMAIL Buzzer Select the check box to activate a buzzer noise at the Device Log Select the check box to enable the Device to record a local alarm l...

Page 191: ...e locked after your entries exceed the maximum number Lock Time Set how long the account is locked for The value ranges from 1 minute to 60 minutes Alarm Out Click Setting to display setting interface General Alarm Enable alarm activation through the alarm devices connected to the selected output port External Alarm Enable alarm activation through the connected alarm box Wireless Siren Enable alar...

Page 192: ...buzzer noise at the Device Log Select the check box to enable the Device to record a local alarm log Voice Prompts Select to enable audio broadcast voice prompts in response to a user account alarm event Table 5 43 Click Apply to complete the settings Step 3 5 10 5 4 Configuring Device Event Settings Select Main Menu ALARM ABNORMITY Device Step 1 The Device interface is displayed See Figure 5 139 ...

Page 193: ... check box to activate a buzzer noise at the Device Log Select the check box to enable the Device to record a network exception log Send EMAIL Select the Send Email check box to enable the system to send an email notification when an alarm event occurs To use this function make sure the email function is enabled in Main Menu NETWORK EMAIL Voice Prompts Select to enable audio broadcast voice prompt...

Page 194: ...n Menu SMART DETECTION PARAMETERS SMD Step 1 The SMD interface is displayed See Figure 5 140 Figure 5 140 Select the channel and enable Step 2 Set parameters See Figure 5 49 Step 3 Parameter Description Sensitivity Set sensitivity including high middle and low The higher the sensitivity is the bigger alarm probability will be the bigger false alarm rate will be The system selects middle by default...

Page 195: ...terface is displayed See Figure 5 141 Figure 5 141 Select channel type begin time and end time and then click Search Step 2 The search result is displayed See Figure 5 142 Click to play back the video Tick the check box before the video and then click Export to export the video to external USB ...

Page 196: ...tion Only the analog channel 1 supports this function The IP channel does not support this function SMD face detection function and IVS function cannot be enabled at the same time 5 11 2 1 Configuring Face Detection Settings When the Device detects the human faces the system activates alarms Select Main Menu SMART DETECTION PARAMETERS Human Face Step 1 The Human Face interface is displayed See Fig...

Page 197: ...he maximum size no alarms will be activated The maximum size should be larger than the minimum size Period Define a period during which the detection is active For details see Setting Motion Detection Period section in 5 10 4 1 Configuring Motion Detect Settings Alarm Out Click Setting to display setting interface Enable alarm activation function Select the alarm output port s to which the periphe...

Page 198: ...age actions such as selecting the preset that you want to be called when an alarm event occurs Face Detect can only link PTZ preset Post Record Set a length of time for the Device to delay turning off recording after the alarm is cancelled The value ranges from 10 seconds to 300 seconds Tour Select the Tour check box to enable a tour of the selected channels Snapshot Select the Snapshot check box ...

Page 199: ...ngs Step 3 5 11 2 2 Searching for Detected Faces To comply with relevant regulations the faces have received fuzzy processing Select Main Menu SMART DETECTION SMART SEARCH Human Face Step 1 The Human Face interface is displayed See Figure 5 144 Figure 5 144 In the Begin Time box and End Time box enter the time Step 2 Select the display by clicking Graph or clicking List Step 3 Click Search Step 4 ...

Page 200: ...Local Configurations 184 Figure 5 145 Figure 5 146 ...

Page 201: ...ocesses and analyzes the images to extract the key information to match with the preset rules When the detected behaviors match with the rules the system activates alarms The IVS function and face detection function cannot be enabled at the same time 5 11 3 1 Configuring Intelligent Settings You can configure the intelligent settings for both analog cameras and IP cameras Not all models support th...

Page 202: ...Local Configurations 186 Figure 5 148 In the Channel list select the channel number that you want to configure the IVS Step 2 function Click Add Step 3 One line of rule is displayed See Figure 5 149 ...

Page 203: ...pwire Rules When the target object crosses the tripwire in the defined direction the system activates alarms The tripwire can be configured as a straight line or broken line Supports detecting one way or two way tripwire crossing Supports multiple tripwires in the same scenario to meet the complexity Supports size filtering for target On the rule line that you added in the Type list select Tripwir...

Page 204: ...he Channel list select the channel that you want to configure the rules for 1 Click 2 The monitoring screen to configure the tripwire rules is displayed See Figure 5 151 for analog camera and the IP camera without preset and see Figure 5 152 for IP camera with preset ...

Page 205: ... 152 Configure the settings for the parameters of drawing rules See Table 5 47 3 Parameter Description Name Enter the customized rule name Direction Set the direction of the tripwire You can choose A to B left to right B to A right to left and Both ...

Page 206: ...t list select the preset that you want to configure the rule for Table 5 47 Drag to draw a tripwire The tripwire can be a straight line broken line or polygon 4 Click OK to save the settings 5 Click to set the actions to be triggered Step 3 The Trigger interface is displayed See Figure 5 153 Figure 5 153 Configure the triggering parameters See Table 5 48 Step 4 Parameter Description Period Click S...

Page 207: ...o send an email notification when an alarm event occurs To use this function make sure the email function is enabled in Main Menu NETWORK EMAIL Record Channel Select the channel s that you want to record The selected channel s starts recording after an alarm event occurs The recording for intelligence event and auto recording function must be enabled For details see 5 1 4 9 Configuring Recorded Vi...

Page 208: ...ight Select the check box to activate a white light camera to trigger white light alarm Siren Select the check box to activate an audio camera to trigger audio alert Table 5 48 Click OK to save the settings Step 5 The INTELL SETTING interface is displayed Select the Enable check box and then click Apply Step 6 The tripwire detecting function is active When the target object crosses the tripwire in...

Page 209: ... Channel list select the channel that you want to configure the rules for 1 Click 2 The monitoring screen to configure the intrusion rules is displayed See Figure 5 155 for analog camera and the IP camera without preset and see Figure 5 156 for IP camera with preset ...

Page 210: ...Local Configurations 194 Figure 5 155 Figure 5 156 Configure the settings for the parameters of drawing rules See Table 5 49 3 Parameter Description ...

Page 211: ... minimum size Preset In the Preset list select the preset that you want to configure the rule for Table 5 49 Drag to draw an area 4 Click OK to save the settings 5 Click to set the actions to be triggered For details see 5 11 3 1 1 Configuring Step 3 Tripwire Rules Select the Enable check box and then click Apply Step 4 The intrusion detecting function is active When the target enters and leaves t...

Page 212: ... an area Step 2 In the Channel list select the channel that you want to configure the rules for 1 Click 2 The monitoring screen to configure the abandoned rules is displayed See Figure 5 158 for analog camera and see Figure 5 159 for IP camera ...

Page 213: ...Local Configurations 197 Figure 5 158 Figure 5 159 Configure the settings for the parameters of drawing rules See Table 5 50 3 Parameter Description ...

Page 214: ...The maximum size should be larger than the minimum size Preset In the Preset list select the preset that you want to configure the rule for Table 5 50 Drag to draw an area 4 Click OK to save the settings 5 Click to set the actions to be triggered For details see 5 11 3 1 1 Configuring Step 3 Tripwire Rules Select the Enable check box and then click Apply Step 4 The abandoned object detecting funct...

Page 215: ...e Channel list select the channel that you want to configure the rules for 1 Click 2 The monitoring screen to configure the missing rules is displayed See Figure 5 161 for analog camera and the IP camera without preset and see Figure 5 162 for IP camera with preset ...

Page 216: ...Local Configurations 200 Figure 5 161 Figure 5 162 Configure the settings for the parameters of drawing rules See Table 5 51 3 Parameter Description ...

Page 217: ...rea 4 Click OK to save the settings 5 Click to set the actions to be triggered For details see 5 11 3 1 1 Configuring Step 3 Tripwire Rules Select the Enable check box and then click Apply Step 4 The missing object detecting function is active When the target is taken away from the defined area exceeds the set time the system activates alarms 5 11 3 2 Enabling the Intelligent Settings for IP Camer...

Page 218: ... Channel list select the IP camera channel that you have configured the Step 2 intelligent settings For the IP camera with preset see Figure 5 164 The IP camera with preset means the speed dome The displayed preset information has been configured before on the speed dome from front end intelligence settings ...

Page 219: ...Local Configurations 203 Figure 5 164 For the IP camera without preset see Figure 5 165 Figure 5 165 Enable the IVS function Step 3 ...

Page 220: ...the IVS button and Face Detect button are displayed See Figure 5 166 Figure 5 166 Select the line of 1_Preset1 3 Click IVS button to enable the intelligent settings to preset 1 The buttons is 4 displayed in blue Click Apply to complete the settings 5 For the IP camera without preset click the IVS button and then click Apply to complete the settings 5 11 3 3 Using Smart Search You can search for th...

Page 221: ... Type list select the event type that you want to search Step 3 In the Begin Time box and End Time box enter the date and time Step 4 Select the display mode of the search results by clicking Graph or List Step 5 Click Search Step 6 The results that satisfy the searching conditions are displayed See Figure 5 168 and Figure 5 169 ...

Page 222: ...Local Configurations 206 Figure 5 168 Figure 5 169 Double click the video or click Step 7 ...

Page 223: ...eo files 5 12 IoT Function 5 12 1 Configuring Sensor Settings You can connect external sensors wirelessly through the Device with USB gateway or through connecting to a camera gateway After connection you can activate alarm events through external sensors 5 12 1 1 Connecting Sensor through Device Only the Device with USB gateway supports this function Select Main Menu IoT MANAGER Sensor Pairing St...

Page 224: ...171 In the Access Type list select USB Gateway Step 2 Click Add Step 3 The Add interface is displayed See Figure 5 172 Figure 5 172 Click Pair Step 4 The Device starts pairing with the sensor After pairing is completed see Figure 5 173 ...

Page 225: ...gurations 209 Figure 5 173 Click Back to exit the pairing interface Step 5 The added sensor information is displayed See Figure 5 174 Click to modify the sensor name click to delete sensor information Figure 5 174 ...

Page 226: ...unction Select Main Menu IoT MANAGER Sensor Pairing Step 1 The Sensor Pairing interface is displayed See Figure 5 175 Figure 5 175 In the Access Type list select Camera Gateway Step 2 In the Channel list select the channel that is connected to the camera Step 3 Click Add Step 4 The Add interface is displayed See Figure 5 176 ...

Page 227: ...ice starts pairing with the sensor After pairing is completed see Figure 5 177 Figure 5 177 Click Back to exit the pairing interface Step 6 The added sensor information is displayed See Figure 5 178 Click to modify the sensor name click to delete sensor information ...

Page 228: ...Local Configurations 212 Figure 5 178 5 12 1 3 Configuring Alarm Linkage Select Main Menu IoT MANAGER Wireless Detector Step 1 The Wireless Detector interface is displayed See Figure 5 179 ...

Page 229: ...cess Type list select USB Gateway Camera Gateway or All Step 2 When Access Type is Camera Gateway you can select Channel to filter the status of present wireless detector Click Step 3 The Setting interface is displayed See Figure 5 180 Figure 5 180 ...

Page 230: ...time for the Device to delay turning off alarm after the external alarm is cancelled The value ranges from 0 seconds to 300 seconds and the default value is 10 seconds Post Record Set a length of time for the Device to delay turning off recording after the alarm is cancelled The value ranges from 10 seconds to 300 seconds and the default value is 10 seconds Anti Dither Configure the time period fr...

Page 231: ...nable the function When an alarm event occurs the extra screen outputs the settings configured in Main Menu DISPLAY TOUR Extra Screen Not all models support this function To use this function extra screen shall be enabled Table 5 52 Click OK to save the settings Step 5 On the Wireless Detector interface click Apply to complete the settings Step 6 5 12 2 Configuring Temperature and Humidity Camera ...

Page 232: ...Local Configurations 216 Figure 5 181 Select the Enable check boxes to enable IoT function See Figure 5 182 Step 2 Figure 5 182 ...

Page 233: ...refresh interval For example you can select 5 Sec You can also display the temperature and humidity data in graphical way by selecting the Display Graph check box to See Figure 5 183 for humidity data in graphical way Figure 5 183 Click Clear to delete the data 5 12 2 3 Exporting Temperature and Humidity Data You can export the temperature and humidity data in BMP format Take exporting humidity da...

Page 234: ...sage dialog box is displayed Click OK Step 7 You can find the exported data on your USB device 5 12 2 4 Configuring Alarm Linkage You can configure alarm linkage settings for temperature and humidity data 5 12 2 4 1 Configuring Alarm Linkage for Temperature Data On the main interface select IoT MANAGER Temperature Humidity Step 1 The Temperature Humidity interface is displayed See Figure 5 185 ...

Page 235: ...ature information line click Step 2 The Setting interface is displayed See Figure 5 186 Figure 5 186 Configure the settings for alarm linkage See Table 5 53 Step 3 Parameter Description Access Point Indicates the channel that the camera is connected to ...

Page 236: ...tivation through devices connected by USB gateway or camera gateway PTZ Click Setting to display the PTZ interface Enable PTZ linkage actions such as selecting the preset that you want to be called when an alarm event occurs Latch Set a length of time for the Device to delay turning off alarm after the external alarm is cancelled The value ranges from 0 seconds to 300 seconds and the default value...

Page 237: ...LAY TOUR Not all models support this function Send Email Enable the system to send an email notification when an alarm event occurs To use this function make sure the email function is enabled in Main Menu NETWORK EMAIL Log Select the check box to enable the Device to record a local alarm log Select the check box to enable the function When an alarm event occurs the extra screen outputs the settin...

Page 238: ...nformation line click Step 2 The Setting interface is displayed See Figure 5 188 Figure 5 188 Configure the settings for the following parameters See Table 5 54 Step 3 Parameter Description Access Point Indicates the channel that the camera is connected to ...

Page 239: ...e alarm activation through devices connected by USB gateway or camera gateway PTZ Click Setting to display the PTZ interface Enable PTZ linkage actions such as selecting the preset that you want to be called when an alarm event occurs Latch Set a length of time for the Device to delay turning off alarm after the external alarm is cancelled The value ranges from 0 seconds to 300 seconds and the def...

Page 240: ... the check box to enable the function When an alarm event occurs the video output port outputs the settings configured in Main Menu DISPLAY TOUR Not all models support this function Send Email Enable the system to send an email notification when an alarm event occurs To use this function make sure the email function is enabled in Main Menu NETWORK EMAIL Log Select the check box to enable the Devic...

Page 241: ...rch You can select Humidity or Temperature Status Select the information state that you want to search This option is available when you select List in the Display Type list Start Time Enter the start time and end time for the information that you want to search End Time Table 5 55 Click Search Step 3 The system starts search according to your parameters settings After searching is finished the re...

Page 242: ...Local Configurations 226 Figure 5 190 For the data displayed in graph see Figure 5 191 Figure 5 191 Click Backup The system starts exporting the data Step 4 ...

Page 243: ...isplayed See Figure 5 192 Figure 5 192 Configure the settings for the wireless alarm output For details see Table 5 56 Step 2 Parameter Description USB Gateway Camera Gateway Auto Automatically activate alarm if the alarm output function for wireless siren is enabled for specific events For example if you want to enable the alarm output through wireless siren for motion detection see Alarm Output ...

Page 244: ...iew screen support single channel mode and four channel mode Displaying monitoring screen and playing back in the web support multi channel mode 5 13 1 Searching the Transaction Records The system supports fuzzy search Select Main Menu POS POS SEARCH Step 1 The POS SEARCH interface is displayed See Figure 5 193 Figure 5 193 In the POS SEARCH box enter the information such as transaction number on ...

Page 245: ...Click to modify the POS name The POS name supports 21 Chinese characters or 63 English characters Enable Enable the POS function Record CH Select the channel s that you want to record The selected channel s starts recording after an alarm occurs The recording for POS alarms and auto recording function must be enabled For details see 5 1 4 9 Configuring Recorded Video Storage Schedule and 5 9 1 Ena...

Page 246: ...ion will not display normally After the network is recovered the latest POS information will be displayed Time Display Enter the time that how long you want to keep the POS information displaying For example enter 5 the POS information disappear from the screen after 5 seconds Font Size In the Font Size list select Small Medium or Big as the text size of POS information COLOR In the color bar clic...

Page 247: ...ce interface which provides you a shortcut to perform backup and upgrading operations See Figure 5 195 For details see 5 14 2 Backing up Files 5 20 2 Viewing Log Information 5 19 5 Exporting and Importing System Settings and 5 19 7 Upgrading the Device Figure 5 195 5 14 2 Backing up Files You can back up the recorded videos and snapshots Select Main Menu BACKUP Step 1 The BACKUP interface is displ...

Page 248: ...ck Browse the Browse interface is displayed Select the route where you want to search for the files Record CH In the Record CH list select the channel where you want to search for the files Type In the Type list select the file type that you want to search Start Time Enter the start time and end time for the files that you want to search End Time File Format In the File Format list select the file...

Page 249: ...an configure the settings for the Device such as IP address DNS according to the networking plan Select Main Menu NETWORK TCP IP the TCP IP interface is displayed See Figure 5 197 For details about parameter settings see 5 1 4 4 Configuring Network Settings Figure 5 197 5 15 1 2 Configuring Port Settings You can configure the maximum connection accessing the Device from Client such as WEB Platform...

Page 250: ...rding to your actual situation UDP Port The default value setting is 37778 You can enter the value according to your actual situation HTTP Port The default value setting is 80 You can enter the value according to your actual situation If you enter other value for example 70 and then you should enter 70 after the IP address when logging in the Device by browser RTSP Port The default value setting i...

Page 251: ...nnection parameters See Table 5 60 Step 2 Parameter Description Wi Fi Auto Connect Enable Wi Fi Auto Connect After the Device is restarted it will automatically connect to the nearest hotspot that had been connected successfully Refresh Refresh the hotspot list The self adaption function such as adding password is supported if such setting was once configured Connect In the hotpots list select a h...

Page 252: ...e USB port of the Device Step 1 Select Main Menu NETWORK 3G 4G Step 2 The 3G 4G interface is displayed see Figure 5 200 Figure 5 200 The 3G 4G interface is consisted of three areas Area 1 Displays the signal strength Area 2 Displays the module configurations Area 3 Displays the connection state The information of Area 2 will display after the 3G 4G module is connected while the information of Area...

Page 253: ... area See Figure 5 201 Figure 5 201 Click Apply to complete the settings Step 6 Supported 3G 4G Modules by the Device China Mobile 3G 4G ZTE MF832S China Mobile 4G ZTE MF832S China Unicom 3G ZTE MF667S HUAWEI E353U 1 China Telecom 4G HUAWEI EC122 ZTE AC2736 If the Device is connected to China Telecom 3G 4G network you can login the Device with the public IP address through the PC of public interne...

Page 254: ... PPPoE is another way for the Device to access the network You can establish network connection by configuring PPPoE settings to give the Device a dynamic IP address in the WAN To use this function firstly you need to obtain the user name and password from the Internet Service Provider Select Main Menu NETWORK PPPoE Step 1 The PPPoE interface is displayed See Figure 5 202 Figure 5 202 Enable the P...

Page 255: ...Preparing for Configuration Please confirm if the Device supports the DDNS Type and log in the website provided by the DDNS service provider to register the information such as domain from PC located in the WAN After you have registered and logged in the DDNS website successfully you can view the information of all the connected devices under this user name Configuring Steps Select Main Menu NETWO...

Page 256: ...www quickddns com which cannot be modified Domain Name The domain name for registering on the website of DDNS service provider Select the domain mode as default domain or customized domain The default domain format is MAC address without quickddns com The customized domain format is name quickddns com Email In the Email box enter the email address that is used to access the DDNS service provider T...

Page 257: ... you can login as anonymity Mail Receiver In the Mail Receiver list select the number of receiver that you want to receive the notification The Device supports up to three mail receivers Email Address Enter the email address of mail receiver s Sender Enter the sender s email address It supports maximum three senders separated by comma Title Enter the email subject Supports Chinese English and Arab...

Page 258: ...ding function If the configuration is correct the receiver s email account will receive the email Before testing click Apply to save the settings Table 5 64 Click Apply to complete the settings Step 3 5 15 1 8 Configuring UPnP Settings You can map the relationship between the LAN and the WAN to access the Device on the LAN through the IP address on the WAN Preparation for Configuration Login the r...

Page 259: ...dicates the status of UPnP function Offline Failed Online Succeeded LAN IP Enter IP address of router on the LAN After mapping succeeded the system obtains IP address automatically without performing any configurations WAN IP Enter IP address of router on the WAN After mapping succeeded the system obtains IP address automatically without performing any configurations ...

Page 260: ...ase ensure the mapping ports are not occupied or limited The internal and external ports of TCP and UDP must be the same and cannot be modified Click to modify the external port Table 5 65 Click Apply to complete the settings Step 3 In the browser enter http WAN IP External IP port You can visit the LAN Device 5 15 1 9 Configuring SNMP Settings Not all models support this function You can connect ...

Page 261: ...y Trap Address Indicates the destination address for the agent program to send the Trap information Trap Port Indicates the destination port for the agent program to send the Trap information Read Only User Enter the user name that is allowed to access the Device and has the Read Only permission Read Write User Enter the user name that is allowed to access the Device and has the Read and Write per...

Page 262: ... configurations of the Device such as the channels quantity and software version 5 15 1 10 Configuring Multicast Settings When you access the Device from the network to view the video if the access is exceeded the video will not display You can use the multicast function to group the IP to solve the problem Select Main Menu NETWORK MULTICAST Step 1 The MULTICAST interface is displayed See Figure 5...

Page 263: ...ox in the Type list select MULTICAST The web will automatically obtain the multicast IP address and join Then you can view the video through multicast function Figure 5 208 5 15 1 11 Configuring Register Settings You can register the Device into the specified proxy server which acts as the transit to make it easier for the client software to access the Device Select Main Menu NETWORK REGISTER Step...

Page 264: ...ver Sub Service ID This ID is allocated by the server and used for the Device Table 5 68 Click Apply to complete the settings Step 3 5 15 1 12 Configuring Alarm Center Settings You can configure the alarm center server to receive the uploaded alarm information To use this function the Alarm Upload check box must be selected For details about alarm event settings see 5 10 Alarm Events Settings Sele...

Page 265: ...nt Port Self Report Time In the Self Report Time list select time cycle and specific time for uploading alarm Table 5 69 Click Apply to complete the settings Step 3 5 15 1 13 Configuring P2P Settings You can manage the devices by using P2P technology to download the application and register the devices For details see 5 1 4 5 Configuring P2P Settings 5 15 1 14 802 1x The Device can be connected wi...

Page 266: ...Local Configurations 250 Figure 5 211 Figure 5 212 Select the Ethernet card you want to certify Step 2 Select Enable and configure parameters See Table 5 70 Step 3 ...

Page 267: ...ll be authorized at server Password Password of the corresponding username Client Certificate When Authentication is TLS click Browse to import from flash drive Private Key Private Key Password It can be configured when Authentication is TLS Table 5 70 Click Apply to complete the settings Step 4 5 15 2 Configuring Network Testing Settings 5 15 2 1 Testing the Network You can test the network conne...

Page 268: ...2 Capturing Packet and Backing up Packet capture means the operations such as capturing resending and editing data that are sent and received during network transmission When there is network abnormality you can perform packet capturing and back up into the USB storage device This date can be provided to the technical support for analyzing the network condition Select Main Menu INFO NETWORK Networ...

Page 269: ...k Refresh Step 3 The Device starts detecting the USB storage device and displays its name in the Device Name box Select the route of the data that you want to capture and back up Step 4 In the Network Sniffer Packet Backup area click Browse 1 The Browse interface is displayed See Figure 5 216 ...

Page 270: ... to create a new folder in the USB storage device Click Apply to save the route selection settings 3 The Test interface is displayed again Click to start packet capturing and backing up Step 5 Only the data packet of one LAN can be captured at one time After capturing starts you can exit the Test interface to perform other operations such as web login and monitoring Click to stop capturing Step 6 ...

Page 271: ...r _ You can set maximum 64 users and 20 groups The group name by User and Admin cannot be deleted You can set other groups and define the relevant permissions However the admin account cannot be set randomly You can manage the account by user and group and the name cannot be repeated Every user must belong to a group and one user only belongs to one group 5 16 1 Configuring User Account 5 16 1 1 A...

Page 272: ...er interface is displayed See Figure 5 219 Figure 5 219 Configure the settings for the parameters of adding a user account See Table 5 71 Step 3 Parameter Description User Name Enter a user name and password for the account Password Confirm Password Re enter the password ...

Page 273: ...select the check boxes in the System tab Playback tab and Monitor tab To manage the user account easily when defining the user account authority it is recommended not to give the authority to the common user account higher that the advanced user account Table 5 71 Click OK to complete the settings Step 4 Setting Permitted Period Next to Period click Setting Step 1 The Set interface is displayed Se...

Page 274: ...ays will take the same settings Define the period by editing Take Sunday as an example Click 1 The Period interface is displayed See Figure 5 221 Figure 5 221 Enter the time frame for the period and select the check box to enable the settings 2 There are six periods for you to set for each day Under Copy select All to apply the settings to all the days of a week or select specific day s that you w...

Page 275: ...ify User interface is displayed See Figure 5 223 Figure 5 223 Change the settings for password user name user group user MAC memo period Step 3 and authority The new password can be set from 8 digits through 32 digits and contains at least two types from number letter and special characters excluding and ...

Page 276: ...questions Click Security Questions 1 The Security Questions interface is displayed See Figure 5 224 Figure 5 224 In the Question list select questions and enter the answers in the Answer box 2 Click Setting to save the settings 3 You can use the security questions and answers to reset the password for admin account To reset the security questions on the Security Questions enter the correct answers...

Page 277: ... user account that you want to delete Step 2 A Message is displayed Click OK to delete a user account Step 3 5 16 2 Configuring Group Account 5 16 2 1 Adding a Group Select Main Menu ACCOUNT GROUP Step 1 The GROUP interface is displayed See Figure 5 226 ...

Page 278: ... 2 The Add Group interface is displayed See Figure 5 227 Figure 5 227 Configure the settings for the parameters of adding a group See Table 5 72 Step 3 Parameter Description Group Name Enter a name for the group Memo Optional Enter a description of the account ...

Page 279: ...ack tab and Monitor tab Table 5 72 Click OK to complete the settings Step 4 5 16 2 2 Modifying a Group Select Main Menu ACCOUNT GROUP Step 1 The GROUP interface is displayed See Figure 5 228 Figure 5 228 Click for the group account that you want to modify Step 2 The Modify Group interface is displayed See Figure 5 229 Step 3 ...

Page 280: ...5 229 Change the settings for group name memo and authority Step 4 Click OK to complete the settings Step 5 5 16 2 3 Deleting a Group Select Main Menu ACCOUNT GROUP Step 1 The GROUP interface is displayed See Figure 5 230 Figure 5 230 ...

Page 281: ...manufactured by other company can connect to the Device through ONVIF protocol by an authorized ONVIF account The admin account is created for ONVIF users right after the Device has been initialized Select Main Menu ACCOUNT ONVIF USER Step 1 The ONVIF USER interface is displayed See Figure 5 231 Figure 5 231 Click Add User Step 2 The Add User interface is displayed See Figure 5 232 ...

Page 282: ...the account 5 17 Audio Management Audio management function manages audio files and configures the playing schedule When there is an alarm event the audio file can be activated 5 17 1 Configuring Audio Files You can add audio files listen to audio files rename and delete audio files and configure the audio volume Select Main Menu AUDIO FILE MANAGER Step 1 The FILE MANAGER interface is displayed Se...

Page 283: ...267 Figure 5 233 Click Add Step 2 The Add interface is displayed See Figure 5 234 Figure 5 234 Select the audio files that you want to import Step 3 Click OK to start importing audio files from the USB storage device Step 4 ...

Page 284: ... storage device to get the file next time Click to play the audio file Click to rename the audio file Click to delete the audio file To decrease or increase the playing volume move the slider to the left or to the right 5 17 2 Configuring Playing Schedule for Audio Files You can configure the settings to play the audio files during the defined time period Select Main Menu AUDIO SCHEDULE Step 1 The...

Page 285: ...od Interval In the Interval box enter the time in minutes for how often you want to repeat the playing Repeat Configure how many times you want to repeat the playing in the defined period Output Includes two options MIC and Audio It is MIC by default The MIC function shares the same port with talkback function and the latter has the priority Table 5 73 The finish time for audio playing is decided ...

Page 286: ...5 237 Configure the settings for the basic settings parameters See Table 5 74 Step 2 Parameter Description HDD Full Configure the settings for the situation all the read write discs are full and there is no more free disc Select Stop Record to stop recording Select Overwrite to overwrite the recorded video files always from the earliest time Pack Mode Configure the time length and file length for ...

Page 287: ...lect Main Menu STORAGE HDD MANAGER Step 1 The HDD MANAGER interface is displayed See Figure 5 238 In the table you can view the information of current HDD such as device name HDD type status total space and free space and serial number of the HDD port Figure 5 238 Configuring the settings for the HDD manager Step 2 HDD type setting In the Type list select Read Write Read Only or Redundant and then...

Page 288: ...Group Mode and then configure HDD group You can enable either HDD Group Mode or Quota Group The system prompts to reboot the device each time when you switch the mode Select Main Menu STORAGE ADVANCE HDD Step 1 The HDD interface is displayed See Figure 5 239 Figure 5 239 Select group for each HDD and then click Apply to complete the settings Step 2 After configuring HDD group click Main Stream Sub...

Page 289: ...Local Configurations 273 Figure 5 240 Figure 5 241 ...

Page 290: ...istribute the storage space of each channel reasonably If the interface displays that Current HDD Mode is HDD Group click Change to Quota Mode and then configure quota You can enable either HDD Group Mode or Quota Group The system prompts to reboot the device each time when you switch the mode Select Main Menu STORAGE QUOTA Step 1 The QUOTA interface is displayed See Figure 5 243 ...

Page 291: ...elect the channels you want to configure and select quota from the drop down list of Step 2 corresponding HDD Click Apply to complete the settings Step 3 Click Statistics to view the quota of each channel in HDD See Figure 5 244 Figure 5 244 ...

Page 292: ...HDD the system cannot detect the bad track Global detect Detect the whole HDD through Windows which takes time and might affect the HDD that is recording the video Select Main Menu STORAGE HDD DETECT Detect Step 1 The Detect interface is displayed See Figure 5 245 Figure 5 245 In the Type list select Key Area Detect or Global Detect and in the HDD list select Step 2 the HDD that you want to detect...

Page 293: ...ecting Results After the detecting is completed you can view the detecting reports to find out the problem and replace the defective HDD to avoid data loss Select Main Menu STORAGE HDD DETECT Report Step 1 The Report interface is displayed See Figure 5 247 ...

Page 294: ...Local Configurations 278 Figure 5 247 Click Step 2 The Details interface is displayed You can view detecting results and S M A R T reports See Figure 5 248 and Figure 5 249 Figure 5 248 ...

Page 295: ...d estimate function can calculate how long you can record video according to the HDD capacity and calculate the required HDD capacity according to the record period Select Main Menu STORAGE REC ESTIMATE Step 1 The REC ESTIMATE interface is displayed See Figure 5 250 Figure 5 250 ...

Page 296: ...or storage according to the channels settings and HDD capacity Click Copy to copy the settings to other channels Calculating Recording Time On the REC ESTIMATE interface click the Known Space tab Step 1 The Known Space interface is displayed See Figure 5 252 Figure 5 252 Click Select Step 2 The Select HDD s interface is displayed Select the check box of the HDD that you want to calculate Step 3 In...

Page 297: ...HDD capacity is displayed See Figure 5 255 Figure 5 255 5 18 9 Configuring FTP Storage Settings You can store and view the recorded videos and snapshots on the FTP server Preparation for Configuration Purchase or download a FTP server and install it on your PC For the created FTP user you need to set the write permission otherwise the upload of recorded videos and snapshots will be failed Configur...

Page 298: ...ymity Enter the user name and password to login the FTP server Enable the anonymity function and then you can login anonymously without entering the user name and password User Name Password Remote Directory Create folder on FTP server If you do not enter the name of remote directory system automatically creates the folders according to the IP and time If you enter the name of remote directory the...

Page 299: ...econds To configure the snapshot interval select Main Menu CAMERA ENCODE Snapshot Channel Select the channel that you want to apply the FTP settings Week Day Select the week day and set the time period that you want to upload the recorded files You can set two periods for each week day Period 1 Period 2 Record type Select the record type Alarm Intel MD and General that you want to upload The selec...

Page 300: ...ace is displayed See Figure 5 258 Figure 5 258 Configure the holiday name repeat mode time range according to your actual Step 3 situation Click Add Step 4 The added holiday information is displayed See Figure 5 259 Enable the Add More function so you can continue adding holiday information ...

Page 301: ...gure 5 259 5 19 2 Configuring RS232 Settings You can configure serial port function Baud rate and so on Only some series products support this RS232 Select Main Menu SYSTEM RS232 The RS232 interface is displayed See Figure 5 260 ...

Page 302: ... Baud Rate Select Baud rate which is 115200 by default Data Bits It ranges from 5 to 8 which is 8 by default Stop Bits It includes 1 and 2 Parity It includes none odd even mark and null It is none by default Table 5 76 5 19 3 Configuring Security Settings To ensure the network security and protect data you can configure the access permission to the Device from host IP host IP means the PC or serve...

Page 303: ...nated IP host to synchronize or change Device time Prevent multiple IP hosts from synchronizing system time with one Device repeatedly Forbid Ping The Device does not respond to Ping requests Semi Join Protect Device operation from hacker attack Mode Mode can be configured when Type is Network Access If Trusted Sites is enabled you can visit device port successfully with IP MAC hosts in Trusted Si...

Page 304: ... Click Apply to complete the settings Step 4 5 19 3 2 Configuring System Service Settings You can enable or disable the system internal services Select Main Menu SYSTEM SECURITY System Service Step 1 The System Service interface is displayed See Figure 5 262 Figure 5 262 Configure the parameters For details see Table 5 78 Step 2 Parameter Description Password Reset Enable or disable the password r...

Page 305: ...or disable the audio and video stream encryption If enabled make sure the devices or software support decryption The audio and video data with third party platform or device cannot be encrypted for transmission To guarantee audio and video data safety it is recommended to disable CGI and ONVIF services Table 5 78 Click Apply to complete the settings Step 3 5 19 4 Configuring System Maintenance Set...

Page 306: ...erature Not all models support this function and it is only supported on the local configuration interface Table 5 79 Click Apply to complete the settings Step 3 5 19 5 Exporting and Importing System Settings You can export or import the Device system settings if there are several Devices that require the same setup The IMP EXP interface cannot be opened if the backup operation is ongoing on the o...

Page 307: ...SYSTEM IMP EXP Step 1 The IMP EXP interface is displayed See Figure 5 264 Figure 5 264 Insert a USB storage device into one of the USB ports on the Device Step 2 Click Refresh to refresh the interface Step 3 The connected USB storage device is displayed See Figure 5 265 ...

Page 308: ...EXP Step 2 The IMP EXP interface is displayed Click Refresh to refresh the interface Step 3 The connected USB storage device is displayed Click on the configuration folder under the name style of Step 4 Config_ YYYYMMDDhhmmss that you want to import Click Import Step 5 The Device will reboot after the imported is succeeded 5 19 6 Restoring Default Settings Only Admin account supports this function...

Page 309: ...toring the selected settings Click Factory Default and then click OK The system starts restoring the whole settings 5 19 7 Upgrading the Device 5 19 7 1 Upgrading File Insert a USB storage device containing the upgrade files into the USB port of the Step 1 Device Select Main Menu SYSTEM UPGRADE Step 2 The UPGRADE interface is displayed See Figure 5 267 ...

Page 310: ...ure 5 267 Click System Upgrade Step 3 The System Upgrade interface is displayed See Figure 5 268 Figure 5 268 Click the file that you want to upgrade Step 4 The selected file is displayed in the Update File box Click Start Step 5 ...

Page 311: ... available Ensure the correct power supply and network connection during upgrading otherwise the upgrading might be failed Select Main Menu SYSTEM UPGRADE Step 1 The UPGRADE interface is displayed See Figure 5 269 Figure 5 269 Check whether there is any new version available Step 2 Auto check Enable Auto check for updates Manual check Click Manual Check The system starts checking the new versions ...

Page 312: ...hether there is a USB storage device connected and if there is any upgrade file and if yes and the check result of the upgrade file is correct the system will upgrade automatically The Uboot upgrade can avoid the situation that you have to upgrade through TFTP when the Device is halted 5 20 Viewing Information You can view the information such as log information HDD information and version details...

Page 313: ... 500 000 logs If there is HDD installed the logs about system operations are saved in the memory of the Device and other types of logs are saved into the HDD If there is no HDD installed the other types of logs are also saved in the memory of the Device When formatting the HDD the logs will not be lost However if you take out the HDD from the Device the logs might be lost Select Main Menu INFO LOG...

Page 314: ...that you want to view System Config Storage Step 2 Record Account Clear Playback and Connection or select All to view all logs In the Start Time box and End Time box enter the time period to search and then Step 3 click Search The search results are displayed See Figure 5 273 ...

Page 315: ...ce is displayed Click Next or Previous to view more log information Click Backup to back up the logs into the USB storage device Click Clear to remove all logs 5 20 3 Viewing Event Information You can view the event information of the Device and channel Select Main Menu INFO EVENT the EVENT interface is displayed See Figure 5 274 ...

Page 316: ... transmission details and test network For details about testing network see 5 15 2 1 Testing the Network 5 20 4 1 Viewing Online Users You can view the online user information and block any user for a period of time Select Main Menu INFO NETWORK Online users the Online users interface is displayed See Figure 5 275 ...

Page 317: ...y 5 seconds to check whether there is any user added or deleted and update the user list timely 5 20 4 2 Viewing the Network Load Network load means the data flow which measures the transmission capability You can view the information such as data receiving speed and sending speed Select Main Menu INFO NETWORK Network Load Step 1 The Network Load interface is displayed See Figure 5 276 ...

Page 318: ...formation of data sending speed and receiving speed The default display is LAN1 load Only one LAN load can be displayed at one time 5 20 5 Viewing HDD Information You can view the HDD quantity HDD type total space free space status and S M A R T information Select Main Menu INFO HDD the HDD interface is displayed See Figure 5 277 ...

Page 319: ... Type Indicates HDD type Total Space Indicates the total capacity of HDD Free Space Indicates the usable capacity of HDD Status Indicates the status of the HDD to show if it is working normally S M A R T View the S M A R T reports from HDD detecting Table 5 80 5 20 6 Viewing Channel Information You can view the camera information connected to each channel Select Main Menu INFO CHANNEL INFO the CHA...

Page 320: ...urations 304 Figure 5 278 5 20 7 Viewing Data Stream Information You can view the real time data stream rate and resolution of each channel Select Main Menu INFO BPS the BPS interface is displayed See Figure 5 279 ...

Page 321: ...Figure 5 279 5 20 8 Viewing Device Status Not all models support this function You can view the information about device status Select Main Menu ALARM ABNORMALITY Device Step 1 The Device interface is displayed See Figure 5 280 ...

Page 322: ...ons 306 Figure 5 280 Select Battery Low Space for Event Type tick the switch behind Enable and then Step 2 click Apply Select Main Menu INFO DEVICE STATUS Step 3 The DEVICE STATUS interface is displayed See Figure 5 281 ...

Page 323: ...s support this function You can view the information about PoC camera such as quantity mode and power consumption Select Main Menu CAMERA PoC INFO the PoC INFO interface is displayed See Figure 5 282 Figure 5 282 Parameter Description AF The maximum power of PoC camera is 6 W AT The maximum power of PoC camera is 12 W Non PoC camera or no camera is connected Table 5 82 ...

Page 324: ...Menu interface or on any interface after you have entered the Main Menu click Select Logout you will log out the device Select Reboot the Device will be rebooted Select Shut down the Device will be turned off If you do not have shutdown authority enter gesture or password first ...

Page 325: ... manual 6 1 Connecting to Network The factory default IP of the Device is 192 168 1 108 The Device supports monitoring on different browsers such as Safari Firefox Google to perform the functions such as multi channel monitoring PTZ control and device parameters configurations Check to make sure the Device has connected to the network Step 1 Configure the IP address subnet mask and gateway for the...

Page 326: ...ting Password You can reset the password by the following methods when you forget the password for admin account If the password reset function is enabled you can use mobile phone to scan the QR code on the local interface or web interface to reset the password If the password reset function is disabled the system prompts indicating password resetting function is disabled To reset the password try...

Page 327: ...Web Operations 311 Figure 6 2 Click Forgot Password Step 2 The Reset Password interface is displayed See Figure 6 4 Figure 6 3 Click OK Step 3 The reset type interface is displayed See Figure 6 4 ...

Page 328: ...use the security code received in your email box to reset the password within 24 hours otherwise the security code becomes invalid Wrong security code entrance up to five times will cause the security code locked for five minutes After five minutes you can continue to use this security code In the Security code box enter the security code received in your reserved email box Step 5 Click Next Step ...

Page 329: ...m 8 characters through 32 characters and contains at least two types from number letter and special characters excluding and Click Save The password resetting is started Step 8 After resetting is completed a pop up message is displayed to indicate the result and you will see the login interface is displayed Then you can use the new password to login the web ...

Page 330: ...displayed 4 Click select Logout Reboot or Shutdown according to your actual situation 5 Displays Cell Phone Client and Device SN QR Code Cell Phone Client Use your mobile phone to scan the QR code to add the device into the Cell Phone Client and then you can start accessing the Device from your cell phone Device SN Obtain the Device SN by scanning the QR code Go to the P2P management platform and ...

Page 331: ...re alarm event actions IVS Configure the behavior detections by drawing rules for detecting tripwire intrusion abandoned objects and missing objects IoT You can view search and export the temperature and humidity data of camera and configure the alarm event settings BACKUP Search and back up the video files to the local PC or external storage device such as USB storage device DISPLAY Configure the...

Page 332: ...oo much dust Hardware malfunction 3 Hard disk cannot be detected There are following possibilities HDD is broken HDD jumper is damaged HDD cable connection is loose Main board SATA port is broken 4 There is no video output whether it is one channel multiple channel or all channel output There are following possibilities Program is not compatible Please upgrade to the latest version Brightness is 0...

Page 333: ...tup is not correct Please enable audio function Corresponding channel has no video input Playback is not continuous when the screen is blue 10 System time is not correct There are following possibilities Setup is not correct Battery contact is not correct or voltage is too low Crystal oscillator is broken 11 Cannot control PTZ on DVR There are following possibilities Front panel PTZ error PTZ deco...

Page 334: ...ommend this mode There is privacy mask or channel protection setup Current user has no right to monitor DVR local video output quality is not good 15 Network connection is not stable There are following possibilities Network is not stable IP address conflict MAC address conflict PC or DVR network card is not good 16 Burn error USB back error There are following possibilities Burner and DVR are in ...

Page 335: ...o AVI via media player No DivX503Bundle exe or ffdshow 2004 1012 exe in Windows XP OS 23 Forgot local menu operation password or network password Please contact your local service engineer or our sales person for help We can guide you to solve this problem 24 When I login via HTTPS a dialogue says the certificate for this website is for other address Please create server certificate again 25 When ...

Page 336: ...camera has been enabled or not Check the main stream type of the camera is H 264 or not Check the device supports camera main stream resolution or not such as 960H D1 and HD1 Check camera network transmission has reached the threshold or not Please check the online user of the camera 32 After I connected to the IP channel there is no video output in the one window or the multiple window mode But I...

Page 337: ...ort A D switch function it can switch analog channel to the IP channel to connect to the IP camera From Main Menu CAMERA CHANNEL TYPE select the last channel to switch to the IP channel Some series product products support IP channel extension it supports N N mode Check the IPC and the DVR is connected or not Please go to the Main Menu CAMERA REGISTRATION to search to view the IP camera is online ...

Page 338: ...al Area Network MAC Media Access Control MTU Maximum Transmission Unit NTP Network Time Protocol NTSC National Television Standards Committee ONVIF Open Network Video Interface Forum PAL Phase Alteration Line PAT Port Address Translation POS Point of Sale PPPoE Point to Point Protocol over Ethernet PSS Professional Surveillance Software PTZ Pan Tilt Zoom RCA Radio Corporation of American RTSP Real...

Page 339: ...Glossary 323 Abbreviations Full term VGA Video Graphics Array WAN Wide Area Network ...

Page 340: ...ays for which the video shall be kept According to Formula 3 to calculate total capacity accumulation T q that is needed Step 3 for all channels in the DVR during scheduled video recording Formula 3 c i i T m q 1 In the formula c means total number of channels in one DVR According to Formula 4 to calculate total capacity accumulation that is needed Step 4 for all channels in DVR during alarm video...

Page 341: ...D Capacity Calculation 325 Bit stream size max File size Bit stream size max File size 640Kbps 281MB 768Kbps 337MB 896Kbps 393MB 1024Kbps 450MB 1280Kbps 562MB 1536Kbps 675MB 1792Kbps 787MB 2048Kbps 900MB ...

Page 342: ...aveler 1GB Kingston DataTraveler 2GB Maxell USB Flash Stick 128MB Maxell USB Flash Stick 256MB Maxell USB Flash Stick 512MB Maxell USB Flash Stick 1GB Maxell USB Flash Stick 2GB Kingax Super Stick 128MB Kingax Super Stick 256MB Kingax Super Stick 512MB Kingax Super Stick 1GB Kingax Super Stick 2GB Netac U210 128MB Netac U210 256MB Netac U210 512MB Netac U210 1GB Netac U210 2GB Netac U208 4GB Tecla...

Page 343: ...D 2GB Big Kingston SD 1GB Big Sandisk SDHC2 8GB Small Sandisk SD 1GB Small Appendix 3 3 Compatible Portable HDD list Manufacturer Model Capacity YDStar YDstar HDD box 40GB Netac Netac 80GB Iomega Iomega RPHD CG RNAJ50U287 250GB WD Elements WCAVY1205901 1 5TB Newsmy Liangjian 320GB WD Elements WDBAAR5000ABK 00 500GB WD Elements WDBAAU0015HBK 00 1 5TB Seagate FreeAgent Go ST905003F 500GB Aigo H8169 ...

Page 344: ...ST3000VX000 3TB SATA Seagate SV35 Support HDD data recovery offered by Seagate ST1000VX002 1TB SATA Seagate SV35 Support HDD data recovery offered by Seagate ST2000VX004 2TB SATA Seagate SV35 Support HDD data recovery offered by Seagate ST3000VX004 3TB SATA Seagate SkyHawk HDD ST1000VX001 1TB SATA Seagate SkyHawk HDD ST1000VX005 1TB SATA Seagate SkyHawk HDD ST2000VX003 2TB SATA Seagate SkyHawk HDD...

Page 345: ...TA Seagate Support HDD data recovery offered by Seagate ST8000VX0012 8TB SATA WD WD Green WD10EURX EOL 1TB SATA WD WD Green WD20EURX EOL 2TB SATA WD WD Green WD30EURX EOL 3TB SATA WD WD Green WD40EURX EOL 4TB SATA WD WD Purple WD10PURX 1TB SATA WD WD Purple WD20PURX 2TB SATA WD WD Purple WD30PURX 3TB SATA WD WD Purple WD40PURX 4TB SATA WD WD Purple WD50PURX 5TB SATA WD WD Purple WD60PURX 6TB SATA ...

Page 346: ...2TB SATA Seagate Constellation ES series SATA interface ST3000NM0005 3TB SATA Seagate Constellation ES series SATA interface ST4000NM0035 4TB SATA Seagate Constellation ES series SATA interface ST6000NM0115 6TB SATA Seagate Constellation ES series SATA interface ST8000NM0055 8TB SATA Seagate Constellation ES series SATA interface ST10000NM0016 10TB SATA Seagate Constellation ES series SATA interfa...

Page 347: ...SATA WD WD RE series SATA interface WD2004FBYZ replace WD2000FYYZ 2TB SATA WD WD RE series SATA interface WD3000FYYZ 3TB SATA WD WD RE series SATA interface WD4000FYYZ 4TB SATA WD WD SATA interface WD2000F9YZ 2TB SATA WD WD SATA interface WD3000F9YZ 3TB SATA WD WD SATA interface WD4000F9YZ 4TB SATA WD WD SATA interface WD4002FYYZ 4TB SATA WD WD SATA interface WD6001FSYZ 6TB SATA WD WD SATA interfa...

Page 348: ...0VT000 320GB SATA Seagate Pipeline HD Mini ST500VT000 500GB SATA Seagate Pipeline HD Mini ST2000LM003 EOL 2TB SATA TOSHIBA 2 5 inch PC series MQ01ABD050V 500GB SATA TOSHIBA 2 5 inch PC series MQ01ABD100V 1TB SATA SAMSUNG HN M101MBB HN M101MBB EOL 1TB SATA Seagate 2 5 inch enterprise series ST1000NX0313 1TB SATA Seagate 2 5 inch enterprise series ST2000NX0253 2TB SATA ...

Page 349: ...nsure the accuracy of the table below And you can use the USB cable with the model recommended to set USB burner Manufacturer Model Port Type Type Sony DRX S50U USB DVD RW Sony DRX S70U USB DVD RW Sony AW G170S SATA DVD RW Samsung TS H653A SATA DVD RW Panasonic SW 9588 C SATA DVD RW Sony DRX S50U USB DVD RW BenQ 5232WI USB DVD RW ...

Page 350: ...O CRT LXB FD17069HB 17 inch HFNOVO CRT LXB HF769A 17 inch HFNOVO CRT LX GJ556D 17 inch Samsung LCD 2494HS 24 inch Samsung LCD P2350 23 inch Samsung LCD P2250 22 inch Samsung LCD P2370G 23 inch Samsung LCD 2043 20 inch Samsung LCD 2243EW 22 inch Samsung LCD SMT 1922P 19 inch Samsung LCD T190 19 inch Samsung LCD T240 24 inch LG LCD W1942SP 19 inch LG LCD W2243S 22 inch LG LCD W2343T 23 inch BENQ LCD...

Page 351: ...ing mode D LinK DES 1016D 10 100M self adaptive D LinK DES 1008D 10 100M self adaptive Ruijie RG S1926S Five network modes AUTO HALF 10M FULL 10M HALF 100M FULL 100M H3C H3C S1024 10 100M self adaptive TP LINK TL SF1016 10 100M self adaptive TP LINK TL SF1008 10 100M self adaptive ...

Page 352: ...oltage resistance protection level ground and etc The thunder proof work shall be a systematic project emphasizing the all round protection including building transmission cable device ground and etc There shall be comprehensive management and the measures shall be scientific reliable practical and economic Considering the high voltage during the inductive thundering the International Electrotechn...

Page 353: ... electromagnetism compatibility design since there is no systematic theory or module The earthing has many modes but the selection depends on the system structure and performance The following are some successfully experience from our past work One point ground In the following figure you can see there is a one point ground This connection provides common point to allow signal to be transmitted in...

Page 354: ...uit When considering the earthing you need to think about two aspects One is the system compatibility and the other is the external interference coupling into the earth circuit which results in system error For the external interference is not regular it is not easy to resolve Appendix 7 3 Thunder Proof Ground Method in the Monitor System The monitor system shall have sound thunder proof earthing ...

Page 355: ...fer to the following figure There is a shortcut way to check these thee cables connection are standard or not not the accurate check In the following operations the multimeter range shall be at 750V For E earth cable Turn the digital multimeter to 750V AC use your one hand to hold the metal end and then the other hand insert the pen to the E port of the socket See the following figure If the multi...

Page 356: ... connection is not proper or it is not the live cable at all For N Neutral cable Turn the digital multimeter to 750V AC use your one hand to hold the metal end and then the other hand insert the pen to the N port of the socket See the following figure If the multimeter shows 0 then you can see current N cable connection is standard If the value is more than 10 then you can see there is inductive c...

Page 357: ...Earthing 341 ...

Page 358: ... RS 232 port and standard RJ45 T568B Please refer to the following figure for RJ45 cable definition Please refer to the following figure for RS 232 pin definition Cross Connection Please refer to the following figure for connection information Please refer to the following table for detailed crossover cable connection information ...

Page 359: ...ble connection information Please refer to the following table for straight connection information RJ45 T568B RJ45 Network cable RS 232 Signal Description 4 Blue 3 RXD 5 White and blue 2 TXD 3 White and green 5 GND ZHEJIANG DAHUA VISION TECHNOLOGY CO LTD Address No 1199 Bin an Road Binjiang District Hangzhou P R China Postcode 310053 Tel 86 571 87688883 Fax 86 571 87688815 Email overseas dahuatech...

Reviews: