


GB
8. CARE AND MAINTENANCE
Warning!
Before opening the machine, switch it off, unplug it from the mains and put up the warning sign
to stop anybody inadvertently switching it back on again. If necessary, discharge the electrolytic
capacitors.
In order to keep your welding machine operational for years to come, you should observe the following:
carry out safety inspections at the stipulated intervals
depending on the machine location, but no less often than twice a year, remove the side panels from
the machine and blow the inside of the machine clean with dry, reduced blow compressed air. Do not
aim air-jets at electronic components from to close a range.
If a lot of dust has accumulated, clean the cooling-air ducts.
daily check out the nozzles, wirefeeder and rollers, hose, torch, pressure regulator and clean or
replace it if neccessary
weelky check out the cables, plugs and replace it if neccessary
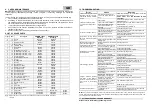
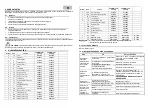
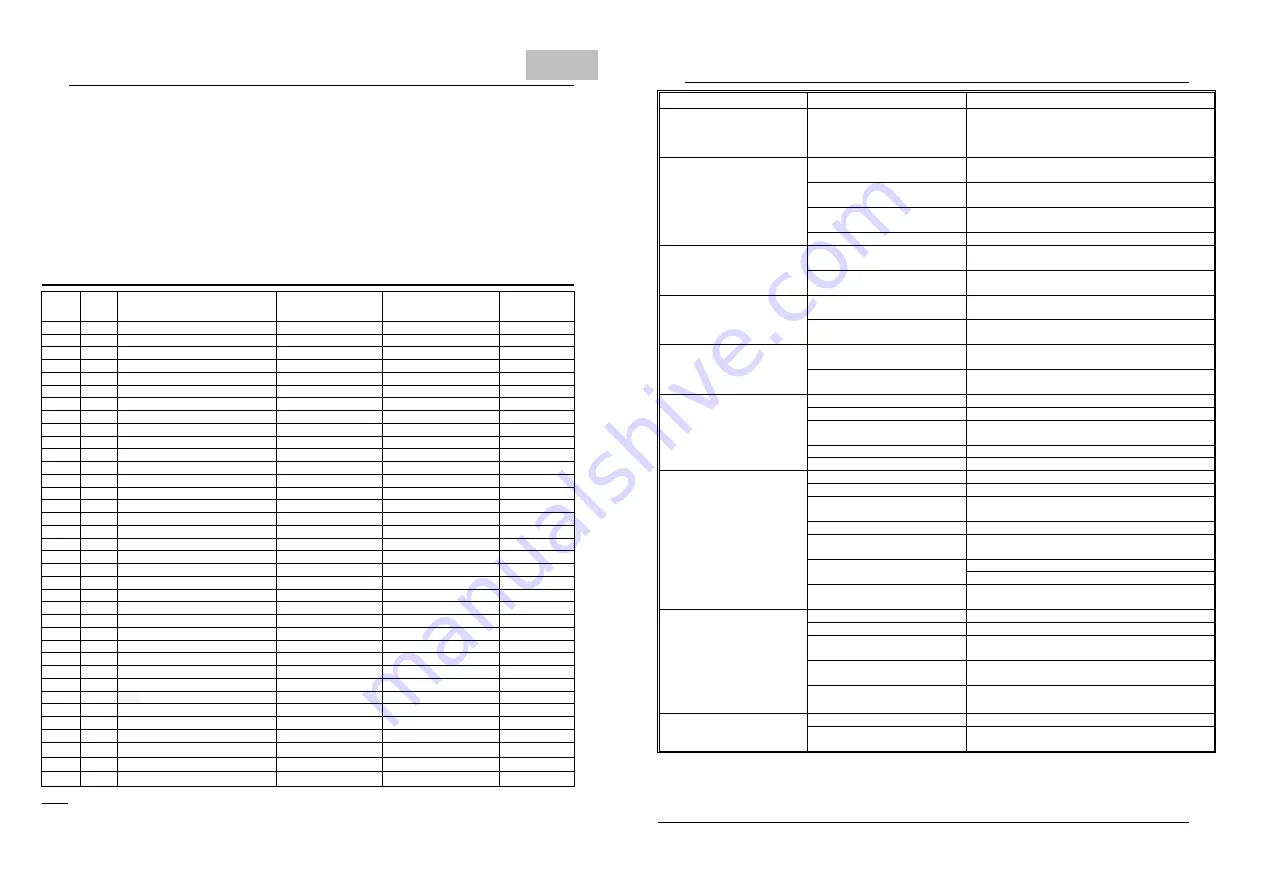
9. LIST OF SPARE PARTS
Figure Pos.
Description
VARMIG 1600c
Profimig
VARMIG 1905c
Profimig
2
14
Choke
M03032
M03032
2
17
Fan
689241
689241
1
2
Adjustment knob
015112
015112
1
5
Mains cable
678706*
677069
1
5a
interface
cable
677074
1
4
Earth cable
602740
602740
1
2
Pointer
015115
015115
1
11
Wheel OK 125 / Ф 12
694344
694344
2
12
Wirefeeding roller
0,6-0,8
693016
693016
2
12
Wirefeeding roller
0,8-1.0 Al
696625
696625
2
12
Wirefeeding roller
1,0-1,2 R*
699790*
699790
1
6
Control lamp OR
693756
693756
2
11
Wirefeeding mechanism
602886
602886
2
19
Carrier
694341
694341
1
7
Welding-torch
696775
602759
1
1
Handle
693391
693391
2
18
Rectifier stack
M94454
M94454
1
3a
Switch 230 / 400 V
696620
1
3
Switch
– 6 position
694342
696621
1
8.b Contact tube 0,6
677693
677693
1
8.a Contact tube 0,8
677696
677696
1
8.a Contact tube 0,9
600199*
600199*
1
10.a Gas nozzle conical
677695
677695
1
10.b Gas nozzle spot.
677692
677692
1
10.c Gas nozzle- protective cap
(600200)*
(600200)*
2
13
Power transformer
M03031
603033
2
15
Electronic board MM 100
695578
695578
21
Gas valve
604081
604081
22
Central connector
603506
603506
23
tube
603507
603507
24 Poti 10k
687089
687089
25 Gas pressure redicer
694171
693947
26
Wheel Ф
45
602300
1
31
Top cover
694382 .RU
694382 .RU
R.1028
1
32
Left cover
694377.RU
694377.RU
R.1028
1
33
Right cover
694378.RU
694378.RU
R.1028
Note: Parts under Pos. 1/1,2,4,5,7,8,10,22 and 2/12,23 and Torch are consumption parts
* - Option
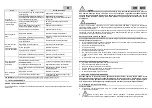
10. TROUBLESHOOTING
Error
Cause
Remedy
The machine stopped to weld
suddenly
– the fan is running
and the temperature indicator
is lit up
Over-temperature in electric-
circuit
– the yellow indicator is
lit up
Allow the machine to cool down, until the
temperature indicator is lit out
DON`T SHOT OFF THE MACHINE WHILE
COOLING!
The mains switch is turned
on, but the machine doesn`t
work.
Phase failure
Check mains fuse protection, mains supply lead
and mains plug
There is no contact between
mass clamp and workpiece
Ensure a tight connection between mass clamp
and workpiece
The power transformer is
damaged
Check/repleace the transformer
The switch is damaged
Check/repleace the switch
Incontinous, week or bad arc
Poor contact between the mass
clamp and the workpiece
Clean the point of contact, check and tighten the
earthening connection
Incorrect welding current
selected
Select the appreopriate welding current (refer to
this operarting instruction)
No welding current. Mains
switch is ON and indicators
are lit up.
Earth connection is wrong.
Check the earth connection and clamp for correct
polarity.
Break in the current cable in the
welding torch.
Exchange the torch.
Machine does not function
when the torch trigger is
pressed. Mains switch is ON
and indicators are lit up.
Welding torch/torch control lead
defective.
Exchange the torch.
Interconnecting cable defective
or not connected up properly.
Check interconnecting cable.
No shielding gas. All other
functions are OK.
Gas cylinder is empty.
Change the gas cylinder.
Gas pressure regulator is faulty. Change the gas pressure regulator.
Gas hose is not mounted or is
damaged.
Mount/change the gas hose.
Welding torch is defective.
Change the welding torch.
Gas solenoid valve is defective. Change the gas solenoid valve.
Poor welding properties
Wrong welding parameters.
Check settings.
Poor earth connection.
Ensure good contact to workpiece.
Not enough shielding gas, or
none at all.
Check the pressure regulator, gas hose, gas
solenoid valve, torch gas connection etc.
Welding torch is leaking
Change the torch.
Wrong contact tube, or contact
tube is worn out.
Change the contact tube.
Wrong wire alloy and/or wrong
wire diameter.
Check the wire spool.
Check the weldability of the base metal.
Shielding gas is not suitable for
this wire alloy.
Use the correct shielding gas.
Irregular wirefeed. Welding
wire forms a loop between
the feed rollers and the wire
inlet nozzle of the welding
torch.
Braking force is set too high.
Loosen the brake.
Contact tube is too narrow.
Use a suitable contact tube.
Wirefeeder inner liner in the
welding torch is defective.
Check the wire inner liner for kinks, dirt, etc.
Wirefeed rollers are unsuitable
for the wire being used.
Use suitable wirefeed rollers.
Wirefeed rollers have wrong
contact pressure
Optimise the contact pressure.
Insufficient cooling power.
Fan is defective.
Replace the fan..
To high atmosphere
temterature
Don't expose the machine to direct sun rays and
avoid welding in overheated rooms
N.B.!
If any other error appears, which is not described here, than the fault is one, that can only be put right by a
service technician. Note the error, the serial number of the machine and the configuration af the power source, and
get in touch with our after-sales service.
11.
AFTER-SALES SERVICES AND WARRANTY
Please refer to the Warranty (Indemnity) bond!


