background image


Quick reference

21

BRC1E51

Remote controller

4PW52905-1

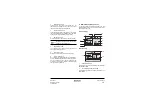
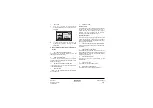
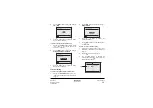
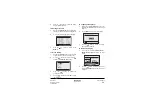
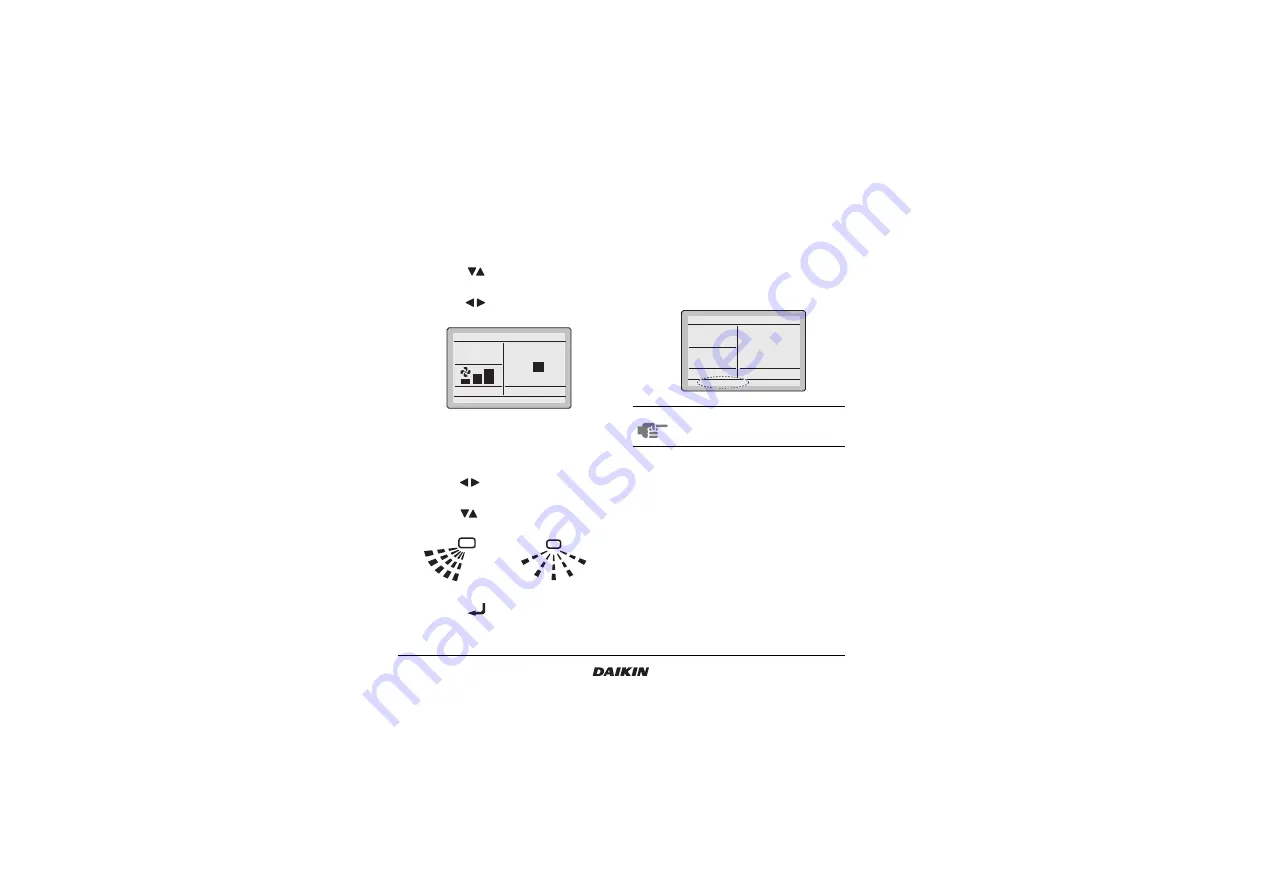
9. Limit operation

1

Display the 

MainMenu

. Proceed step (9) to

display the basic screen with limit operation
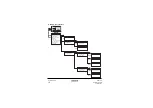
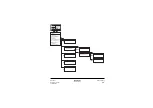
temperatures (Refer to the chapter “Main menu
structure” on page 19)
.

2

Use the 

 buttons to change the set

temperature.

3

Push the 

 buttons to toggle between 

min

and 

max

 temperature.

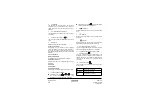
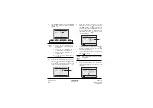
10. Airflow direction setting

1

Display the 

Airflow Direction

 setting screen (10)

(Refer to the chapter “Main menu structure” on
page 19)
.

2

Use the 

 buttons to change the setting to

90 or 180 degrees swing angle.

3

Use the 

 buttons to change the setting to

Swing

Pos. 0

Pos. 1

Pos. 2

Pos. 3

, and 

Pos. 4

.

4

Push the 

 button to confirm the setting.

Basic screen is displayed.

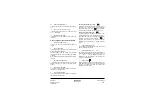
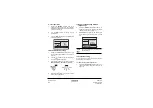
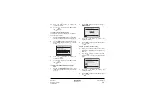
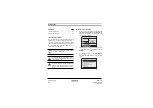
11. Quick cooling/heating ON/OFF 

(SkyAir only)

1

Display the 

MainMenu

 and proceed step (11) to

display the basic screen (Refer to the chapter
“Main menu structure” on page 19).

2

Quick Cool/Heat

 will appear on the basic screen

when the Quick Cool/Heat function is turned
ON.

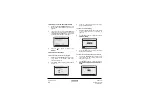
12. Ventilation setting

Only in case HRV is connected. Refer to the HRV
manuals for more information.

12.1 How to change the ventilation rate

1

Display the 

Ventilation rate

 settings screen (12.1)

(Refer to the chapter “Main menu structure” on
page 19)
.

Fan

Return

Press the menu button

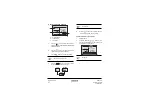
Set temperature

max

20

°C

min

28

°C

3  4 

NOTE

Redo this procedure to turn Quick Cool/
Heat function off.

Set temperature 

28

°C 

Cool

Quick Cool/Heat

Summary of Contents for BRC1E51

Page 1: ...Remote controller BRC1E51 QUICK REFERENCE ...

Page 2: ...1 3 4 6 2 1 1 2 2 1 2 3 4 5 9 7 6 8 120 19 120 mm 5 2 2 1 2 2 7 10 mm L 1 2 3 4 5 6 7 ...

Page 3: ...8 P1 P2 1 1 1 1 2 4 5 5 5 4 4 4 2 2 2 P1 P2 P1 P2 P1 P2 PCB PCB PCB PCB 3 3 3 3 5 5 5 8 1 8 2 8 4 8 1x 1x 1x 1x 8 8 4 8 4 8 3 8 4 8 2 8 4 8 1 8 1 8 2 8 3 8 4 ...

Page 4: ... 8 11 Checking of error records 9 12 Registration method of the service contact 10 13 Clock setting 10 14 Language changeover 11 1 Safety Precautions Please read these Safety Precautions carefully before installing the remote controller equipment Improper installation or attachment of equipment or accessories could result in electric shock short circuit leaks fire or other damage to the equipment ...

Page 5: ...ocation considering it should be a place where the average temperature in the room can be detected that is not exposed to direct sunlight that is not near a heat source that is not affected by outside air or air draught due to e g door opening closing where the display is kept clean where the front is kept clear where the temperature is between 10 C and 50 C where the relative humidity is maximum ...

Page 6: ...ten with the two included wood screws Ø3 5x32 and plugs 2 for flush mounting fasten with the two included machine screws M4x16 NOTE Put on a flat surface Be careful not to distort the shape of the lower part of the remote controller by overtightening the mounting screws 1 indoor unit 2 lower part of the remote controller 3 upper part of the remote controller 4 notch the part for the wiring to pass...

Page 7: ...e sub main remote controller 3 When Error code U5 Connection under check Please wait for a moment is displayed on both remote controllers push and hold the button of the sub remote controller for 4 seconds 4 The sub remote controller now displays Sub remote contrl 5 After a few seconds the basic screen is displayed Be careful not to pinch the wiring when attaching NOTE 1 The switch box and wiring ...

Page 8: ...e chapter Field settings on page 5 You can now proceed with connecting the remote controller to be defined as main 9 Field settings If optional accessories are mounted on the indoor unit the indoor unit setting may have to be changed Refer to the instruction manual for each optional accessory Procedure 1 Press and hold the button for four seconds to enter the Field setting menu 2 Use the buttons t...

Page 9: ...operation is unnecessary when setting by group 5 Highlight the second code No to be changed using the buttons and use the buttons to select the desired second code No 6 Push the button to display the confirmation screen 7 Use the buttons to select Yes and push the button 8 Push the button two times to return to basic screen Notes NOTE When setting by group all of the second code No that may be set...

Page 10: ...gn is not to be displayed Display Do not display 11 21 0 Setting number of connected Sky Air simultaneous operation system indoor units setting for simultaneous operations system Pair Twin Triple Double twin 12 22 1 ON OFF input from outside setting for when forced ON OFF is to be operated from outside Forced OFF ON OFF operation 2 Thermostat differential changeover setting for when using remote s...

Page 11: ... limit operation and Home leave function only Not use Use 3 Permission level setting Level 2 Level 3 1e 2 Home leave function Not permitted Permitted Mode Note 1 FIRST CODE NO Description of setting SECOND CODE NO Note 2 01 02 03 04 NOTE 1 Second code No at factory shipment is set to 01 However in the following cases it is set to 02 Airflow direction range except round flow cassette Thermostat sen...

Page 12: ...ttons to select Remote controller record and push the button 4 The 10 latest errors and their Unit No are displayed in order Return Setting MainMenu Set temp mode changeover Airflow Direction Quick Cool Heat On Off Ventilation Timer setting Service Contact Model Info 1 2 Return Setting Airflow Direction Swing Return Setting Field setting Test operation ON OFF Register Service Contract Field settin...

Page 13: ...d push the button 3 Use the and buttons to select and set Year Month Day and time 4 Push the button to display the confirmation screen 5 Use the buttons to select Yes and push the button Return Setting Field setting Test operation ON OFF Register Service Contract Field setting list Group No setting Indoor unit Airnet No set Outdoor unit Airnet No set 1 2 Return Setting Register Service Contract No...

Page 14: ...2 Use the buttons to select Language changeover and push the button 3 Use the buttons to select the desired language and push the button to confirm Notes Return Setting MainMenu Convinient functions Setting status list Clock setting Language changeover 2 2 Return Setting Selectable languages Language changeover English ...

Page 15: ... functions 25 16 Setting status list 26 17 Clock setting 26 18 Language changeover 26 19 Error code display 26 1 Safety Precautions Please read these Safety Precautions carefully before installing air conditioning equipment and be sure to install it correctly Failure to follow these instructions properly may result in property damage or personal injury which may be serious depending on the circums...

Page 16: ... programmed for each day of the week schedule timer can be enabled disabled at any time linked to a set temperature or a LIMIT operation or an OFF operation last command overrules previous command until next scheduled command 4 LIMIT OPERATION Limit operation provides thermostat control within the range of the set minimum and maximum temperature The minimum temperature setting will trigger heating...

Page 17: ...ation button the backlight will be lit for approximately 30 seconds When one indoor unit is controlled by two remote controllers the backlight of the remote controller operated earlier than the other one will be lit 4 Name and function of icons To change between the Standard display and the Detailed display refer to the chapter How to select the display on page 25 Standard display Detailed display...

Page 18: ...he element Clean the filter and element Indicates that the filter or element should be cleaned 7 VENTILATION CLEANING Ventilation mode icons indicate the current ventilation mode HRV only AUTOMATIC HEAT EXCHANGE BYPASS AIR Cleaning unit icon indicates that the air cleaning unit option is operational 8 DISPLAY Indicates that the key lock is set or a permission level is set 9 DISPLAY Indicates that ...

Page 19: ...TION In this mode heating will be activated as required by the setpoint or limit operation Hot start heat pump types only At the start of a heating operation the indoor fan is stopped until a certain indoor heat exchanger temperature is reached and is displayed This prevents cold air from leaving the indoor unit Defrost heat pump types only In heating operation freezing of the outdoor heat exchang...

Page 20: ...or High 5 Push the button The operation lamp will turn off and the system stops operating Additional features of the controller 1 HOME LEAVE 1 Push and hold the or button for four seconds to enable the Home leave mode The Home leave icon is displayed a Operation mode b Temperature c Fan speed NOTE When in Fan Dry or Vent mode the temperature can not be set Set temperature 28 C Cool Return Setting ...

Page 21: ...et the operation start stop time for any day of the week It is possible to set up to 5 actions per day Both operation modes normal operation and limit operation can be selected Additionally the holiday settings can be set OFF Reminder Timer This allows you to set each operation period of the system in a range of 30 180 minutes The system is turned off automatically after the selected time each tim...

Page 22: ...setting Schedule timer Off reminder timer Schedule timer Enable Disable setting Condition setting Holiday setting Off reminder timer Enable Disable setting Condition setting Schedule timer Enable Disable setting Schedule timer Schedule timer Holiday setting Off reminder timer Enable Disable setting Off reminder timer 9 11 10 12 1 12 2 13 1 13 2 13 3 13 4 13 5 Set temperature 28 C Cool Return Setti...

Page 23: ...tions Setting Status list Clock setting Language changeover Service contact Model info Setting Status list Clock setting Language changeover Convenient Functions Contrast adjustment Display changeover Contrast adjustment Display changeover Display Desired disp select Display changeover Display Display changeover Desired disp select 14 15 1 15 2 15 3 16 17 18 Set temperature 28 C Cool Return Settin...

Page 24: ...0 Pos 1 Pos 2 Pos 3 and Pos 4 4 Push the button to confirm the setting Basic screen is displayed 11 Quick cooling heating ON OFF SkyAir only 1 Display the MainMenu and proceed step 11 to display the basic screen Refer to the chapter Main menu structure on page 19 2 Quick Cool Heat will appear on the basic screen when the Quick Cool Heat function is turned ON 12 Ventilation setting Only in case HRV...

Page 25: ...ble Disable setting screen 13 1 Refer to the chapter Main menu structure on page 19 2 Use the buttons to change the setting to Enable or Disable 3 Push the button to display the confirmation screen 4 Use the buttons to select Yes and push the button 13 2 How to use the condition setting 1 Display the Condition setting screen 13 2 Refer to the chapter Main menu structure on page 19 2 Use the button...

Page 26: ...to change the day 8 To copy all actions of the day previously set push the button 9 When the entire schedule timer settings are completed highlight an item that is not an operation NOTE There are 4 types of operations 1 Switch on the installation at a scheduled time in combination with a set point 2 Switch on the installation at a scheduled time in limit operation 3 Switch off the installation at ...

Page 27: ... setting screen 13 4 Refer to the chapter Main menu structure on page 19 2 Use the buttons to change the setting to Enable or Disable 3 Push the button to display the confirmation screen 4 Use the buttons to select Yes and push the button 13 5 How to use the condition setting 5 Display the Condition setting screen 13 5 Refer to the chapter Main menu structure on page 19 6 Use the buttons to set th...

Page 28: ... 3 Push the button to confirm the setting Basic screen is displayed 15 2 How to select the display 1 Display the Display settings screen 15 2 Refer to the chapter Main menu structure on page 19 2 Use the buttons to change the setting to Standard or Details 3 Push the button to confirm the setting Basic screen is displayed 15 3 How to select the detailed display selection 1 Display the Desired disp...

Page 29: ...on 18 Language changeover 1 Display the Language changeover screen 18 Refer to the chapter Main menu structure on page 19 2 Use the buttons to select the language 3 Push the button to confirm the setting Basic screen is displayed 19 Error code display 1 If an error occurs Error Press Menu Button or Warning Press Menu Button will blink in the basic screen 2 Push the button The error code will blink...

Page 30: ... on the bottom of the basic screen the filter has to be cleaned 2 After the filter or element is washed cleaned or replaced push the button to enter the MainMenu 3 Use the buttons to select Filter Sign Reset and push the button to reset the filter sign NOTE Do not use any paint thinner organic solvent or strong acid Do not wash the remote controller Doing so may cause electric leakage and result i...

Page 31: ...NOTES ...

Page 32: ...4PW52905 1 ...

Reviews: