


EDUS72-975
Operation Manual
BRC1E71
15
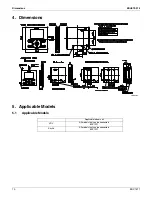
6.4
Basic Operation
3P243520-2C
10
English
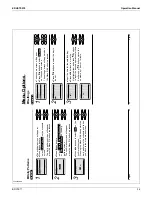
Basic Operation
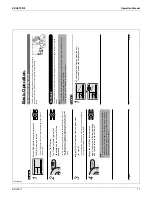
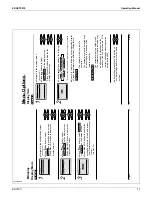
Cool/Heat/Auto/Fan Operation
(SkyAir and VR
V)
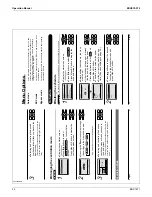
Operation
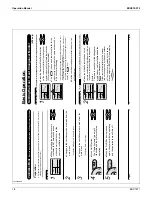
1
2
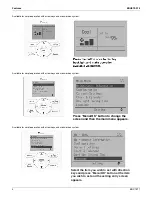
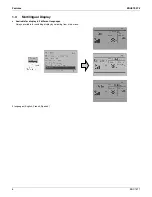
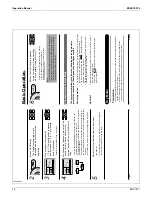
Ɣ
Display the main menu screen.
(See page 22.)
Ɣ
Before setting the schedule , the
clock must be set.
Ɣ
The date & time screen will appear
.
Ɣ
Set the current year
, month, day
, and
time. (See clock settings on page 39.)
Ɣ
If the clock has not been set, a screen
like the one on the left will appear
.
Press
buttons to select
Ye
s
and
press Menu/OK button.
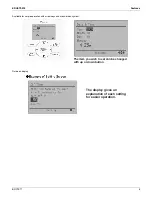
Ɣ
Press buttons to select
Schedule
the main menu screen.
Press Menu/OK button to display
the timer screen.
Setting
Clock has not been set.
W
o
uld you like to set it now?
Schedule
Ye
s
No
Setting
Date &
T
ime
Ye
a
r
2008
Month 01
Day 01
Tu
e
s
d
a
y
12
:00
A
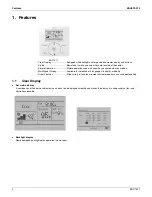
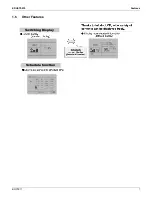
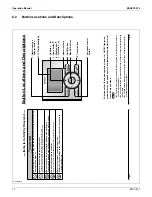
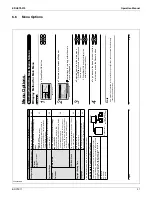
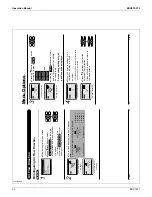
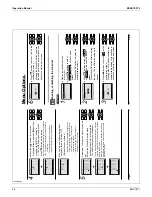
Operation screen
display
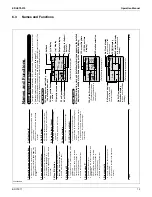
Describes screens that
will be displayed on the
remote controller in
operation.
Operation procedure
Explains the sequence of
operation for the remote controller
.
Operate the buttons according to
the procedure.
Operation button
display
Displays the location of
buttons to be operated.
How to follow the operation manual
Setting
Main Menu
Air Flow Direction
V
e
ntilation
Schedule
Of
f T
imer
Celsius / Fahrenheit
Maintenance Information
1/2
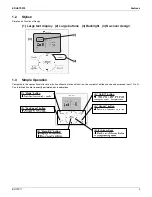
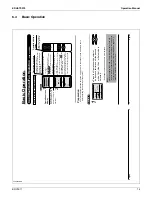
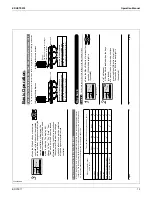
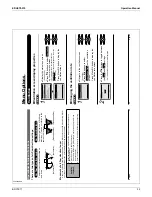
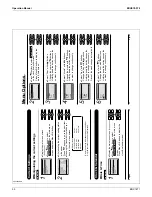
Preparation
For mechanical protection purposes, apply power to the outdoor units at least six hours
Ɣ
before starting the operation of the system.
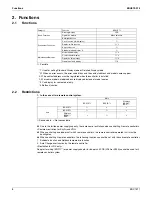
Operation
1
Cool
Return
Setting
Set to
Cool
74
F
Press the Operation mode selector
Ɣ
button several times until the desired
mode Cool, Heat, Fan, or
Auto mode is
selected.
Unavailable operation modes are not displayed.
*
Note
Before changing the mode, confi
rm that the display does not
Ɣ
indicate master controlled status. Both heat and cool mode may
not be selected if the unit is master controlled. See page 16 if
MASTER CONTROLLED icon blinks.
01_EN_3P243520-2C.indd 10
8/27/2009 1:48:30 PM
English
9
01_EN_3P243520-2C.indd 9
8/27/2009 1:48:30 PM
Summary of Contents for BRC1E71
Page 1: ...AMERICAS...
Page 8: ...EDUS72 975 Features BRC1E71 7 1 5 Other Features...


