5 Commissioning
Installation manual
27
D2CND024A1/4AB + D2TND012~024A4AB
Wall-mounted condensing boiler
3P469346-3N – 2019.11
5.2
Gas-air ratio: No need to adjust
The installer does not have to adjust the gas-air ratio, because the
boiler has an electronic gas adaptive feature.
5.3
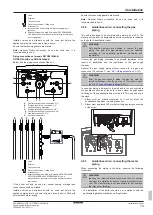
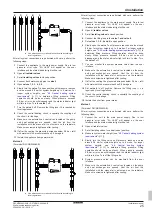
To check for gas leakage
DANGER
Before passing next steps, this control must be fulfilled.
1
Before connecting the unit to power mains, close valves 1, 2
and 3.
2
Connect a manometer to gas counter.
3
Open valves 1, 2 and 3.
4
Close valve 1.
5
Note the manometer measurement and wait for 10 minutes.
6
After 10 minutes, compare the manometer measurement with
the initial value. If the pressure is decreased, it means there is
gas leakage. Check the gas line and fittings.
7
Repeat this process until being sure that there is no leakage.
8
Close valve 1, remove the manometer and open valve 1 again.
1
2
3
5.4
To commission the unit
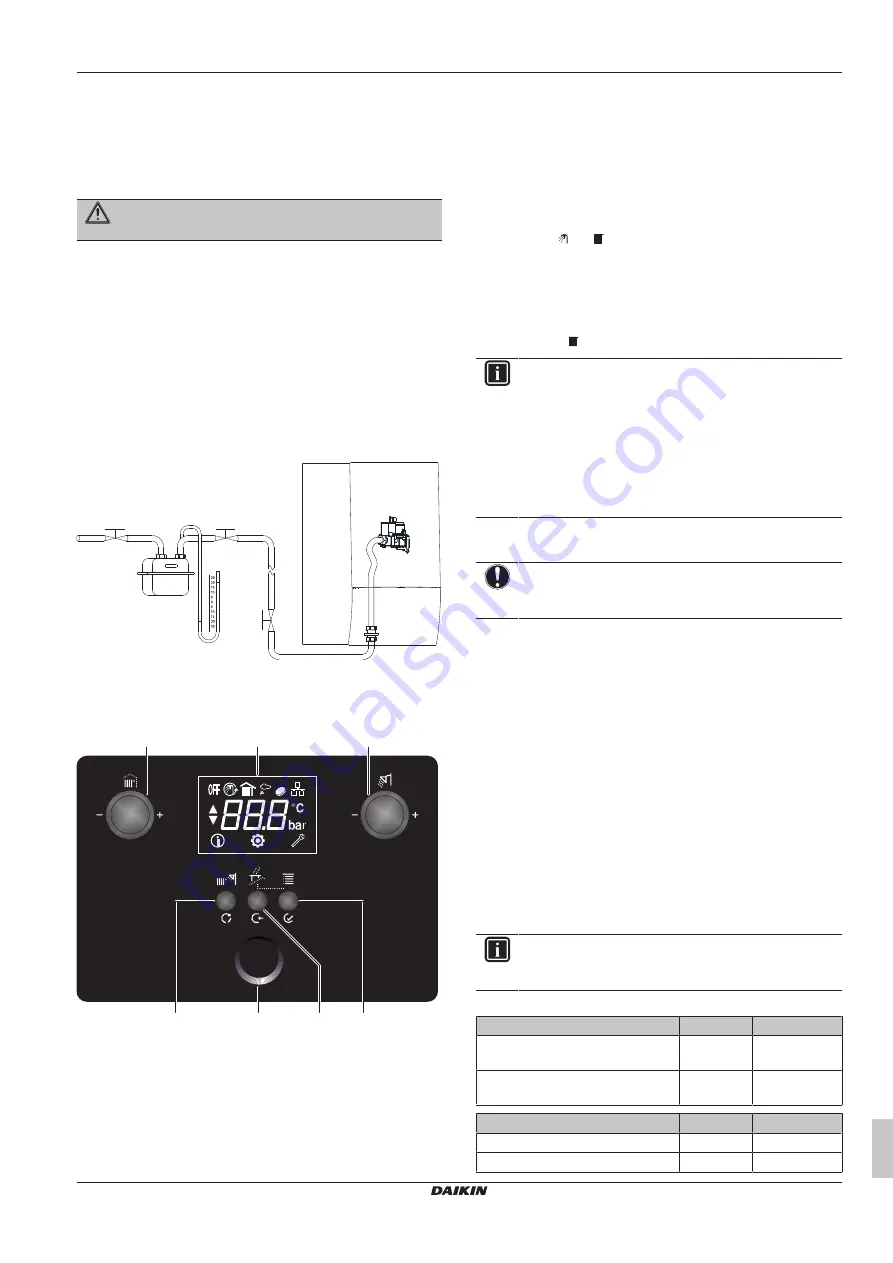
Legend - User interface:
a
e
f
g
c
b
d
a
Left dial
b
LCD screen
c
Right dial
d
Mode / Reset
e
Status indicator
f
Cancel / Back
g
Menu / Enter
1
Make sure the system is filled with water and fully vented as
described in this manual.
2
Check that the central heating and domestic hot water isolating
valves are open.
3
Check that gas service valve is open.
4
Connect the unit to the main power supply. The user interface
will be energized.
5.4.1
To commission the central heating
1
Set mode to winter mode via "Mode" button on the user
interface. ( and icons are displayed on the screen.)
2
Set central heating set temperature to maximum value via left
dial. If connected, make sure all external controls such as
outdoor sensor and room thermostat are calling for heat.
3
The boiler control now go through its ignition sequence. The
status indicator will glow constantly in blue if flame is
established. icon will blink when central heating is active.
INFORMATION
After first power ON, the boiler does not increase its
capacity above a preset value for about 12 minutes, even if
there is demand.
▪ First 0~2 minutes: The electronic gas adaptive system
calibrates itself.
▪ Next 8~10 minutes: The boiler performs the low water
temperature function. You can skip this function by
pressing the "Cancel" button for 5 seconds.
5.4.2
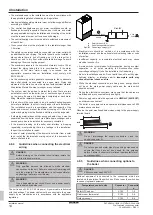
To measure the flue emissions
NOTICE
Make sure all the radiator valves are opened and water
circulation is allowed.
1
Change operation mode to the stand-by.
2
Before activating the sweeper mode, gas analyzer device
should be mounted to its place on the flue.
3
To activate the sweeper mode, press "Cancel" and "Menu"
buttons together 5 seconds. With sweeper mode, boiler can be
operated at maximum and minimum capacity independent of
heat demand.
4
When the sweeper mode is activated, "tst - 100" caption will
appear on the screen. This means boiler is operating at nominal
capacity. Check the CO
2
values at nominal capacity.
5
To switch between nominal and minimum capacities, press
"Mode" button. "tst - xx" caption will appear on screen. This
means boiler is operating at minimum capacity. Check the CO
2
values at minimum capacity.
6
To quit sweeper mode, again press "Cancel" and "Menu"
buttons together 5 seconds. Sweeper mode will be deactivated
and boiler will return to normal operation mode. Sweeper mode
also finishes automatically after 15 minutes.
INFORMATION
“xx” is referring to minimum percental capacity and this
value can be different according to model.
The CO
2
values should be in limits as shown in below table.
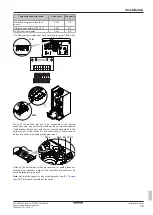
CO
2
emissions
Unit
Value
CO
2
Emission at nominal and
minimum heat input (G20)
%
9.0 ± 0.8
CO
2
Emission at nominal and
minimum heat input (G31)
%
11.3 ± 1.0
Gas inlet pressure
Unit
Value
G20 (min. / max.)
mbar
17 / 30
G31 (min. / max.)
mbar
25 / 45
Summary of Contents for D2CND024A4AB
Page 31: ......

