5 Commissioning
Installation Manual
20
D2CNL024A1AA
Wall-mounted condensing boiler
3P469346-12P – 2020.07
3
Set all isolating valves to vertical (open) position.
4
Measure system water height (see
10]).
5
Slowly turn the filling valve until pressure reaches a value
around 0.8 bar for system heights up to 6 metre. For longer
system
heights,
see
10] to determine filling pressure. Filling
operation should be done slowly. When pressure exceeds
0.8 bar, error code will disappear and the status indicator light
will turn to blue. Turn off the filling valve.
6
System pressure value can be monitored from the user
interface.
7
Make sure the automatic air vent valves located on the pump
and heat exchanger are opened. Vent the air from the
installation with the manual air vent screws on the radiators.
Make sure screws are tightened after venting.
a
a
Filling valve
8
If after the venting the pressure decreases below 0.8 bar, refill
the system with water until the pressure reaches 0.8 bar again.
9
Check the central heating circuit - especially the couplings of
the circuit - for leakage.
10
Isolate the unit from power mains.
5
Commissioning
UPOZORENJE
Only qualified persons should conduct commissioning.
OPREZ
Preliminary electrical system checks such as earth
continuity, polarity, resistance to earth and short circuit
must be carried out by using a suitable test meter by a
competent person.
5.1
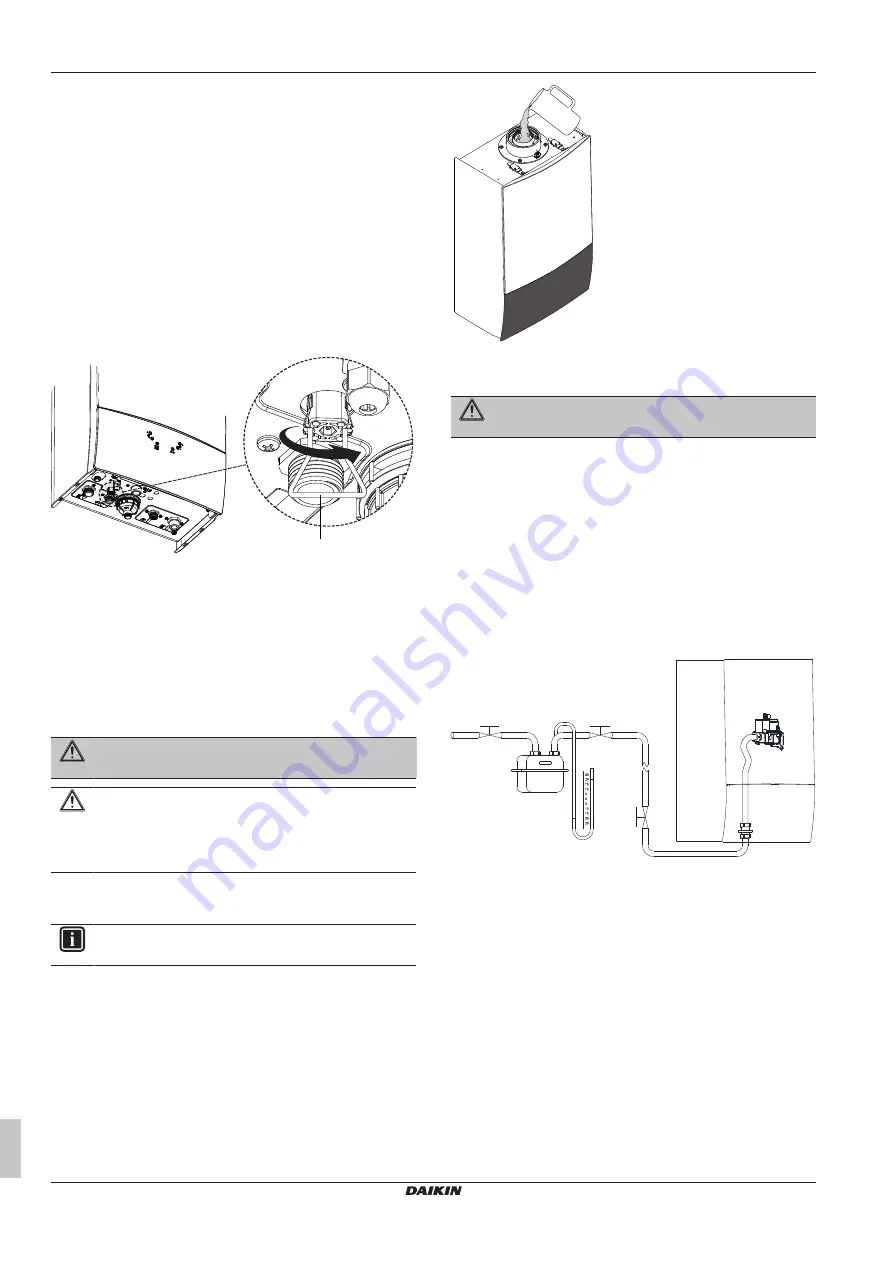
To fill the condensate trap
INFORMACIJA
Water must be poured into the
inner
tube.
Fill the condensate trap by pouring 0.2 litres of water from the boiler
flue outlet.
5.2
To check for gas leakage
OPASNOST
Before passing next steps, this control must be fulfilled.
1
Before connecting the unit to power mains, close valves 1, 2
and 3.
2
Connect a manometer to gas counter.
3
Open valves 1, 2 and 3.
4
Close valve 1.
5
Note the manometer measurement and wait for 10 minutes.
6
After 10 minutes, compare the manometer measurement with
the initial value. If the pressure is decreased, it means there is
gas leakage. Check the gas line and fittings.
7
Repeat this process until being sure that there is no leakage.
8
Close valve 1, remove the manometer and open valve 1 again.
1
2
3
5.3
To commission the unit
Legend - User interface:
Summary of Contents for D2CNL024A1AA
Page 23: ......


