5
5.
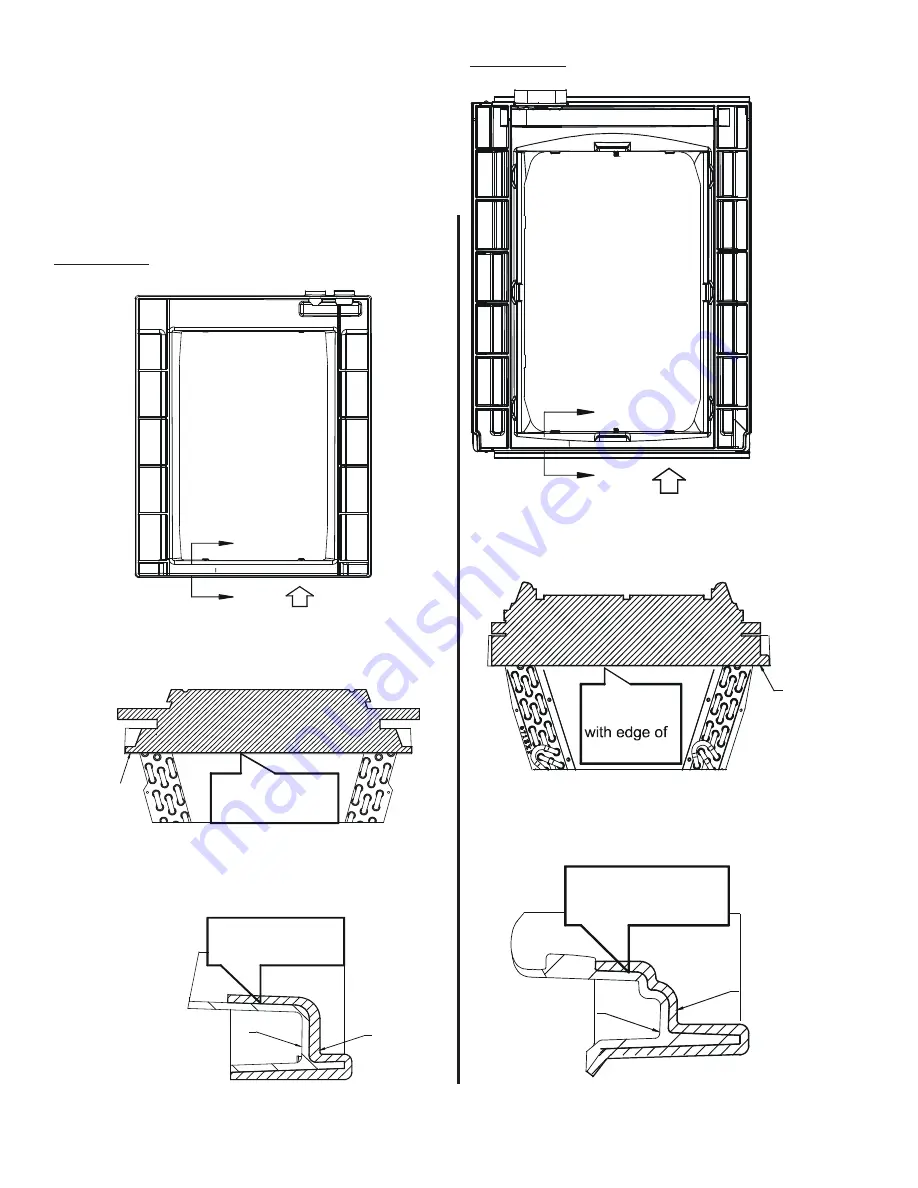
Apply insulation B and D.
Ensure the edge of insulation B and D is flush with
the top edge of the drain pan (See view G and J of
Figure 8 and 9).
Fold over the remaining insulation to inside of drain
pan.
Firmly press the insulation along the surface of
drain pan. Don’t allow any air gap/bubble between
insulation and drain pan (See Section J-J and
Section K-K of Figure 8 and 9).
For DPICX-*A
G
H
H
Insulation B
Section H-H
View G
For DPICX-*A
Flush edge of
insulation with edge
of drain pan
Attach the insulation
along the surface of
drain pan
Insulation B
Drain pan
Figure 8
For DPICX*-B
G
H
H
Flush edge
of insulation
drain pan
Insulation B
Section H-H
View G
For DPICX-*B
Attach the insulation
along the surface of
drain pan
Insulation B
Drain pan
Section H-H
Section H-H
View G


