SERVICING
21
S-12 CHECKING HIGH PRESSURE SWITCH
WARNING
HIGH VOLTAGE
DISCONNECT ALL POWER BEFORE SERVICING
OR INSTALLING THIS UNIT. MULTIPLE POWER
SOURCES MAY BE PRESENT. FAILURE TO DO SO
MAY CAUSE PROPERTY DAMAGE, PERSONAL IN-
JURY OR DEATH.
The high pressure switch senses the pressure in the com-
pressor discharge line. If abnormally high condensing pres-
sures develop, the contacts of the control open, breaking the
control circuit before the compressor motor overloads. This
control is automatically reset.
1. Using an ohmmeter, check across terminals of high
pressure control, with wire removed. If not continuous,
the contacts are open.
2. Attach a gauge to the dill valve port on the base valve.
With power ON:
WARNING
LINE VOLTAGE NOW PRESENT.
3. Start the system in charge mode and place a piece of
cardboard in front of the condenser coil, raising the con-
densing pressure.
4. Check pressure at which the high pressure control cuts-
out. If it cuts-out at 605 PSIG to -17 PSIG, it is operating
normally (See causes for high head pressure in Service
Problem Analysis Guide). If it cuts out below this pres-
sure range, replace the control.
S-13 CHECKING INDOOR/OUTDOOR HI/LOW PRES-
SURE SENSOR
With power ON:
WARNING
LINE VOLTAGE NOW PRESENT.
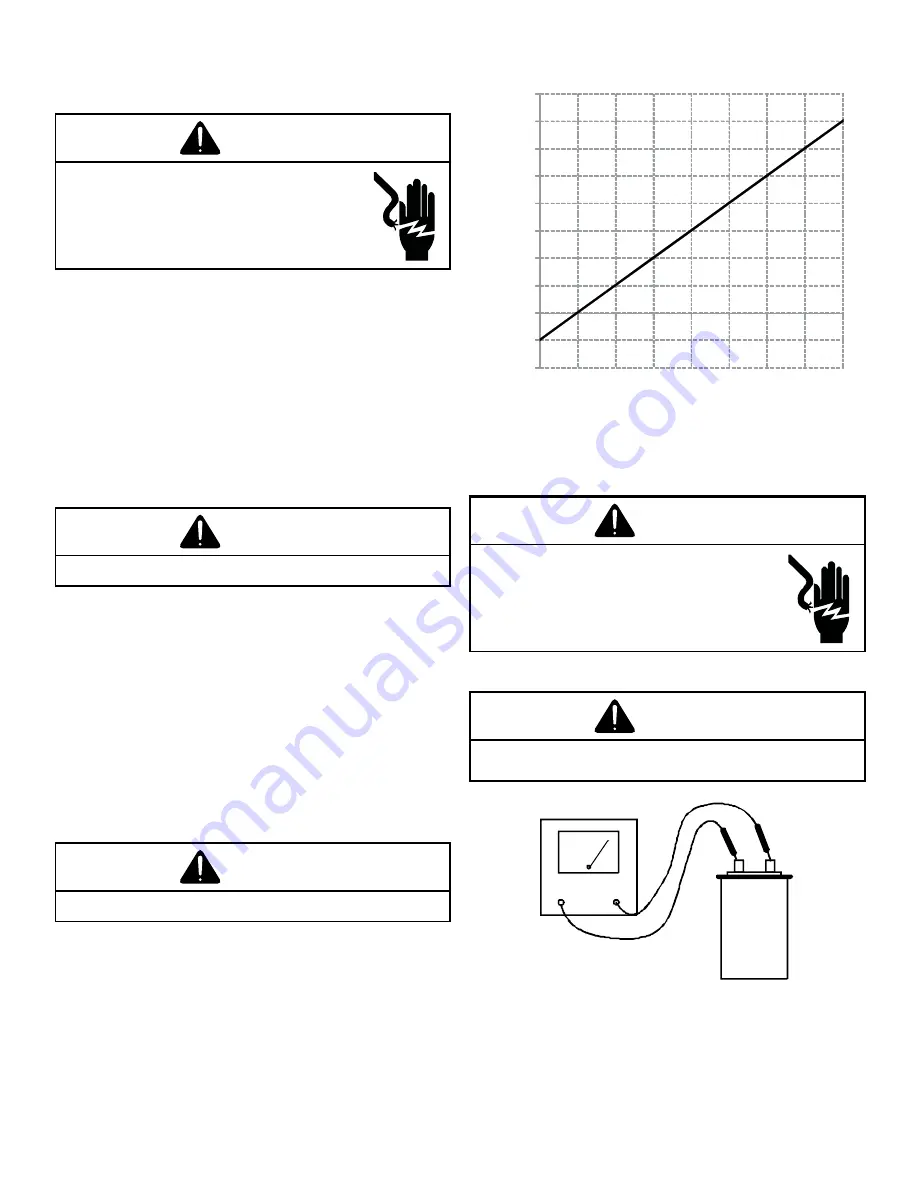
The HI/LOW and indoor pressure sensor senses the suc-
tion pressure in cooling mode and the discharge pressure
in heating mode.
Follow the following sequence to check the pressure sensor.
1. Connect a voltmeter across the sensor terminals be-
tween black and white wirings. The voltmeter should
show the voltage in the following table.
2. Replace the sensor if the sensor is open, shorted or out-
side the valid voltage range.
-200
-100
0
100
200
300
400
500
600
700
800
0.0
0.5
1.0
1.5
2.0
2.5
3.0
3.5
4.0
De
te
cte
d P
ress
ur
e (
PS
IG
)
Output Voltage (DCV)
VOLTAGE VS PRESSURE CHARACTERISTICS
S-15A RESISTANCE CHECK
WARNING
HIGH VOLTAGE
DISCONNECT ALL POWER BEFORE SERVICING
OR INSTALLING THIS UNIT. MULTIPLE POWER
SOURCES MAY BE PRESENT. FAILURE TO DO SO
MAY CAUSE PROPERTY DAMAGE, PERSONAL IN-
JURY OR DEATH.
1. Discharge capacitor and remove wire leads.
WARNING
DISCHARGE CAPACITOR THROUGH A 20 TO 30 OHM RESISTOR
BEFORE HANDLING.
OHMMETER
CAPACITOR
TESTING CAPACITOR RESISTANCE
2. Set an ohmmeter on its highest ohm scale and connect
the leads to the capacitor -
A. Good Condition - indicator swings to zero and slow-
ly returns to infinity. (Start capacitor with bleed re
-
sistor will not return to infinity. It will still read the
resistance of the resistor).


