Installation manual
25
E(D/B)(H/L)Q011~016BB
Unit for air to water heat pump system
4PW67904-1 – 01.2011
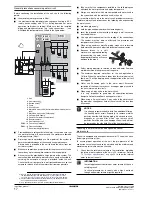
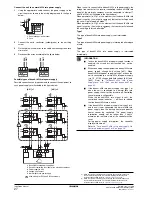
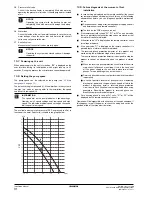
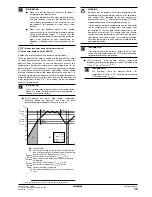
Door 2: electrical parts of the hydraulic compartment: X10M
1 Earth leakage circuit breaker
2 Fuse
(1)
1
Using the appropriate cable, connect the power circuit to the
main circuit breaker as shown on the wiring diagrams (inside of
door 2) and in
figure 2
.
2
Connect the earth conductor (yellow/green) to the earthing
screw next to the X10M terminal.
3
Fix the cable with cable ties to the cable tie mountings to ensure
strain relief. (Positions are marked with
in
figure 2
.)
Note: only relevant field wiring is shown.
4
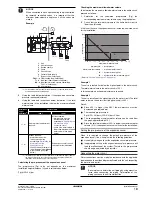
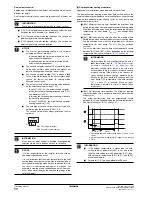
If the backup heater capacity is to be set lower than the default
value (6 kW), this can be done by reconnecting wires according
to following figure. The backup heater capacity is now 3 kW for
V3 models or 2 kW for W1 models.
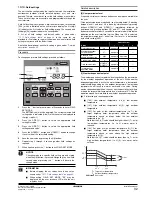
Connection of the thermostat cable
Connection of the thermostat cable depends on the application.
See also
"3.4.
Typical application examples" on page
4
and
"10.2. Room thermostat installation configuration" on page 29
for
more information and configuration options on pump operation in
combination with a room thermostat.
Thermostat requirements
■
Power supply: 230 V AC or battery operated
■
Contact voltage: 230 V.
Procedure
1
Connect the thermostat cable to the appropriate terminals as
shown on the wiring diagram and installation manual of the room
thermostat kit.
2
Fix the cable with cable ties to the cable tie mountings to ensure
strain relief.
3
Set DIP switch SS2-3 on the PCB to ON. See
"10.2. Room
thermostat installation configuration" on page
29
for more
information.
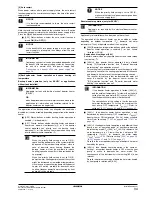
Connection of the first set point and second set point contacts
The connection of the set point contact is only relevant in case dual
set point contact is enabled.
See also
"3.4. Typical application examples" on page 4
and
"Dual set
point control" on page 39
.
Contact requirements
The contact shall be a voltage free contact that ensure 230 V
(100 mA).
Procedure
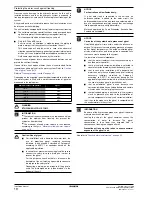
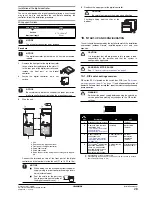
1
Connect the contact of first set point and second set point to the
appropriate terminals as shown in the figure below
2
Fix the cables with cable ties to the cable tie mountings to
ensure strain relief.
3
Depending on the required pump operation set DIP switch
SS2-3 and field setting [F-00]. See
"10.3. Pump operation
configuration" on page 29
and field setting [F-00] in
"[F] Option
setup" on page 43
.
Model
Backup heater
capacity
Backup heater
nominal voltage
Maximum
running current
Z
max
(
Ω
)
V3
(a) (b)
(a) Equipment complying with EN/IEC 61000-3-12
(1)
(b) This equipment complies with EN/IEC 61000-3-11
(2)
provided that the system
impedance Z
sys
is less than or equal to Z
max
at the interface point between the
user's supply and the public system. It is the responsibility of the installer or user
of the equipment to ensure, by consultation with the distribution network operator
if necessary, that the equipment is connected only to a supply with a system
impedance Z
sys
less than or equal to Z
max
.
6 kW
1x 230 V
26 A
0.29
W1
6 kW
3x 400 V
8.7 A
—
V3
(c)
(c) Refer to procedure how to set the backup heater to lower capacity.
3 kW
1x 230 V
13 A
—
W1
2 kW
3x 400 V
5.0 A
—
(1) European/International Technical Standard setting the limits for harmonic
currents produced by equipment connected to public low-voltage systems
with input current >16 A and
≤
75 A per phase.
(2) European/International Technical Standard setting the limits for voltage
changes, voltage fluctuations and flicker in public low-voltage supply
systems for equipment with rated current
≤
75 A.
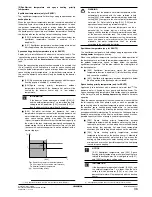
NOTICE
The earth leakage circuit breaker must be a high-speed
type breaker of 30 mA (<0.1 s).
L1
L3
L2
L1
L3
L2
1
2
X10M
X10M
V3
1N~ 50 Hz
230 V
W1
3N~ 50 Hz
400 V
V3
W1
1
2
3
4
5
6
1
2
3
4
5
6
E11H
E12H
E13H
E11H
E12H
E13H
X5M
BRN
BLK
GRY
X5M
1
2
3
4
5
6
1
2
3
4
5
6
E11H
E12H
E13H
E11H
E12H
E13H
X5M
BRN
BLK
GRY
X5M
1
2
3
4
1
2
3
4
E12H
ON
E12H
OFF
X5M
BLK
BRN
X5M
1
2
3
4
1
2
3
4
E12H
ON
E12H
OFF
X5M
BRN
BLK
X5M
X2M
SP1
SP2
1
2
3
4
SP1 First set point contact
SP2 Second set point contact

