Installation manual
9
ERQ100~140A7V1B
Inverter condensing unit
4PW51321-1
9.6.
Precautions when connecting field piping and
regarding insulation
■
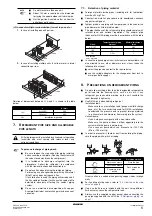
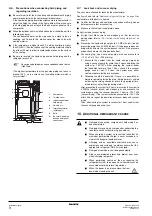
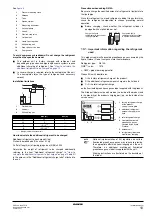
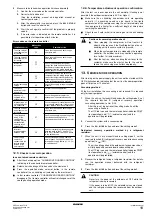
Be careful not to let the air handling and outdoor branch piping
come into contact with the compressor terminal cover.
If the liquid-side piping insulation might come into contact with it,
adjust the height as shown in the figure below. Also, make sure
the field piping does not touch the bolts or outer panels of the
compressor.
■
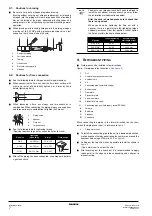
When the outdoor unit is installed above the air handling unit the
following can occur:
The condensated water on the stop valve can move to the air
handling unit. To avoid this, please cover the stop valve with
sealing material.
■
If the temperature is higher than 30°C and the humidity is higher
than RH 80%, then the thickness of the sealing materials should
be at least 20 mm in order to avoid condensation on the surface
of the sealing.
■
Be sure to insulate the liquid and gas-side field piping and the
refrigerant branch kit.
(The highest temperature that the gas-side piping can reach is
around 120°C, so be sure to use insulating material which is
very resistant.)
9.7.
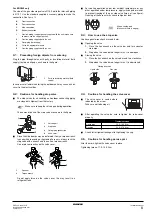
Leak test and vacuum drying
The units were checked for leaks by the manufacturer.
and refer to
"Additional refrigerant charge" on page 9
nomenclature of the parts in figure 6.
■
Confirm that the gas and liquid line stop valves are firmly closed
before pressure test or vacuuming.
■
Make sure that valve A is completely open.
Air tight test and vacuum drying
■
Air tight test: Make sure to use nitrogen gas. (For the service
port position, refer to
"9.2. Cautions for handling stop valve" on
■
Pressurize the liquid and gas pipes to 4.0 MPa (40 bar) (do not
pressurize more than 4.0 MPa (40 bar)). If the pressure does not
drop within 24 hours, the system passes the test. If the pressure
drops, check where the nitrogen leaks from.
■
Vacuum drying: Use a vacuum pump which can evacuate to
–100.7 kPa (5 Torr, –755 mm Hg)
1. Evacuate the system from the liquid and gas pipes by
using a vacuum pump for more than 2 hours and bring the
system to –100.7 kPa. After keeping the system under
that condition for more than 1 hour, check if the vacuum
gauge rises or not. If it rises, the system may either
contain moisture inside or have leaks.
2.
Following should be executed if there is a possibility of
moisture remaining inside the pipe (if piping work is carried
out during the raining season or over a long period of time,
rainwater may enter the pipe during work).
After evacuating the system for 2 hours, pressurize the system to
0.05 MPa (vacuum break) with nitrogen gas and evacuate the
system again using the vacuum pump for 1 hour to –100.7 kPa
(vacuum drying). If the system cannot be evacuated to –100.7 kPa
within 2 hours, repeat the operation of vacuum break and vacuum
drying.
Then, after leaving the system in vacuum for 1 hour, confirm that
the vacuum gauge does not rise.
10. A
DDITIONAL
REFRIGERANT
CHARGE
Any exposed piping may cause condensation or burns
if touched.
2
1
3
5
5
A
4
4
6
1
Compressor
2
Terminal cover
3
Indoor and outdoor
field piping
4
Corking, etc.
5
Insulation material
(field supply)
6
Bolts
A
Be careful with pipe,
bolt and outer panel
connections
■
Refrigerant cannot be charged until field wiring has
been completed.
■
Refrigerant may only be charged after performing the
leak test and the vacuum drying (see above).
■
When charging a system, care shall be taken that its
maximum permissible charge is never exceeded, in
view of the danger of liquid hammer.
■
Charging with an unsuitable substance may cause
explosions and accidents, so always ensure that the
appropriate refrigerant (R410A) is charged.
■
Refrigerant containers shall be opened slowly.
■
Always use protective gloves and protect your eyes
when charging refrigerant.
■
When performing service on the unit requiring the
refrigerant system to be opened, refrigerant must be
evacuated according to local regulations.
■
When the power is on, please close the front
panel when leaving the unit.

