ERX125~250A7W1B
Inverter condensing unit
4PW30064-1D
Installation manual
13
2.
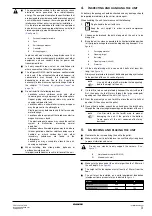
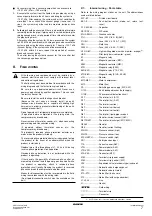
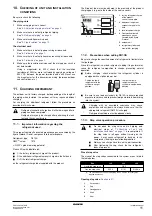
Press the
button once if the LEDs combination is not
as in the figure below.
3.
Press the
button once.
4.
Hold the
button down for 5 seconds or more.
5.
Charging mode judgement
If the indoor temperature is 20°C DB or lower, charging in
cooling mode is not possible in some cases.
6.
Start up
Wait while the unit is preparing for charging in cooling mode.
7.
Ready
Press the
button once within 5 minutes.
If the
button is not pushed within 5 minutes,
P2
will be
displayed on the remote controller. Refer to
malfunction code display" on page 13
8.
Operation
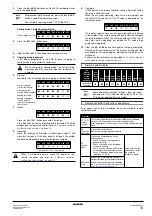
When the following LED display is shown, open valve A and
close the front panel. If the front panel is left open, the system
can not operate properly during the refrigerant charging.
*
= The state of this LED is not important.
9.
Complete
If the display on the remote controller shows a flashing
PE
code,
charging is almost finished.
When the unit stops operating, close valve A immediately and
check the LEDs and check if the
P9
code is displayed on the
remote controller.
If it is not as shown above, correct the malfunction (as indicated
in the display of the remote controller) and restart the complete
charging procedure. When the charging amount is little, the
PE
code may not be displayed, but instead the
P9
code will be
displayed immediately.
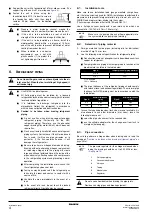
10. Press the
button once and the charging is complete.
Record, with a permanent marker, the amount of refrigerant that
was added on the wiring diagram attached on the inside of the
switch box.
Perform the test procedure as described in
was added in cooling mode" on page 16
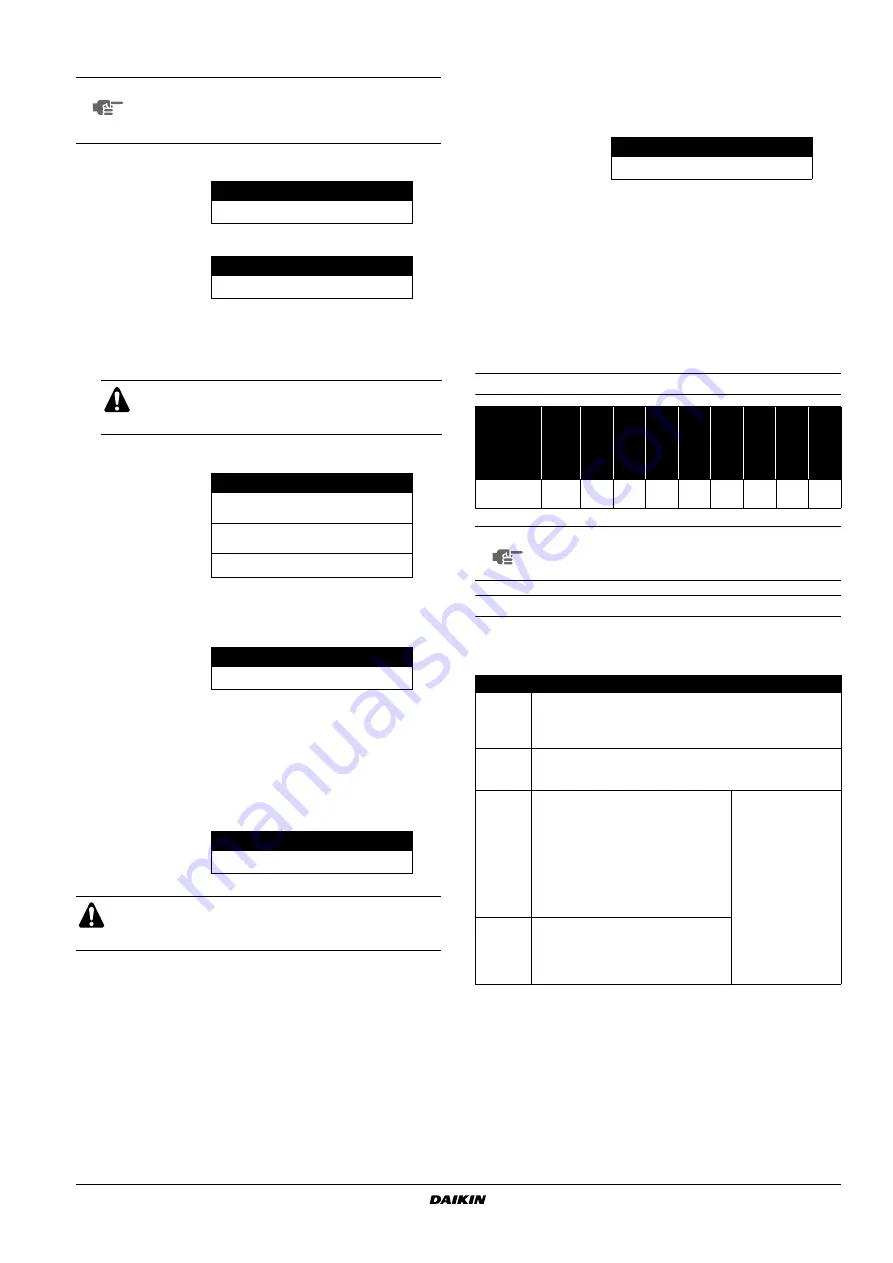
2
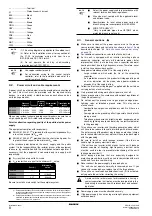
Normal system display
3
Remote controller malfunction code display
Error codes can only be displayed when the standard remote
controller is used.
NOTE
Wherever during this procedure, press the
button if something becomes unclear.
You will return to setting mode 1 (H1P=
x
"OFF").
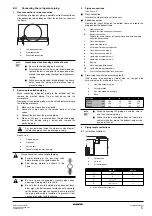
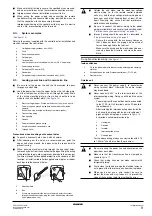
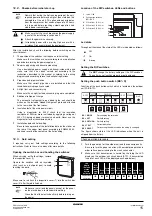
Setting mode 1 (default system status)
H1P
H2P
H3P
H4P
H5P
H6P
H7P
Default status (normal)
x
x w x
x
x
x
H1P
H2P
H3P
H4P
H5P
H6P
H7P
w w w w w w w
When charging in cooling mode, the unit will stop
operating when the required amount of refrigerant is
charged.
H1P
H2P
H3P
H4P
H5P
H6P
H7P
Pressure control
(for the first minute)
x c x
x
x
x w
Start up control
(for the next 2 minutes)
x c x
x
x w x
Waiting for stable
heating conditions
(for the next ±15
minutes (according to
the system))
x c x
x
x w w
H1P
H2P
H3P
H4P
H5P
H6P
H7P
c c c x w x w
H1P
H2P
H3P
H4P
H5P
H6P
H7P
w c
*
*
*
*
*
When a malfunction occurs, check the display of the
remote controller and refer to
malfunction code display" on page 13
BS1 MODE
BS1 MODE
BS4 TEST
BS4 TEST
BS4 TEST
BS4 TEST
H1P
H2P
H3P
H4P
H5P
H6P
H7P
w c c w w w w
LED
display
(Default
status
before
delivery)
Micro-
computer
operation
monitor
HAP
Mode
H1P
Ready
/Error
H2P
Indivi-
dual
H3P
Bulk
(master)
H4P
Bulk
(slave)
H5P
Low
noise
H6P
Demand
H7P
Multi
H8P
Single outdoor
unit system
c
x
x
w
x
x
x
x
x
NOTE
Some dedicated functions (master, slave, low noise,
demand and multi) indicated above the LEDs on the
PCB are not applicable for this model.
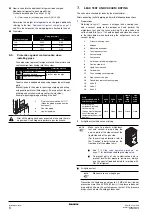
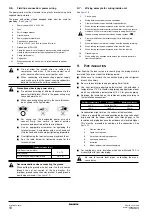
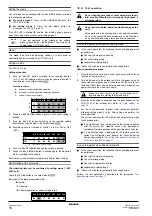
Error code
PA
,
PH
,
PC
replace
cylinder
Close valve A and replace the empty cylinder. When renewed,
open valve A (the outdoor unit will not stop operating).
After replacing the cylinder, open valve A again and continue the
work.
P8
recharge
operation
Close valve A immediately.
Restart the charging procedure again.
P2
charge
hold
Close valve A immediately. Check
following items:
- Check if the gas side stop valve is
opened correctly
- Check if the valve of the refrigerant
cylinder is opened
- Check if the air inlet and outlet of the
air handling unit are not obstructed
- Check if the indoor temperature is not
lower than 20°C DB
After correcting the
abnormality, restart
the charging
procedure again.
*
abnormal
stop
Close valve A immediately. Confirm the
malfunction code by the remote controller
and correct the abnormality by following
the
"Correcting after abnormal completion
of the test operation" on page 17
.
BS1 MODE

