1-15
English
7
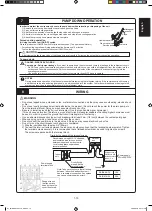
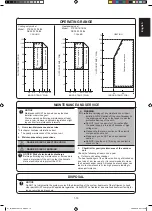
PUMP DOWN OPERATION
In order to protect the environment, be sure to pump down when relocating or disposing of the unit.
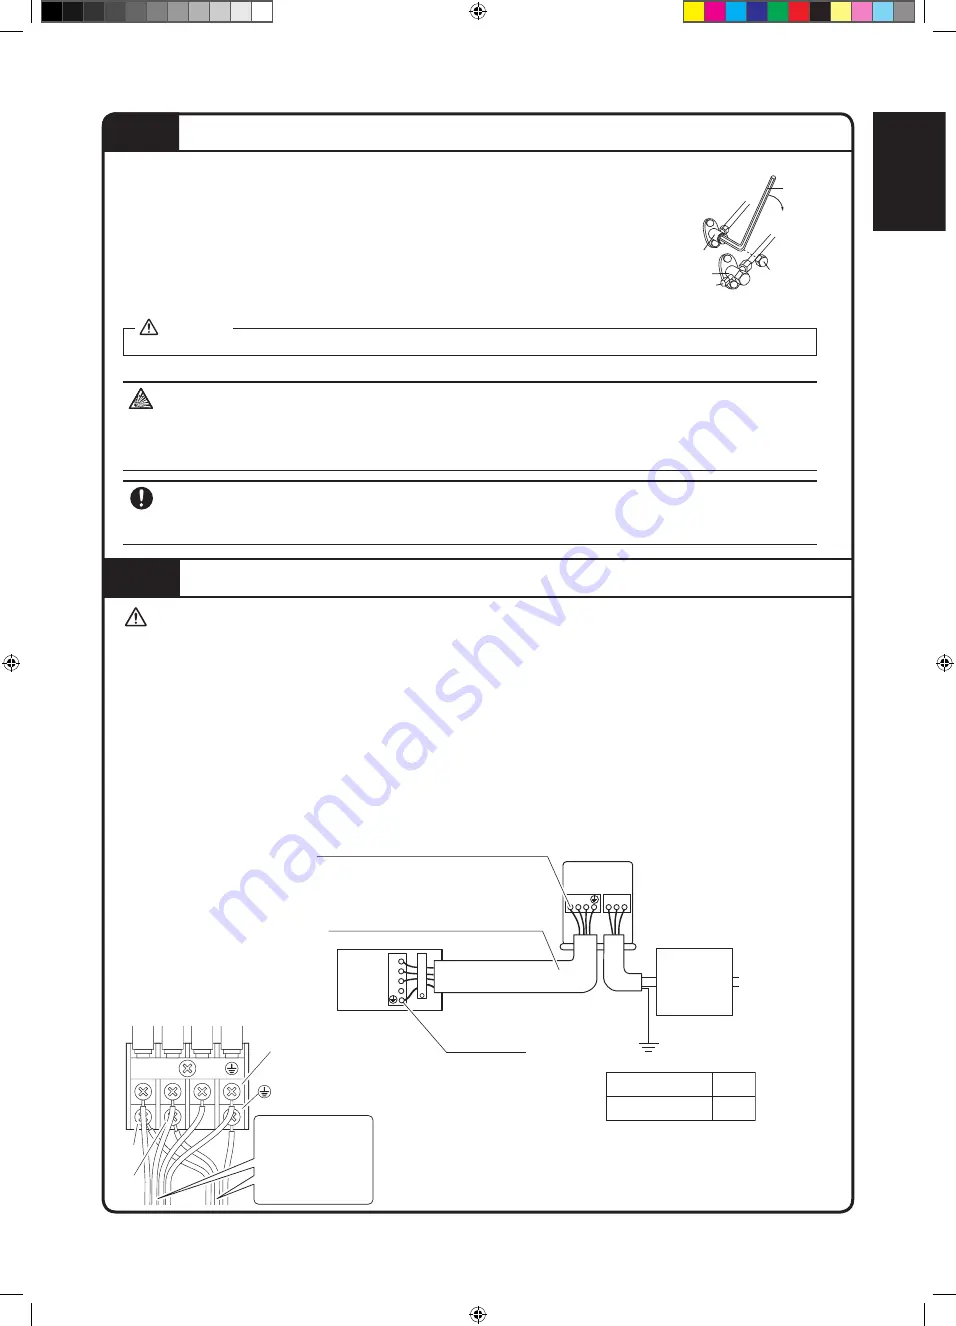
1) Remove the valve cap from liquid stop valve and gas stop valve.
2) Carry out forced cooling operation.
3) After five to ten minutes, close the liquid stop valve with a hexagonal wrench.
4) After two to three minutes, close the gas stop valve and stop forced cooling operation.
5) Attach the valve cap once procedures are complete.
Forced cooling operation
Using the indoor unit ON/OFF switch
Press the indoor unit ON/OFF switch for at least 5 seconds. (The operation will start.)
• Forced cooling operation will stop automatically after around 15 minutes.
To stop the operation, press the indoor unit ON/OFF switch.
After closing the liquid stop valve, close the gas stop valve within 3 minutes, then stop the forced cooling operation.
CAUTION
To pump down
DANGER: RISK OF EXPLOSION
Pump down - Refrigerant leakage
. If you want to pump down the system, and there is a leakage in the refrigerant circuit:
•
Do NOT use the unit
ʼ
s automatic pump down function, with which you can collect all refrigerant from the system into the
outdoor unit. Possible consequence: Self-combustion and explosion of the compressor because of air going into the
operating compressor.
•
Use a separate recovery system so that the unit
ʼ
s compressor does NOT have to operate.
NOTICE
During pump down operation, stop the compressor before removing the refrigerant piping. If the compressor is still running
and the stop valve is open during pump down, air will be sucked into the system. Compressor breakdown or damage to the
system can result due to abnormal pressure in the refrigerant cycle.
Hexagonal
wrench
Close
Valve lid
Service port
Gas stop valve
Liquid stop valve
8
WIRING
WARNING
• Do not use tapped wires, extension cords, or starburst connections, as they may cause overheating, electric shock,
or fire.
• Do not use locally purchased electrical parts inside the product. (Do not branch the power for the drain pump, etc.,
from the terminal block.) Doing so may cause electric shock or fire.
• Be sure to install a ground fault circuit interrupter. (One that can handle higher harmonics.)
(This unit uses an inverter. Therefore, a ground fault circuit interrupter capable of handling higher harmonics must
be used in order to prevent the ground fault circuit interrupter malfunctioning.)
• Use an all-pole disconnection type circuit breaker with at least 3mm (1/8 inch) between the contact point gaps.
• When carrying out wiring, take care not to pull at the conduit.
• Do not connect the power wire to the indoor unit. Doing so may cause electric shock or fire.
• Do not turn on the circuit breaker until all work is completed.
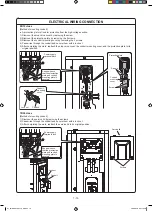
1) Strip the insulation from the wire 3/4" (20mm).
2) Connect the inter-unit wires between the indoor and outdoor units so that the terminal numbers match. Tighten
the terminal screws securely. It is recommended that a flathead screwdriver be used to tighten the screws.
The screws are packed with the terminal block.
3
1
2
1
2
3
1 2 3
L1 L2 GR
Firmly
fi
x the wires with the terminal screws.
Safety devices in
accordance with
local and national
codes, i.e. a
circuit breaker
Power supply
60Hz 208-230V
RX/RK 09/12
15A
20A
RX/RK 18/24
Firmly
fi
x the
wires with the
terminal screws.
Note: Take care to ensure that all wiring
between indoor unit and outdoor unit
has a consistent connection. Any splices
can cause communication errors.
Indoor
unit
Ground
Power supply
terminal block
L1
L2
Shape wires so
that the service
lid and stop valve
cover fit securely.
Outdoor
unit
Recommend using AWG14, stranded
and insulated wire for connections
between indoor and outdoor units.
Local code always supersedes
recommendation.
01_IM-BMS-FTX&FTK_EN.indb 15
01_IM-BMS-FTX&FTK_EN.indb 15
2/28/2020 6:27:17 PM
2/28/2020 6:27:17 PM

