


Installation
EDUS39-900-F10
22
FXMQ-MF
Installation
Unit Installation
Installin
g
optional accessories before installin
g
the unit is easier. See the installation manuals included with the
optional accessories.
As for the parts to be used for installation
w
ork, be sure to use the provided accessories and specified parts designated
by our company.
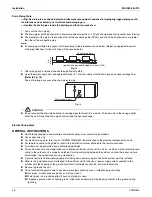
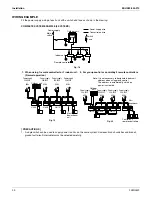
1. Temporarily install the unit.
Mount the hanger brackets to suspension bolts. Secure the hanger brackets on the top and the bottom
w
ith nuts
<1>~<3> (M10, field supplied) and
w
ashers (M10, accessory 10)).
2. Adjust the height of the unit
w
ith the nut <2>.
(Refer to Fi
g
. 4)
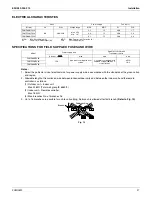
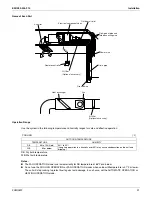
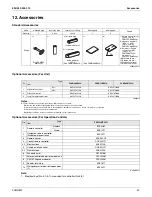
3. Make sure the unit is level.
Use a level or a vinyl tube filled
w
ith
w
ater to make sure that the unit is level and that the tilt (do
w
n
w
ard slope) to the
drain socket and air inlet side is
w
ithin 1°.
(Refer to Fi
g
. 5)
4. Tighten both upper and lo
w
er nuts <1>, <3>.
(Refer to Fi
g
. 4)
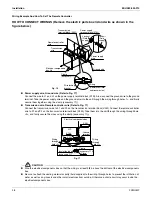
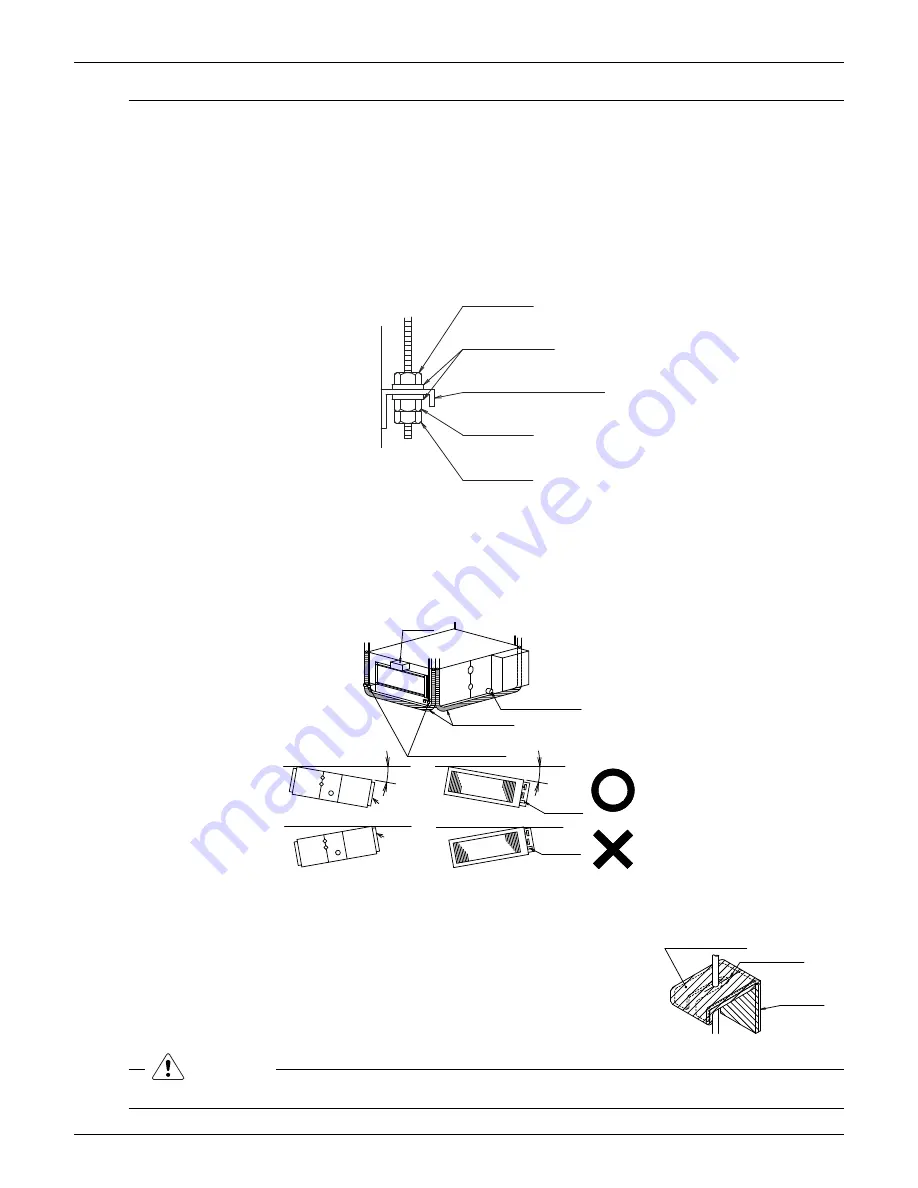
5. Insulate the four hanger brackets
w
ith the sealing pad. (accessory 6)) Insulate the
hanger brackets so that the surface and edges of the hanger brackets cannot be
seen.
(Refer to Fi
g
. 6)
CAUTION
Setting the unit at an angle opposite to the drain socket or air inlet side might cause leaks.
N
ut <1>
(Field supply)
N
ut <2>
(Field supply)
N
ut <3>
(Field supply)
Washer
(accessory 10))
Hanger bracket
(attached
w
ith main body)
Main body
Fi
g
. 4
Level
Drain socket
V
inyl tube
Hanger bracket
setting bolt
1˚ or less
1˚ or less
Air inlet side
Air inlet side
Drain
socket
Drain
socket
Fi
g
. 5
Fi
g
. 6
Sealing pad 6)
Slit of
sealing
pad
Hanger
bracket
Summary of Contents for FXMQ-MF
Page 1: ...EDUS 39 900 F10_a AMERICAS FXMQ MF Outdoor Air Processing Unit ...
Page 7: ...Dimensions EDUS39 900 F10 6 FXMQ MF FXMQ72MFVJU FXMQ96MFVJU Unit in 3D065453A ...
Page 8: ...EDUS39 900 F10 Piping Diagrams FXMQ MF 7 4 Piping Diagrams 4D018650C ...
Page 17: ...Fan Performances EDUS39 900 F10 16 FXMQ MF FXMQ96MFVJU 3D065651B ...
Page 19: ...Sound Levels Reference EDUS39 900 F10 18 FXMQ MF FXMQ96MFVJU 4D068577 ...


