EDUS041016
Installation Manual
Room Air Conditioners J-Series
41
5
Installation Guidelines
• Where a wall or other obstacle is in the path of outdoor unit’s intake or exhaust airflow, follow the installation guidelines below.
• For any of the below installation patterns, the wall height on the exhaust side should be 47-1/4 inch (1200mm) or less.
Precautions on Installation
• Check the strength and level of the installation ground so that the unit will not cause any operating vibration or noise after installed.
• In accordance with the foundation drawing, fix the unit securely by means of the foundation bolts. (Prepare 4 sets of M8 or M10
foundation bolts, nuts and washers each which are available on the market.)
• It is best to screw in the foundation bolts until their length are 3/4 inch (20mm) from the foundation surface.
Outdoor Unit Installation
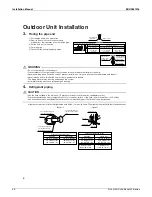
1.
Installing outdoor unit
1) When installing the outdoor unit, refer to “Precautions for Selecting the Location” and the “Outdoor Unit Installation
Drawings”.
2) If drain work is necessary, follow the procedures below.
2.
Drain work (Heat pump models)
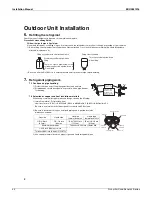
1) Use drain plug for drainage.
2) If the drain port is covered by a mounting base or floor surface, place
additional foot bases of at least 1-1/4 inch (30mm) in height under the outdoor
unit’s feet.
3) In cold areas, do not use a drain hose with the outdoor unit.
(Otherwise, drain water may freeze, impairing heating performance.)
More than 1-15/16 (50)
More than 1-15/16 (50)
More than 5-7/8 (150)
More than
3-15/16 (100)
More than 1-15/16 (50)
More than 3-15/16 (100)
Side view
47-1/4
(1200)
or less
Wall facing one side
Walls facing two sides
Top view
Top view
unit: inch (mm)
More than 5-7/8 (150)
More than 11-13/16 (300)
More than 1-15/16 (50)
Walls facing three sides
3/4”
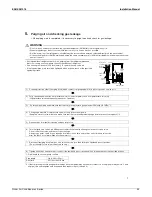
(20mm)
Drain port
Bottom frame
Drain plug
Hose (available commercially,
inner dia. 5/8 inch (16mm))
Summary of Contents for J Series
Page 1: ...EDUS041016 J Series Cooling Only Heat Pump SEER 13 Models ...
Page 53: ...Operation Manual EDUS041016 52 Room Air Conditioners J Series 12 2 Operation Instructions ...
Page 54: ...EDUS041016 Operation Manual Room Air Conditioners J Series 53 ...
Page 55: ...Operation Manual EDUS041016 54 Room Air Conditioners J Series ...
Page 56: ...EDUS041016 Operation Manual Room Air Conditioners J Series 55 ...
Page 57: ...Operation Manual EDUS041016 56 Room Air Conditioners J Series ...
Page 58: ...EDUS041016 Operation Manual Room Air Conditioners J Series 57 ...
Page 59: ...Operation Manual EDUS041016 58 Room Air Conditioners J Series ...
Page 60: ...EDUS041016 Operation Manual Room Air Conditioners J Series 59 ...
Page 61: ...Operation Manual EDUS041016 60 Room Air Conditioners J Series ...
Page 62: ...EDUS041016 Operation Manual Room Air Conditioners J Series 61 ...
Page 63: ...Operation Manual EDUS041016 62 Room Air Conditioners J Series ...
Page 64: ...EDUS041016 Operation Manual Room Air Conditioners J Series 63 ...
Page 65: ...Operation Manual EDUS041016 64 Room Air Conditioners J Series ...
Page 66: ...EDUS041016 Operation Manual Room Air Conditioners J Series 65 ...
Page 67: ...Operation Manual EDUS041016 66 Room Air Conditioners J Series ...
Page 68: ...EDUS041016 Operation Manual Room Air Conditioners J Series 67 ...
Page 69: ...Operation Manual EDUS041016 68 Room Air Conditioners J Series ...
Page 70: ...EDUS041016 Operation Manual Room Air Conditioners J Series 69 ...
Page 71: ...Operation Manual EDUS041016 70 Room Air Conditioners J Series ...
Page 72: ...EDUS041016 Operation Manual Room Air Conditioners J Series 71 ...
Page 73: ...Operation Manual EDUS041016 72 Room Air Conditioners J Series ...
Page 74: ...EDUS041016 Operation Manual Room Air Conditioners J Series 73 ...
Page 75: ...Operation Manual EDUS041016 74 Room Air Conditioners J Series ...
Page 76: ...EDUS041016 Operation Manual Room Air Conditioners J Series 75 ...
Page 77: ...Operation Manual EDUS041016 76 Room Air Conditioners J Series 3P253185 2 ...

