13 Piping installation
Installation and operation manual
21
LRYELRNUN5A7Y1
CO
₂
Conveni-Pack outdoor unit and capacity up unit
4P605461-1 – 2020.04
a
a
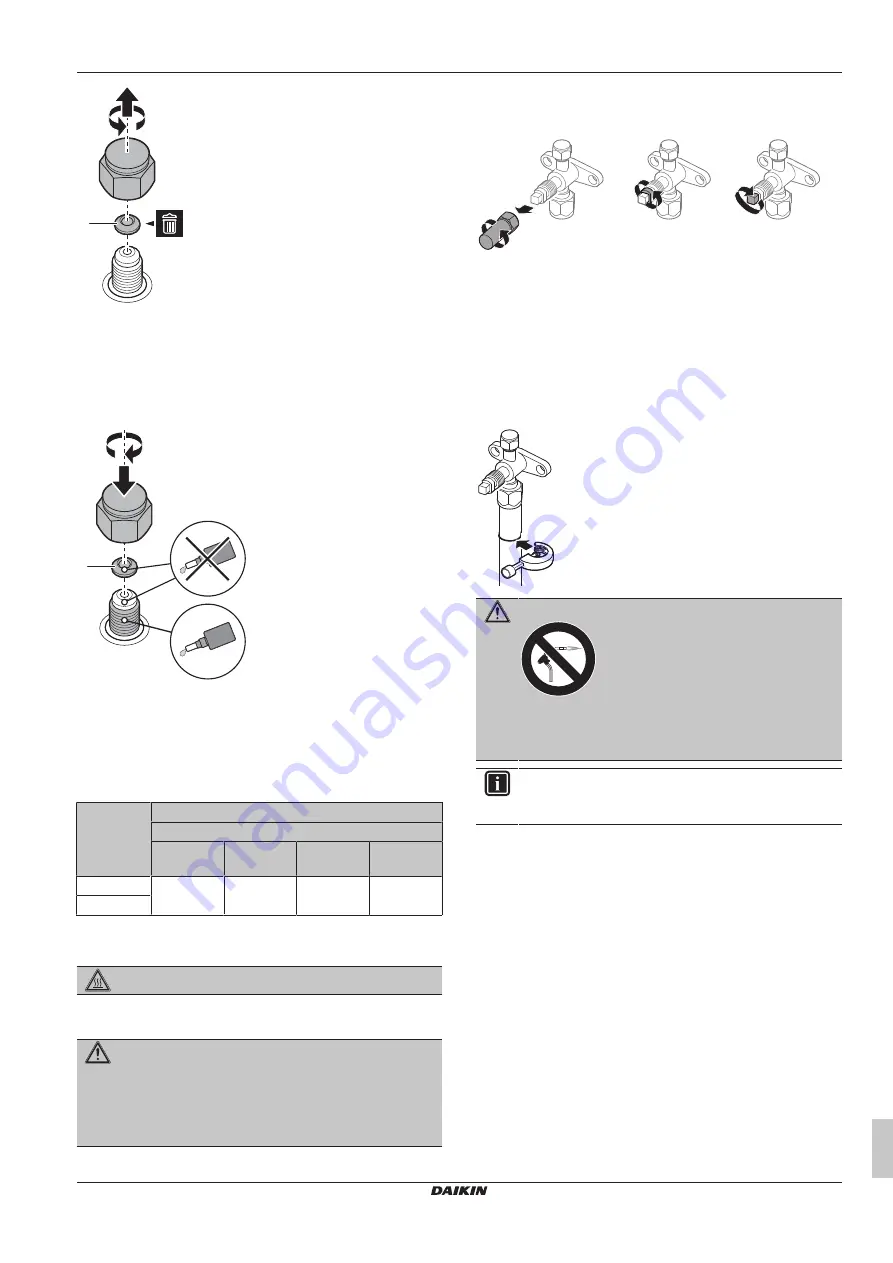
Copper packing
4
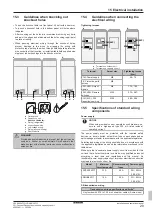
Add a new copper packing and mount the service port cap.
Apply screw lock agent or silicon sealant to the screw thread
when mounting the service port cap. If not, moisture and
condensing water may penetrate and freeze between the screw
thread. As a result, refrigerant may leak and the valve cap may
break.
a
b
a
New copper packing
b
Screw lock agent or silicon sealant only on screw thread
5
Tighten the service port cap.
Also see
13.2.3
Tightening torques
Stop valve
size (mm)
Tightening torque N•m (turn clockwise to close)
Shaft
Valve cap
Packing
pressure
Valve stem
Valve core
cap
Ø15.9
38.2~46.6
7.4~9.0
13.2~16.0
14.2~17.2
Ø19.1
13.3
Connecting the refrigerant piping
DANGER: RISK OF BURNING/SCALDING
13.3.1
To remove the spun pipes
WARNING
Any gas or oil remaining inside the stop valve may blow off
the spun piping.
If these instructions are NOT followed correctly it may
result in property damage or personal injury, which may be
serious depending on the circumstances.
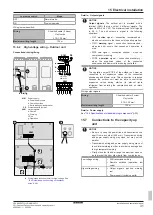
To remove the spun piping:
1
Open the stop valve cap, unlock the valve and check if the
valve is closed.
1
2
3
1
Open the stop valve cap (counterclockwise).
2
Unlock the valve (counterclockwise).
3
Close the valve (clockwise).
2
Open the service port cap slowly and check that there is no
pressure left.
3
Incrementally loosen the valve core to ensure that there is no
pressure left.
4
Cut off the lower part of the gas and liquid stop valve pipes
along the black line. Use only appropriate tools, such as a pipe
cutter or pair of nippers.
WARNING
Never remove the spun piping by brazing.
Any gas or oil remaining inside the stop valve may blow off
the spun piping.
INFORMATION
If the stop valve was initially open, a small amount of
refrigerant or oil may leak out.
5
Wait until all oil has dripped out before continuing with the
connection of the field piping in case the recovery was not
complete.
You can now connect the ingoing and outgoing refrigerant piping.
13.3.2
To connect the refrigerant piping to the
outdoor unit
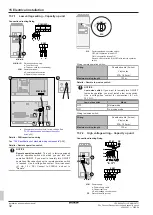
You can route refrigerant piping to the front or side of the unit.
Summary of Contents for LRYEN10A7Y1
Page 43: ......


