18 Troubleshooting
Installation and operation manual
37
LRYELRNUN5A7Y1
CO
₂
Conveni-Pack outdoor unit and capacity up unit
4P605461-1 – 2020.04
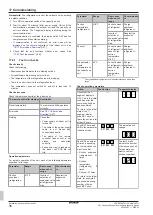
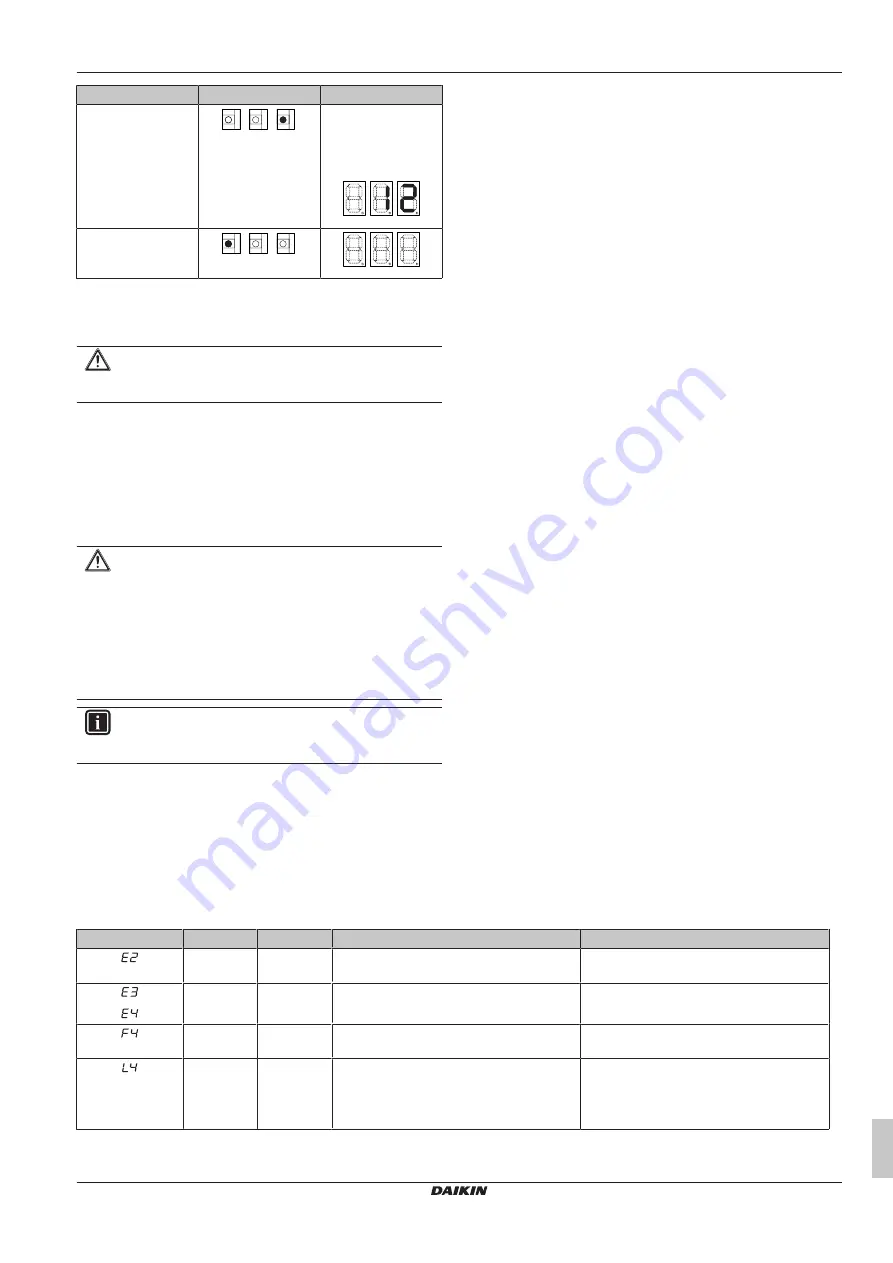
Action
Push button
7-segment display
Push BS3 once, and
indicate each of the
selected parameters.
BS1 BS2 BS3
MODEMODE
MODE
MODE
For example, 7-
segment displays 12
if suction superheat is
12.
Push BS1 once to
return to the initial
state.
BS1 BS2 BS3
MODEMODE
MODE
MODE
Check defrosting
Check if the indoor unit starts defrosting if the defrosting setting is
applied.
CAUTION
ALWAYS turn off the operation switch BEFORE turning off
the power supply.
17.4.2
Correcting after abnormal completion of
the test run
The test operation is only completed if there is no malfunction code
displayed on the user interface or outdoor unit 7‑segment display. In
case of a displayed malfunction code, perform correcting actions as
explained in the malfunction code table. Carry out the test operation
again and confirm that the abnormality is properly corrected.
CAUTION
After the refrigerant is fully charged, do NOT turn off the
operation switch and power supply of the outdoor unit. This
prevents the safety valve actuation due to an increase in
internal pressure under high ambient temperature
conditions.
When internal pressure rises, the outdoor unit can operate
by itself to reduce the internal pressure, even if no indoor
unit is operating.
INFORMATION
Refer to the installation manual of the indoor unit for
detailed malfunction codes related to indoor units.
17.5
Logbook
In accordance with the applicable legislation, the installer must
provide a logbook upon installation of the system. The logbook shall
be updated following any maintenance or repair of the system. In
Europe, EN378 provides the necessary guidance for this logbook.
Content of the logbook
The following information must be provided:
▪ Details of the maintenance and repair works
▪ Quantities and kind of (new, reused, recycled, reclaimed)
refrigerant which have been charged on each occasion
▪ Quantities of refrigerant which have been transferred from the
system on each occasion
▪ Results of any analysis of a reused refrigerant
▪ Source of reused refrigerant
▪ Changes and replacements of components of the system
▪ Results of all periodic routine tests
▪ Significant periods of non-use
Furthermore, you can add:
▪ Instructions for shutting down the system in case of an emergency
▪ Name and address of fire department, police and hospital
▪ Name, address and day and night telephone numbers for
obtaining service
Location of the logbook
The logbook shall either be kept in the machinery room, or the data
shall be stored digitally by the operator with a printout in the
machinery room, in which case the information shall be accessible to
the competent person when servicing or testing.
18
Troubleshooting
18.1
Solving problems based on error
codes
If the unit runs into a problem, the user interface displays an error
code. It is important to understand the problem and to take
measures before resetting an error code. This should be done by a
licensed installer or by your local dealer.
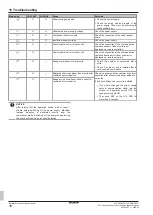
This chapter gives you an overview of all possible error codes and
their descriptions as they appear on the user interface.
For detailed troubleshooting of each error, see the service manual.
18.1.1
Error codes: Overview
In case other error codes appear, contact your dealer.
Main code
LRYEN10*
LRNUN5*
Cause
Solution
O
O
Electrical leakage
Correct the field wiring and connect ground
wiring.
O
—
The stop valves are closed
Open the stop valve on both the gas and
liquid side.
O
—
Wrong selection of cooling load (including the
expansion valves)
Reselect the cooling load, including the
expansion valve.
O
O
▪ Heat exchanger of outdoor unit is blocked.
▪ The outdoor temperature is above the
maximum operating temperature.
▪ Check if any obstacles block the heat
exchanger and remove them.
▪ Operate
the
unit
only
within
the
temperature operation range.
Summary of Contents for LRYEN10A7Y1
Page 43: ......


