5 Installation
Installation and operation manual
14
RKXYQ5T7Y1B
VRV IV compressor unit for indoor installation
4P408443-1 – 2015.07
b
Earth connection
c
Power supply wiring (including earth) (sheathed cable)
F1/F2
Transmission wiring (sh shielded cable)
d
Compressor unit
e
Heat exchanger unit
f
Indoor unit
g
User interface
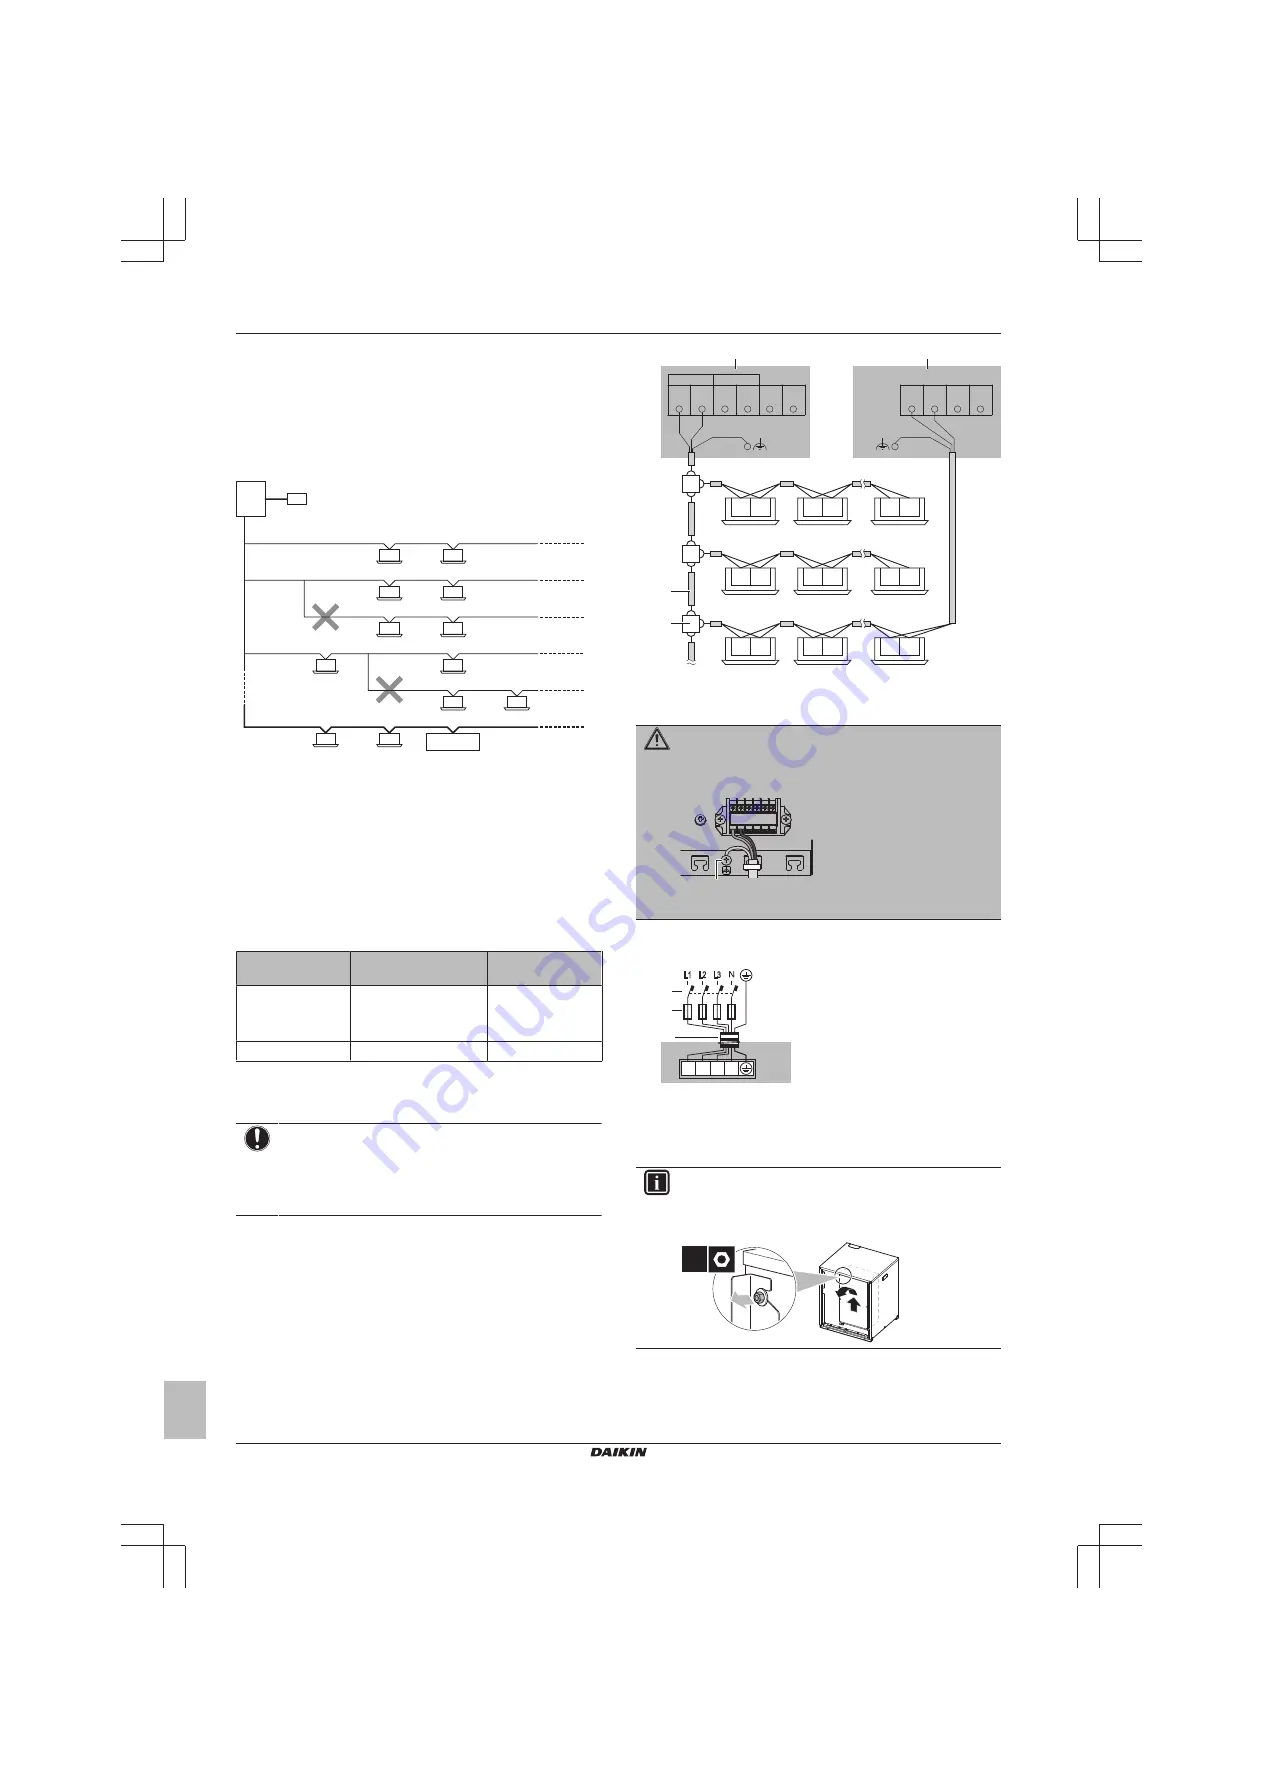
Branches
No branching is allowed after branching.
D
B
C
b2
b3
c1
c2
b1
a
A
A
Central user interface (etc...)
B
Compressor unit
C
Indoor unit
D
Heat exchanger unit
a
Main line. The main line is the line to which the
transmission wiring of the heat exchanger unit is
connected.
b1, b2, b3
Branch lines
c1, c2
No branch is allowed after branch
5.7.2
Guidelines when connecting the electrical
wiring
Tightening torques
Wiring
Screw size
Tightening torque
(N•m)
Power supply wiring
(power
shielded ground)
M5
2.0~3.0
Transmission wiring
M3.5
0.8~0.97
5.7.3
To connect the electrical wiring on the
compressor unit
NOTICE
▪ Follow the wiring diagram (delivered with the unit,
located on the switch box cover).
▪ Make sure the electrical wiring does NOT obstruct
proper reattachment of the service cover.
1
Remove the service covers of the compressor unit and the
switch box.
2
Connect the transmission wiring as follows:
F1 F2
F1 F2
F1 F2
F1 F2
F1 F2
F1 F2
F1 F2
F1 F2
F1 F2
d
X2M
X2M
TO OUT/D
TO IN/D
F1 F2
F1 F2
b
a
c
a
Compressor unit
b
Heat exchanger unit
c
Sh shielded cable (2 wires) (no polarity)
d
Terminal board (field supply)
WARNING
You must use shielded wire and connect the earth to the
transmission terminal.
X2M
F1 F2
a
a
Earth (use the screw delivered as accessory)
3
Connect the power supply as follows:
3N~ 50 Hz
380-415 V
L1 L2 L3
L1 L2 L3
N
X1M
a
b
c
a
Earth leakage circuit breaker
b
Fuse
c
Power supply cable
4
Route the wiring through the frame, and fix the cables (power
supply and transmission wiring) with cable ties.
INFORMATION
To make routing the wiring easier, you can turn the switch
box horizontally by loosening the screw on the left side of
the switch box.
1×


