SiBE341001
Field Setting from Outdoor Unit
Test Operation
86
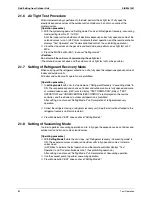
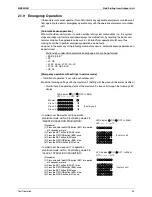
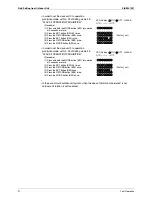
2.1.3 Cool/Heat Changeover Setting [For RQCEP Type]
z
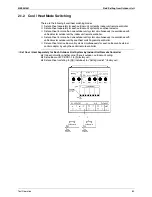
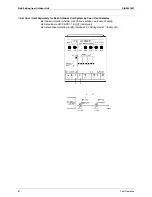
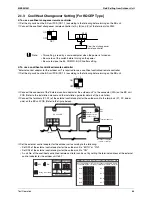
To use a cool/heat changeover remote controller
c
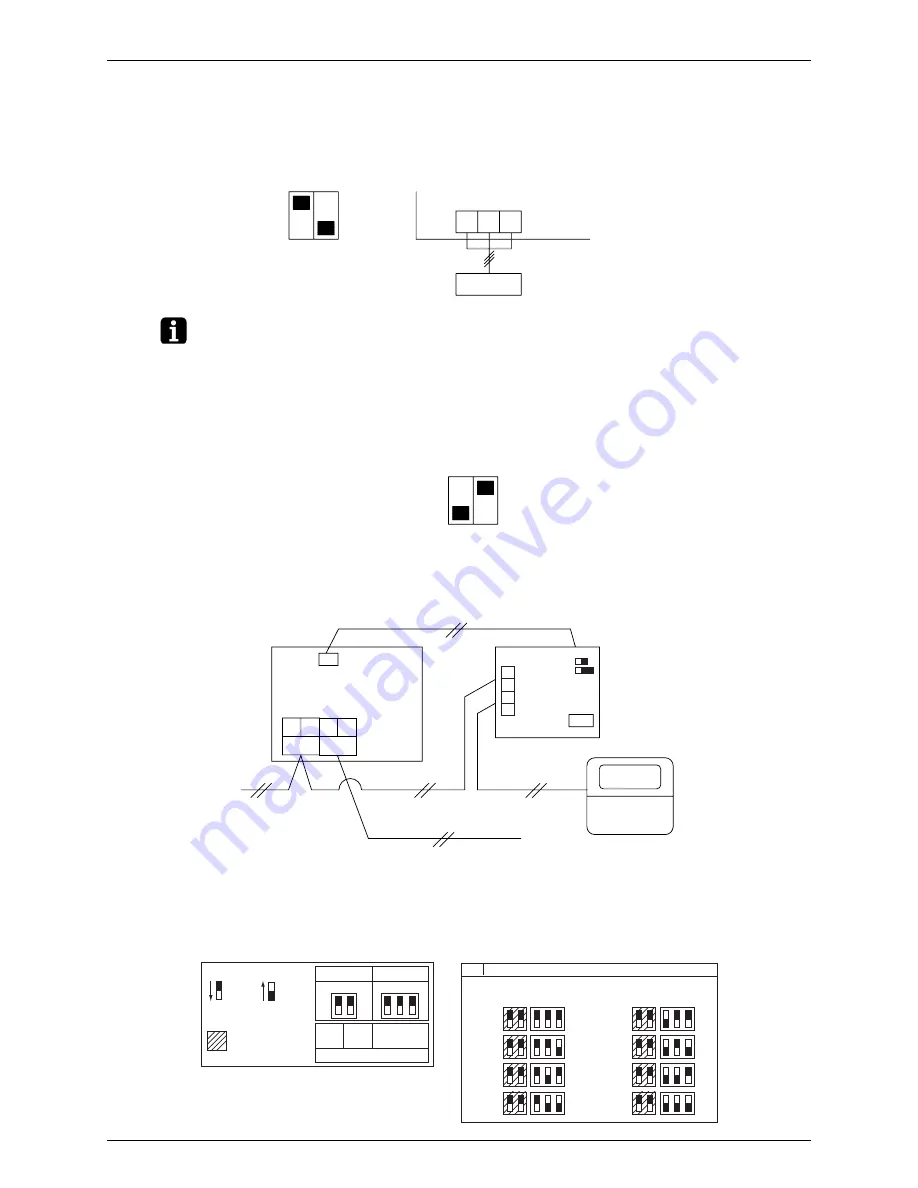
Set the dip switch on the BS unit PCB (DS 1-1) according to the following before turning on the BS unit.
d
Connect the cool/heat changeover remote controller to (A), (B) and (C) of the terminal strip X2M.
Note:
• This setting is read by a micro-computer when the power is turned on.
• Be sure to set the switch before turning on the power.
• Be sure to close the EL. COMPO. BOX lid after setting.
z
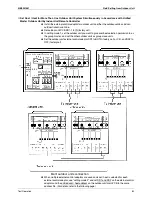
To use a cool/heat centralized remote controller
"External control adaptor for the outdoor unit" is required to use a cool/heat centralized remote controller.
c
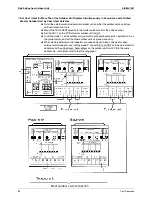
Set the dip switch on the BS unit PCB (DS 1-2) according to the following before turning on the BS unit.
d
Connect the connector of the "External control adaptor for the outdoor unit" to the connector (X2A) on the BS unit
PCB (Refer to the installation manual and the installation guide for details of the installation).
e
Connect the terminals (F1, F2) of the external control adaptor for the outdoor unit to the terminals (F1, F2: indoor
side) on the BS unit PCB (Refer to the figure below).
f
Set the external control adaptor for the outdoor unit according to the following:
• Set SS1 of the external control adaptor for the outdoor unit to "BOTH" or "C/H".
• Set SS2 of the external control adaptor for the outdoor unit to "ON".
• A unit No. of the cool/heat centralized remote controller can be set by setting the terminal address of the external
control adaptor for the outdoor unit to 0-7.
ON
OFF
DS1
1
2
X2M
A
B
C
Cool / heat changeover
remote controller
ON
OFF
DS1
1
2
F1 F2
X2A
Indoor
side
F1 F2
F1
Outdoor
side
BS unit PCB
Cool/heat centralized
remote controller
Terminal address
External control
adaptor for the
outdoor unit
SS1
SS2
(Note1)
F2
N
P
: OFF
: ON
DS1
: Set by other items
Higher 2 bits
Demand address
Cool/
heat
Central
No.
Terminal
address
Lower 3 bits
Fig.1
No.0
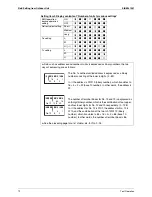
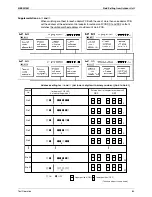
Setting lower 3 bits of the cool/heat address by DS1 and 2
DS2
No.1
No.2
No.3
No.4
No.5
No.6
No.7
Set the same No. (0-7) as the outdoor unit and BS unit
controlled by the cool/heat centralized remote controller
Summary of Contents for RQYQ140-180PY1
Page 216: ...Piping Diagrams SiBE341001 207 Appendix 1 2 BS Unit BSVQ100 160 250PV1 4D057985B...
Page 217: ...SiBE341001 Piping Diagrams Appendix 208 BSV4Q100PV1 3D064148...
Page 218: ...Piping Diagrams SiBE341001 209 Appendix BSV6Q100PV1 3D064149...
Page 220: ...Wiring Diagrams for Reference SiBE341001 211 Appendix 2 2 BS Unit BSVQ100 160 250PV1 3D055928C...
Page 221: ...SiBE341001 Wiring Diagrams for Reference Appendix 212 BSV4Q100PV1 3D063928B...
Page 222: ...Wiring Diagrams for Reference SiBE341001 213 Appendix BSV6Q100PV1 3D063929B...
Page 223: ...SiBE341001 Option List Appendix 214 3 Option List 3 1 Option Lists Outdoor Unit 3D066354...

