Installation manual
19
RX(Y)Q5-10-1 RXQ RXYQ
RXYHQ1 RX(Y)Q14~18P7W1BA
VRVIII System air conditioner
4PW48461-1
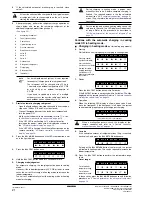
11.2. Precautions when adding R410A
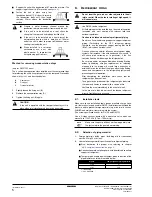
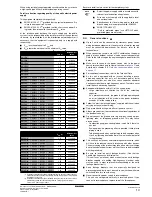
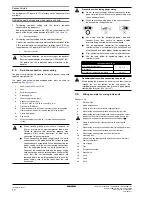
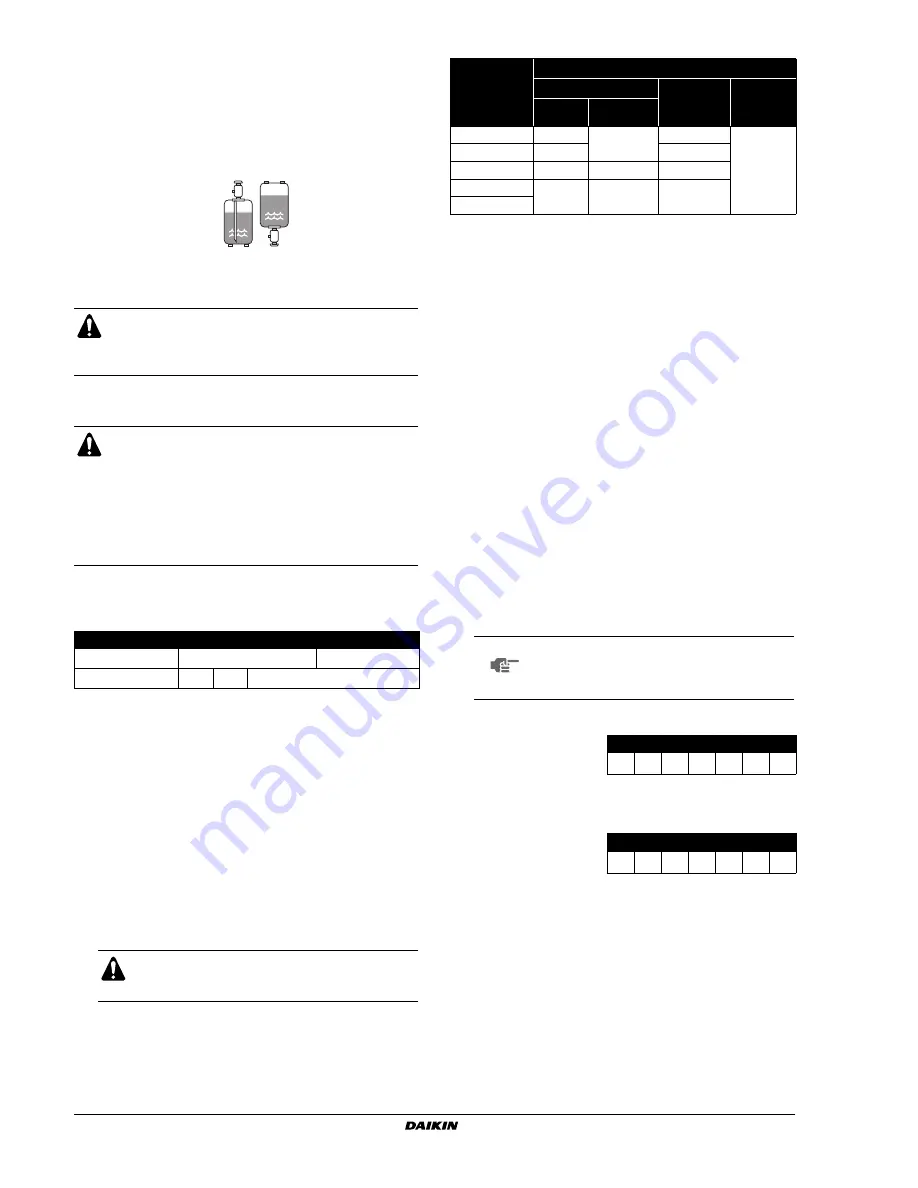
Be sure to charge the specified amount of refrigerant in liquid state to
the liquid pipe.
Since this refrigerant is a mixed refrigerant, adding it in gas form may
cause the refrigerant composition to change, preventing normal
operation.
■
Before charging, check whether the refrigerant cylinder is
equipped with a siphon tube or not.
■
Be sure to use tools exclusively for R410A to ensure required
pressure resistance and to prevent foreign materials from mixing
into the system.
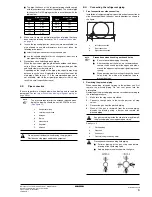
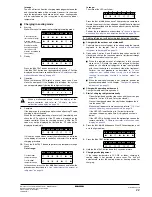
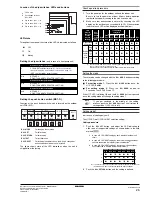
11.3. Stop valve operation procedure
Size of stop valve
The sizes of the stop valves connected to the system are as listed in
the table below.
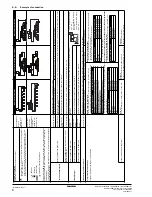
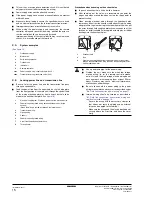
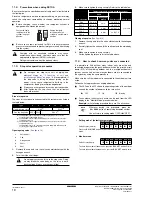
Opening stop valve
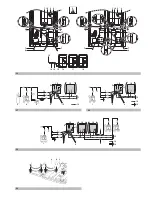
(See figure 14)
1.
Remove the cap and turn the valve counterclockwise with the
hexagon wrench.
2.
Turn it until the shaft stops.
3.
Make sure to tighten the cap securely. Refer to the table below
Closing stop valve
(See figure 14)
1.
Remove the cap and turn the valve clockwise with the hexagon
wrench.
2.
Securely tighten the valve until the shaft contacts the main body
seal.
3.
Make sure to tighten the cap securely.
For the tightening torque, refer to the table above.
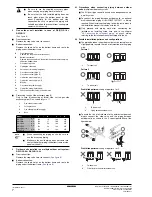
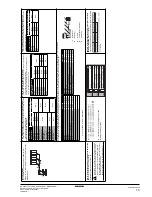
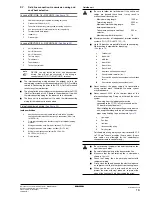
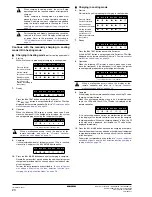
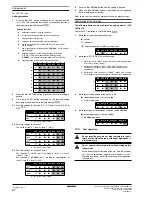
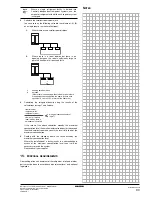
11.4. How to check how many units are connected
It is possible to find out how many indoor units are active and
connected by operating the push-button switch on the printed circuit
board (A1P) of the working outdoor unit. In a multiple outdoor unit
system, you can find out how many outdoor units are connected to
the system by using the same procedure.
Make sure that all the indoor units connected to the outdoor unit are
active.
Follow the 5-step procedure as explained below.
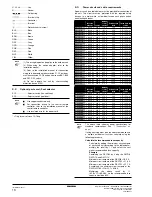
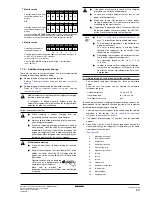
■
The LEDs on the A1P shows the operating status of the outdoor
unit and the number of indoor units that are active.
■
The number of units that are active can be read from the LED
display in the "Monitor Mode" procedure below.
Example: in the following procedure there are 22 units active:
Charge the liquid
refrigerant with the
cylinder in upright
position.
Charge the liquid
refrigerant with the
cylinder in up-side-down
position.
Charging with an unsuitable substance may cause
explosions and accidents, so always make sure that the
appropriate refrigerant (R410A) is charged.
Refrigerant containers must be opened slowly.
■
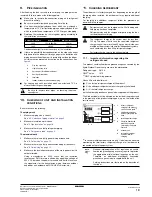
Do not open the stop valve until all piping and
electrical steps of
"10.
Checking of unit and
installation conditions" on page 18
are completed. If
the stop valve is left open without turning on the
power, it may cause refrigerant to build up in the
compressor, leading to insulation degradation.
■
Always use a charge hose for service port connection.
■
After tightening the cap, check that no refrigerant
leaks are present.
Type
5
8
10
12
14
16
18
Liquid line stop valve
Ø9.5
(a)
(a) The model RX(Y)Q12 + RXYHQ12 supports field piping of Ø12.7 on the
accessory pipe supplied with the unit.
Ø12.7
(b)
(b) The model RX(Y)Q18 supports field piping of Ø15.9 on the accessory pipe
supplied with the unit.
Gas line stop valve
Ø15.9 Ø19.1
Ø25.4
(c)
(c) The model RX(Y)Q10 supports field piping of Ø22.2 on the accessory pipe
supplied with the unit.
The model RX(Y)Q12~18 + RXYHQ12 supports field piping of Ø28.6 on the
accessory pipe supplied with the unit.
1
Service port
2
Cap
3
Hexagon hole
4
Shaft
5
Seal
Do not apply excessive force to the stop valve. Doing
so may break the valve body, as the valve is not a
backseat type. Always use the special tool.
Stop valve size
Tightening torque N•m (Turn clockwise to close)
Shaft
Cap (valve lid)
Service port
Valve body
Hexagonal
wrench
Ø9.5
5.4~6.6
4 mm
13.5~16.5
11.5~13.9
Ø12.7
8.1~9.9
18.0~22.0
Ø15.9
13.5~16.5
6 mm
23.0~27.0
Ø19.1
27.0~33.0
8 mm
22.5~27.5
Ø25.4
x
OFF
w
ON
c
Blinking
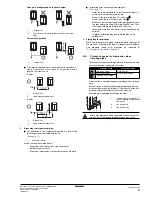
NOTE
Wherever during this procedure, press the
button if something becomes unclear.
You will return to setting mode 1 (H1P=
x
"OFF").
1
Setting mode 1 (default system status)
H1P
H2P
H3P
H4P
H5P
H6P
H7P
Default status (normal)
x
x w x
x
x
x
Press the
button to switch from setting mode 1 to monitor
mode.
2
Monitor mode
H1P
H2P
H3P
H4P
H5P
H6P
H7P
Default status display
c x
x
x
x
x
x
To check the number of indoor units, press the
button 5 times
To check the number of outdoor units, press the
button 8 times
BS1 MODE
BS1 MODE
BS2 SET
BS2 SET
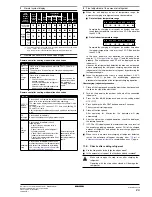
Summary of Contents for RXYHQ12P8W1B
Page 36: ...NOTES NOTES...
Page 38: ...4PW48461 1 Copyright Daikin...

