■
English
12
4.
Installing indoor unit
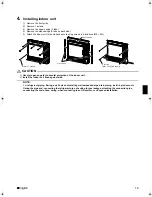
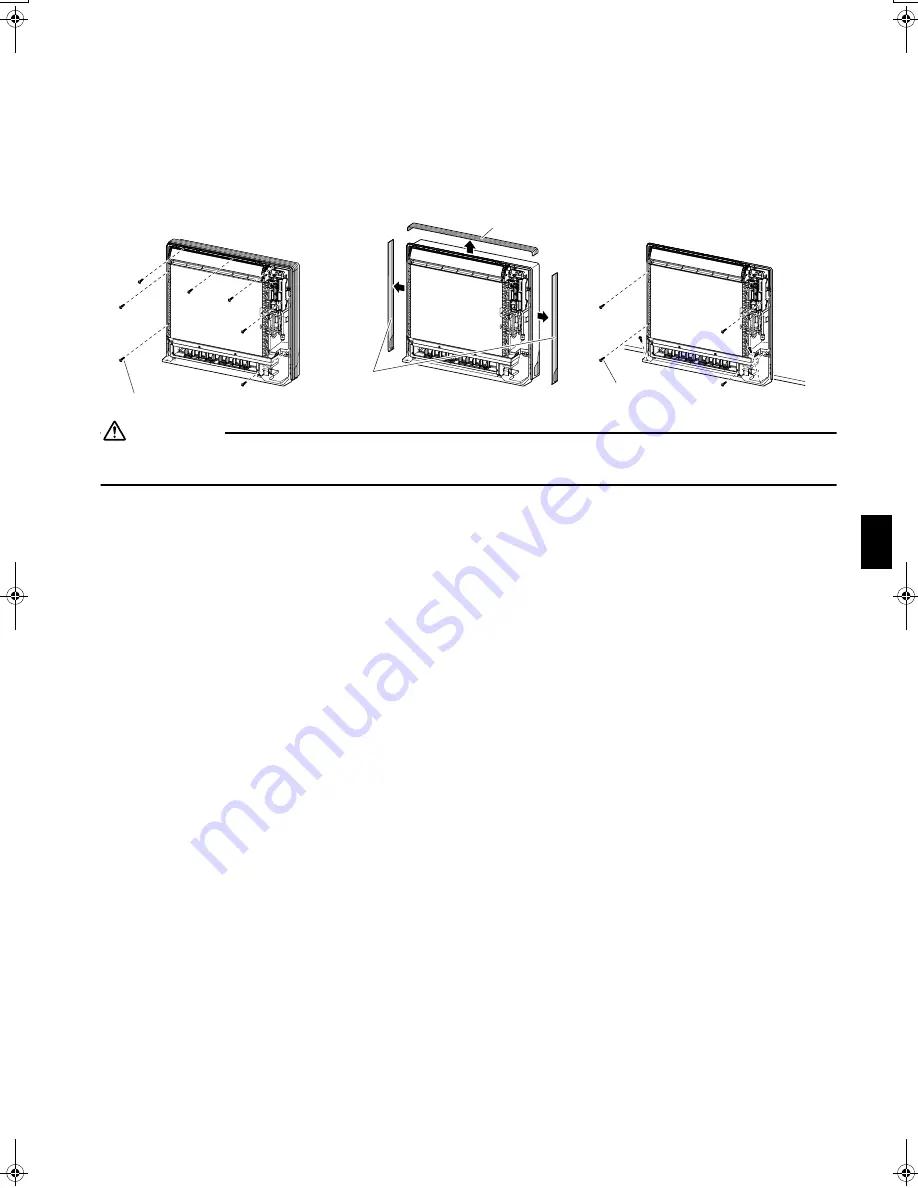
1) Remove the front grille.
2) Remove 7 screws.
3) Remove the upper casing (2 tabs).
4) Remove the side casings (2 tabs on each side).
5) Attach the indoor unit to the wall and secure using screws in 6 locations (M4 × 25L).
CAUTION
1)
Use drain pan edge for horizontal projection of the indoor unit.
2)
Install the indoor unit flush against wall.
NOTE:
For
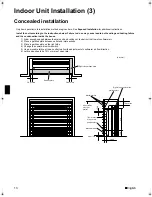
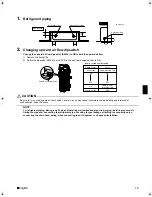
refrigerant piping, Boring a wall hole and installing wall embedded pipe, drain piping, installing indoor unit,
flaring the pipe end, connecting the refrigerant pipe, checking for gas leakage, attaching the connection pipe,
connecting the drain hose, wiring, when connecting to an HA system,
see
Exposed Installation
.
Side casing
Upper casing
Remove 7 screws.
6 screws
(M4 × 25L)(Field supply)
01_EN_3P191292-1E.fm Page 12 Monday, November 10, 2008 6:44 PM


