background image

2

 | 

General safety precautions

Installer and user reference guide

7

BS4~12A14AJV1B
VRV 5 branch selector unit
4P695527-1 – 2022.02

If

Then

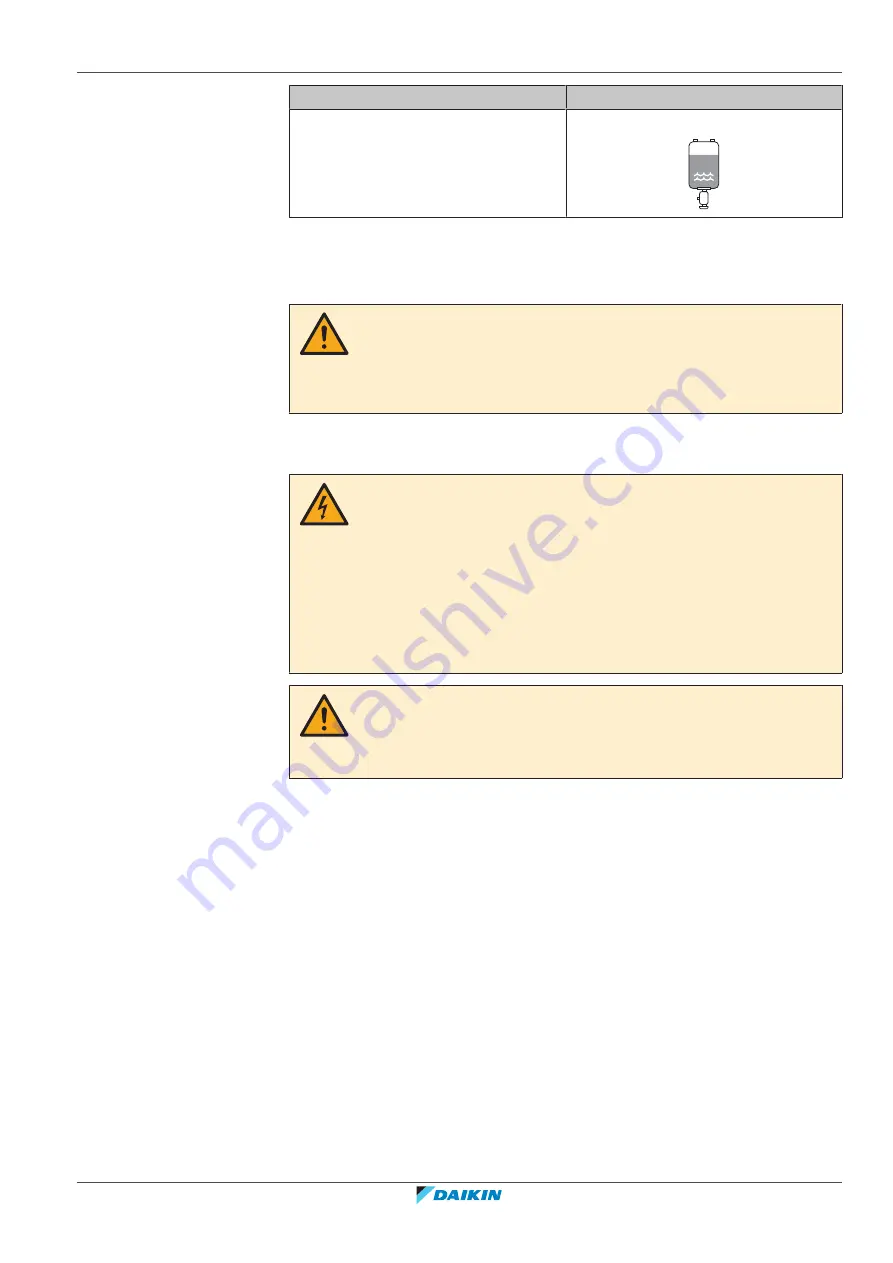
A siphon tube is NOT present

Charge with the cylinder upside down.

Open refrigerant cylinders slowly.

Charge the refrigerant in liquid form. Adding it in gas form may prevent normal
operation.

CAUTION

When the refrigerant charging procedure is done or when pausing, close the valve of
the refrigerant tank immediately. If the valve is NOT closed immediately, remaining
pressure  might  charge  additional  refrigerant. 

Possible  consequence: 

Incorrect

refrigerant amount.

2.1.4 Electrical

DANGER: RISK OF ELECTROCUTION

Turn  OFF  all  power  supply  before  removing  the  switch  box  cover,  connecting
electrical wiring or touching electrical parts.

Disconnect the power supply for more than 10 minutes, and measure the voltage
at  the  terminals  of  main  circuit  capacitors  or  electrical  components  before
servicing. The voltage MUST be less than 50 V DC before you can touch electrical
components. For the location of the terminals, see the wiring diagram.

Do NOT touch electrical components with wet hands.

Do NOT leave the unit unattended when the service cover is removed.

WARNING

If  NOT  factory  installed,  a  main  switch  or  other  means  for  disconnection,  having  a
contact  separation  in  all  poles  providing  full  disconnection  under  overvoltage
category III condition, MUST be installed in the fixed wiring.

Summary of Contents for VRV 5 BS10A14AJV1B

Page 1: ...Installer and user reference guide VRV 5 branch selector unit BS4A14AJV1B BS6A14AJV1B BS8A14AJV1B BS10A14AJV1B BS12A14AJV1B ...

Page 2: ...t you must read before installing Format Paper in the box of the BS unit BS unit installation and operation manual Installation and operation instructions Format Paper in the box of the BS unit Installer and user reference guide Preparation of the installation reference data Detailed step by step instructions and background information for basic and advanced usage Format Digital files on https www...

Page 3: ...in minor or moderate injury NOTICE Indicates a situation that could result in equipment or property damage INFORMATION Indicates useful tips or additional information Symbols used on the unit Symbol Explanation Before installation read the installation and operation manual and the wiring instruction sheet Before performing maintenance and service tasks read the service manual For more information ...

Page 4: ...l shock short circuit leaks fire or other damage to the equipment ONLY use accessories optional equipment and spare parts made or approved by Daikin WARNING Make sure installation testing and applied materials comply with applicable legislation on top of the instructions described in the Daikin documentation WARNING Tear apart and throw away plastic packaging bags so that nobody especially childre...

Page 5: ...wing places In potentially explosive atmospheres In places where there is machinery that emits electromagnetic waves Electromagnetic waves may disturb the control system and cause malfunction of the equipment In places where there is a risk of fire due to the leakage of flammable gases example thinner or gasoline carbon fibre ignitable dust In places where corrosive gas example sulphurous acid gas...

Page 6: ...than the specified amount of refrigerant When the refrigerant system is to be opened refrigerant MUST be treated according to the applicable legislation NOTICE Make sure refrigerant piping installation complies with applicable legislation In Europe EN378 is the applicable standard NOTICE Make sure the field piping and connections are NOT subjected to stress NOTICE After all the piping has been con...

Page 7: ...trical DANGER RISK OF ELECTROCUTION Turn OFF all power supply before removing the switch box cover connecting electrical wiring or touching electrical parts Disconnect the power supply for more than 10 minutes and measure the voltage at the terminals of main circuit capacitors or electrical components before servicing The voltage MUST be less than 50 V DC before you can touch electrical components...

Page 8: ... WARNING After finishing the electrical work confirm that each electrical component and terminal inside the electrical components box is connected securely Make sure all covers are closed before starting up the unit CAUTION When connecting the power supply connect the earth cable first before making the current carrying connections When disconnecting the power supply disconnect the current carryin...

Page 9: ...the radio waves a distance of 1 meter may NOT be sufficient NOTICE ONLY applicable if the power supply is three phase and the compressor has an ON OFF starting method If there exists the possibility of reversed phase after a momentary black out and the power goes ON and OFF while the product is operating attach a reversed phase protection circuit locally Running the product in reversed phase can b...

Page 10: ... open flames an operating gas appliance or an operating electric heater in the duct work WARNING The appliance shall be stored in a room without continuously operating ignition sources example open flames an operating gas appliance or an operating electric heater WARNING The fixing method of the unit MUST be in accordance with the instructions from this manual See 14 4 Mounting the unit 461 WARNIN...

Page 11: ... to refrigerant leakage Possible consequence asphyxiation suffocation and fire NEVER bend the branch and header pipes sticking out of the unit They have to remain straight ALWAYS support the branch and header pipes at a distance of 1 m from the unit WARNING Overheated insulation can start to burn Possible consequence fire When performing brazing work header or branch pipes cool all other header an...

Page 12: ...he power supply has a missing or wrong N phase equipment might break down Establish proper earthing Do NOT earth the unit to a utility pipe surge absorber or telephone earth Incomplete earthing may cause electrical shocks Install the required fuses or circuit breakers Secure the electrical wiring with cable ties so that the cables do NOT come into contact with sharp edges or piping particularly on...

Page 13: ... external switching device such as a timer or connected to a circuit that is regularly turned ON and OFF by the utility WARNING When carrying out an inspection on the switch box of the unit ALWAYS make sure that the unit is disconnected from the mains Turn off the respective circuit breaker When a safety device was activated stop the unit and find out why the safety device was activated before res...

Page 14: ...for or detection of refrigerant leaks NOTICE Take precautions to avoid excessive vibration or pulsation to refrigeration piping Protect the protection devices piping and fittings as much as possible against adverse environmental effects Provide space for expansion and contraction of long runs of piping Design and install piping in refrigerating systems such as to minimise the likelihood of hydraul...

Page 15: ...For the user Installer and user reference guide 15 BS4 12A14AJV1B VRV 5 branch selector unit 4P695527 1 2022 02 For the user ...

Page 16: ...years and above and persons with reduced physical sensory or mental capabilities or lack of experience and knowledge if they have been given supervision or instruction concerning use of the appliance in a safe way and understand the hazards involved Children SHALL NOT play with the appliance Cleaning and user maintenance SHALL NOT be made by children without supervision WARNING To prevent electric...

Page 17: ...bol this chemical symbol means that the battery contains a heavy metal above a certain concentration Possible chemical symbols are Pb lead 0 004 Waste batteries MUST be treated at a specialised treatment facility for reuse By ensuring waste batteries are disposed of correctly you will help to prevent potential negative consequences for the environment and human health 4 2 Instructions for safe ope...

Page 18: ...ance and service see 7 Maintenance and service 423 WARNING The unit is equipped with a refrigerant leak detection system for safety To be effective the unit MUST be electrically powered at all times after installation except for maintenance WARNING NEVER replace a fuse with a fuse of a wrong ampere ratings or other wires when a fuse blows out Use of wire or copper wire may cause the unit to break ...

Page 19: ...ther than those recommended by the manufacturer Be aware that the refrigerant inside the system is odourless WARNING The refrigerant inside the unit is mildly flammable but normally does NOT leak If the refrigerant leaks in the room and comes in contact with fire from a burner a heater or a cooker this may result in fire or the formation of a harmful gas Turn OFF any combustible heating devices ve...

Page 20: ...oting 425 WARNING Stop operation and shut OFF the power if anything unusual occurs burning smells etc Leaving the unit running under such circumstances may cause breakage electrical shock or fire Contact your dealer WARNING Make sure installation servicing maintenance repair and applied materials follow the instructions from Daikin and in addition comply with applicable legislation and are perform...

Page 21: ...e the unit MUST be electrically powered at all times after installation except for short service periods NOTICE Do NOT use the system for other purposes In order to avoid any quality deterioration do NOT use the unit for cooling precision instruments food plants animals or works of art NOTICE For future modifications or expansions of your system A full overview of allowable combinations for future...

Page 22: ...a qualified service person to perform this work NOTICE Turn ON the power 6 hours before operation in order to have power running to the crankcase heater and to protect the compressor This operation manual is for the following systems with standard control Before initiating operation contact your dealer for the operation that corresponds to your system type and mark If your installation has a custo...

Page 23: ...r or service agent We recommend performing maintenance at least once a year However applicable legislation might require shorter maintenance intervals Following symbols may occur on the indoor unit Symbol Explanation Measure the voltage at the terminals of main circuit capacitors or electrical components before servicing 7 2 Periodic check of the ventilated enclosure In case a ventilated enclosure...

Page 24: ...substances e g organic solvents hair spray paint in high concentrations in the close proximity of the BS unit because this may cause misdetection by the R32 refrigerant leakage sensor NOTICE Functionality of the safety measures are periodically automatically checked In case of malfunction an error code will be displayed on the user interface INFORMATION The sensor has a lifetime of 10 years The us...

Page 25: ...ate at all Check if there is no power failure Wait until power is restored If power failure occurs during operation the system automatically restarts immediately after power is restored Check if no fuse has blown or breaker is activated If necessary change the fuse or reset the breaker If the problem persists contact your installer If a refrigerant leak occurs error code Actions will be taken by t...

Page 26: ... starts working and makes the noise Its volume will reduce in about a minute A continuous low hissing sound is heard when the system is in cooling or defrost operation This is the sound of refrigerant gas flowing through the BS unit A hissing sound originating from the 4 way valve in the outdoor unit which is heard at the start or immediately after stopping operation or defrost operation or when s...

Page 27: ... Installer and user reference guide 27 BS4 12A14AJV1B VRV 5 branch selector unit 4P695527 1 2022 02 9 Relocation Contact your dealer to remove and reinstall the entire unit Moving units requires technical expertise ...

Page 28: ... is required by law to collect transport and discard the refrigerant in accordance with the hydrofluorocarbon collection and destruction regulations NOTICE Do NOT try to dismantle the system yourself dismantling of the system treatment of the refrigerant oil and other parts MUST comply with applicable legislation Units MUST be treated at a specialised treatment facility for reuse recycling and rec...

Page 29: ...For the installer Installer and user reference guide 29 BS4 12A14AJV1B VRV 5 branch selector unit 4P695527 1 2022 02 For the installer ...

Page 30: ...o bring the unit to its final installation position In this chapter 11 1 To handle the unit 30 11 2 To unpack the unit 32 11 3 To remove the accessories 36 11 1 To handle the unit For easier manual carrying of the BS6 12A only cut the 2 middle straps to remove the pallet while keeping the unit in its cardboard packaging When handling the unit take into account the following Fragile handle the unit...

Page 31: ...s in the cardboard For the BS10 12A units it is advised to lift with more than 2 people When moving the unit carry it slowly After unpacking lift the unit via the hanger brackets Do not exert any pressure on other parts especially not on the refrigerant piping and drain piping For the BS10 12A units it is advised to lift with more than 2 people ...

Page 32: ...box Installer and user reference guide 32 BS4 12A14AJV1B VRV 5 branch selector unit 4P695527 1 2022 02 11 2 To unpack the unit For BS4A 1 Cut and remove the straps 2 Remove the box parts as indicated in the picture ...

Page 33: ...11 About the box Installer and user reference guide 33 BS4 12A14AJV1B VRV 5 branch selector unit 4P695527 1 2022 02 For BS6 12A 3 Cut and remove the inner straps ...

Page 34: ...the box Installer and user reference guide 34 BS4 12A14AJV1B VRV 5 branch selector unit 4P695527 1 2022 02 4 Remove the pallet 5 Cut and remove the outer straps 6 Remove the box parts as indicated in the picture ...

Page 35: ...11 About the box Installer and user reference guide 35 BS4 12A14AJV1B VRV 5 branch selector unit 4P695527 1 2022 02 ...

Page 36: ...sulation tube for stopper pipe Ø9 5 mm 3 for BS4A 1 for BS6 12A i Insulation tube for stopper pipe Ø15 9 mm 4 for BS4A 2 for BS6 12A j Insulation tube for stopper pipe Ø22 2 mm k Tie wraps 8 for BS4A 11 for BS6 12A l Duct closing plate m Stopper pipe Ø9 5 mm 3 for BS4A 1 for BS6 12A n Stopper pipe Ø15 9 mm 4 for BS4A 2 for BS6 12A o Stopper pipe Ø22 2 mm p Liquid header reducer pipe Ø15 9 9 5 mm q...

Page 37: ...ication NOTICE When installing or servicing several units at the same time make sure NOT to switch the service panels between different models 12 1 1 Identification label BS unit Location 12 2 About the operation range INFORMATION For the operation limits see 14 1 1 Installation site requirements of the unit 455 12 3 System layout WARNING The installation MUST comply with the requirements that app...

Page 38: ...mation about an option see the installation and operation manual of the option Duct connection kit EKBSDCK This kit is required when you install ducting on the air inlet side See the examples in 14 2 Possible configurations 459 and 14 5 1 To install the ducting 465 This kit can also be used when measuring the airflow See 18 3 3 About measuring the airflow rate 4103 Joint kit EKBSJK This kit is req...

Page 39: ...t 4P695527 1 2022 02 c c c a e d b c c c b b b c c c BS4 12A X1M X15A X3M X3 4M X3 4 5M X2M BS10 12A BS6 12A BS4 12A f g a Power supply for the BS unit b Transmission wiring c Cable tie d Power supply of the drain up kit e Relay harness of the drain up kit f Relay connector of the drain up kit g Ferrite core ...

Page 40: ...BS unit are explained in more detail below If they are followed no additional safety measures for the BS unit are required Carefully follow the installation requirements for the BS unit as explained in this manual Follow the installation requirements described in the outdoor unit and indoor unit installation and operation manuals to ensure that the complete system is compliant with legislation Out...

Page 41: ...the occupied space make sure that the piping is protected against accidental damage Piping should be checked according to procedure as mentioned in the installation and operation manual delivered with the outdoor unit 13 3 To determine the required safety measures Step 1 Determine the total amount of refrigerant in the system See the installation and operation manual delivered with the outdoor uni...

Page 42: ...in At least 50 of Anvmin is less than 200 mm above the floor The bottom of the lower opening is 100 mm from the floor The height of the opening is 20 mm For the upper opening It is not an opening to the outside The opening cannot be closed The opening must be 0 006 m 50 of Anvmin The bottom of the upper opening must be 1500 mm above the floor The height of the opening is 20 mm Note The requirement...

Page 43: ... c External alarm d m kg Amin m All other floors a All other floors a Lowest under ground floor b No safety measure c No safety measure c External alarm d 5 16 15 16 35 207 104 207 6 23 18 23 36 213 107 213 7 31 21 31 37 219 110 219 8 41 24 41 38 225 113 225 9 51 27 51 39 231 115 231 10 59 30 59 40 237 118 237 11 65 33 65 41 243 121 243 12 71 36 71 42 249 124 249 13 77 38 77 43 127 14 83 41 83 44 ...

Page 44: ... FLOORS LOWEST UNDERGROUND FLOOR The graphs and table are based on an installation height of the BS unit between 1 8 m and 2 2 m The installation height is the height of the bottom of the BS unit to the floor See also 14 1 1 Installation site requirements of the unit 455 If the installation height is more than 2 2 m different boundaries for the applicable safety measures can apply To know which sa...

Page 45: ... When the room area is sufficiently large no safety measures are required This also includes a BS unit installed in the lowest underground floor The duct connection must be replaced with the duct closing plate accessory see 14 5 2 To install the duct closing plate 466 BS unit test run Before BS unit operation it is required to perform a test run that simulates a refrigerant leak See 18 3 BS unit t...

Page 46: ...a refrigerant leak is detected in any BS unit of the system Note An address number for the supervisor remote controller must be assigned to the BS unit See 17 1 Making field settings 491 When the R32 sensor in the BS unit detects a refrigerant leak the SVS output will close and activates the alarm An error message will display on the remote controllers of the connected indoor units See 20 Troubles...

Page 47: ...ll a non return valve grill filter or other component in the evacuation duct Extraction fan The extraction fan must have a CE marking and cannot act as an ignition source during normal operation Example Brushed DC motors cause sparks and are not allowed Fan power must be lower than 2 5 kVA Replacement air Make sure that sufficient replacement air is available for the extraction of a refrigerant le...

Page 48: ...designing the evacuation channel in order to account for tolerances on parts dirt and dust building up in the evacuation channel over time etc Note The internal pressure of the BS unit should not be more than 350 Pa below the pressure of the surroundings Write down the pressure drop generated by all the components in the evacuation channel for the selected airflow rate For the BS unit use the curv...

Page 49: ...250 300 50 P OUT Pa AFR OUT m h 47 5 115 Use the curves with instructions how to read them of the manufacturer of the components to find the pressure drop generated by all components in the ductwork A conversion of units might be required Beware that for ducting the pressure drop from the manufacturer might be given per unit length of ducting units are for example Pa m Multiply this value by the d...

Page 50: ...ing field settings 491 Multiple BS units in parallel 1 extraction fan In this configuration multiple parallel BS units are connected to a single extraction fan Each BS unit benefits from a direct airflow path to the extraction fan In case of a refrigerant leak in any BS unit the damper of that BS unit will open and allow direct air evacuation to the extraction fan The dampers of the other BS units...

Page 51: ...n 0 default parallel 2 4 Safety measures 1 default enable 2 7 Ventilated enclosure 1 default enable a Assign a unique cluster number to each cluster in the system All BS units in the same cluster MUST have the same cluster number Note Some field settings need to be made on all main PCBs A1P A2P and A3P of the same BS unit For more information see 17 1 Making field settings 491 Multiple BS units in...

Page 52: ...Before BS unit operation it is required to perform a test run that simulates a refrigerant leak See 18 3 BS unit test run 4101 for more details Field settings Multiple BS units in series 1 extraction fan Code Description Value 2 0 Cluster indication 1 enable 2 1 Cluster number a 2 2 Cluster configuration 1 series 2 4 Safety measures 1 default enable 2 7 Ventilated enclosure 1 default enable a Assi...

Page 53: ...onfiguration 0 default parallel 1 series 2 4 Safety measures 1 default enable 2 7 Ventilated enclosure 1 default enable Note Some field settings need to be made on all main PCBs A1P A2P and A3P of the same BS unit For more information see 17 1 Making field settings 491 Example It is not allowed to combine parallel and series configurations within the same cluster a B A a a b a BS unit b Extraction...

Page 54: ...Value 2 0 Cluster indication 1 enable 2 1 Cluster number 1 2 2 Cluster configuration 0 default parallel 2 4 Safety measures 1 default enable 2 7 Ventilated enclosure 1 default enable BS units c without safety measures Code Description Value 2 0 Cluster indication 0 default disable 2 4 Safety measures 0 disable BS units d with external alarm safety measure Code Description Value 2 0 Cluster indicat...

Page 55: ...lation location with sufficient space to transport the unit in and out of the site Avoid installation in an environment with a lot of organic solvents such as ink and siloxane Do NOT install the unit in places often used as work place In case of construction works e g grinding works where a lot of dust is created the unit MUST be covered WARNING The appliance shall be stored in a room without cont...

Page 56: ...RMATION Equipment meets the requirement for commercial and light industrial location when professionally installed and maintained INFORMATION The sound pressure level is less than 70 dBA INFORMATION Also read the general installation site requirements See the 2 General safety precautions 44 chapter INFORMATION Also read the following requirements Service space requirements See below in this topic ...

Page 57: ...th between the BS unit and the indoor unit 5 m c a b b a a BS unit b Indoor unit c Sound insulation field supply Drainage Make sure condensation water can be evacuated properly Drain pipe length Keep drain piping as short as possible Drain pipe size Keep the pipe size equal to or greater than that of the connecting pipe vinyl pipe of 20 mm nominal diameter and 26 mm outer diameter Bad odours To pr...

Page 58: ...coming from or going to another BS unit drain piping and ducting d Minimum connection space for the refrigerant piping to the indoor units e False ceiling f False ceiling opening g Floor surface Ceiling strength Check whether the ceiling is strong enough to support the weight of the unit If there is a risk reinforce the ceiling before installing the unit For existing ceilings use anchors For new c...

Page 59: ...200 mm BS6 8A 1600 mm BS10 12A 14 2 Possible configurations Refrigerant piping A B b a a a 1 2 1 2 b a a a C b b A Refrigerant piping connected to left side only B Refrigerant piping connected to right side only C Refrigerant piping connected to both sides flow through 1 From outdoor or from BS unit 2 From outdoor or from to BS unit a Stopper pipes accessory b Field piping field supply ...

Page 60: ... ducting on the air outlet side B Reversed flow Ducting on both sides C No extraction ventilation installed 1 To extraction fan or another BS unit 2 From another BS unit a Duct field supply b EKBSDCK option kit c Duct closing plate accessory In case you need to reverse the airflow switch the air inlet and outlet side See 14 5 3 To switch the air in and outlet side 467 INFORMATION Some options may ...

Page 61: ...ttended when the service cover is removed 14 3 2 To close the unit 2 1 3 SW8 3 2 N m 14 4 Mounting the unit 14 4 1 To mount the unit INFORMATION Optional equipment When installing optional equipment also read the installation manual of the optional equipment Depending on the field conditions it might be easier to install the optional equipment first 1 Install 4 M8 or M10 suspension bolts into the ...

Page 62: ... the suspension bolts in between the 2 washers a b b d c a Nut field supply b Washer field supply c Hanger bracket d Double nut field supply a b c e d a Ceiling slab b Anchor bolt c Long nut or turnbuckle d Suspension bolt e BS unit 4 Secure the unit by tightening the nut and double nut 5 Level the unit at all 4 corners by turning the double nuts the long nuts or the turnbuckles Use a level or wat...

Page 63: ...e drain hose might cause leaks and damage the installation space and surroundings 1 Push the drain hose as far as possible over the drain pipe connection 1 a b a Drain pipe connection attached to the unit b Drain hose accessory 2 Position the metal clamp around the drain hose as close to the unit as possible 3 Tighten the metal clamp and bend the tip of the metal clamp so that the large self adhes...

Page 64: ...leaks Close the inspection hole 5 Wind the large self adhesive sealing pad accessory around the metal clamp and drain hose Note Start on the screw part of the metal clamp work your way around the clamp and end overlapping your starting point 5 b a c d a Drain pipe connection attached to the unit b Drain hose accessory c Metal clamp accessory d Large self adhesive sealing pad accessory 6 Connect th...

Page 65: ...h or metal plate of the wooden structure separate the duct and wall electrically 1 Connect the air outlet Position a 160 mm duct of at least 1 m over the unit duct connection Fix the duct to the duct connection with minimum 3 screws Follow the instructions of the duct manufacturer for other connections Install the first meter of the air outlet duct after the unit in such a way that it does not slo...

Page 66: ...ly e Insulation field supply f Sealing material accessory g Screw field supply 4 Protect the ducting against reverse airflow from wind 5 Prevent that animals debris and dust can enter the ducting 6 If necessary separate the duct and wall electrically 7 Optionally provide service holes in the ducting to make maintenance easier 8 Optionally provide sound insulation As the ducting is only used when a...

Page 67: ...ch box 1 Open the BS unit See 14 3 1 To open the unit 461 2 Remove the 4 screws 3 Store the screws in a safe place 4 Loosen the M8 bolts 2 turns without removing them 5 Lift the switch box pull it forward and lower it 4 SW8 2 2 SW13 To remove the damper 1 Remove the leftmost wire fixing plate It holds the damper wire in place Loosen the screws lightly without removing them Slide and lift the plate...

Page 68: ... earth wire Store the screw in a safe place Cut the cable ties that fix the damper wire to the pipe and the one that bundles the damper wire a b b b a Damper wire b Cable ties 3 Remove the damper Remove the 4 screws Store the screws in a safe place Pull the damper from the unit Do not use excessive force as the wires on the back of the damper can get stuck inside the unit Carefully guide the wires...

Page 69: ...H2 SW8 τ 3 2 N m a Screw b Damper c Damper wire To remove the duct connection 1 Remove the 4 screws 2 Store the screws in a safe place 3 Pull the duct connection from the unit 4 PH2 SW8 To install the duct connection 1 Position the duct connection onto the other side of the unit 2 Attach the duct connection with 4 screws 4 PH2 SW8 3 2 N m ...

Page 70: ...t Pull the wires through until the foam insulation fits properly in the small hole in the unit s metal plate This makes the connection airtight Attach the damper with 4 screws 4 PH2 SW8 3 2 N m a b b b b c 1 2 a Damper wire b Screw c Damper 2 Connect the damper wires a b c 1 PH2 1 7 N m a Connector b Earth wire screw c Damper earth wire Connect the damper wire to the intermediate connector Positio...

Page 71: ...e over the screws and slide it in place Make sure the backside is aligned properly with the insulation of the switch box in order to make it airtight Tighten the 2 screws PH2 SW8 1 2 3 2 N m 2 2 4 Attach the damper wires Attach the damper wire on the refrigerant piping in the indicated places Make sure the wire is tight but do not pull on it excessively Leave 20 cm of wire between the fixation on ...

Page 72: ...fix damper wire to piping field supply c Tie wrap to bundle the damper wire field supply d Leftmost wire fixing plate To re install the switch box 1 Lift the switch box slide it backwards and lower it a short distance 2 Install and tighten the 4 screws It is not required to tighten the M8 bolts again 4 SW8 3 2 N m 3 Close the BS unit See 14 3 2 To close the unit 461 ...

Page 73: ...nt piping 75 15 3 1 To connect the refrigerant piping 75 15 3 2 To braze the pipe end 76 15 3 3 Joining branch pipe ports 77 15 4 To insulate the refrigerant piping 78 15 1 Installation limitations The illustration and table below show the installation limitations g a f e b c g g d g g g g g g a b See table below c Maximum limit of 16 downstream ports of BS units in refrigerant flow through Unused...

Page 74: ...ndex of indoor units connected to BS units in refrigerant flow through c 750 Maximum number of ports of BS units in refrigerant flow through c 16 Maximum number of indoor units connected to BS units in refrigerant flow through c 64 15 2 Preparing refrigerant piping 15 2 1 Refrigerant piping requirements NOTICE The piping and other pressure containing parts shall be suitable for refrigerant Use pho...

Page 75: ...oam as insulation material with a heat transfer rate between 0 041 and 0 052 W mK 0 035 and 0 045 kcal mh C with a heat resistance of at least 120 C Insulation thickness Ambient temperature Humidity Minimum thickness 30 C 75 to 80 RH 15 mm 30 C 80 RH 20 mm 15 3 Connecting the refrigerant piping 15 3 1 To connect the refrigerant piping e e b a d c g h e f f f f f f f a BS unit b Liquid pipe field s...

Page 76: ...ng Prerequisite Remove the yellow paper from around the header pipes to avoid fire during brazing 1 Connect the header pipes to the appropriate field supply pipes The type of pipe is indicated on the removed yellow paper Use a reducing joint accessory if the field supply pipe size does not match the header pipe size of the BS unit The diameters of the header pipes of the BS unit are Liquid pipe 15...

Page 77: ...anti oxidants when brazing pipe joints Residue can clog pipes and break equipment Do NOT use flux when brazing copper to copper refrigerant piping Use phosphor copper brazing filler alloy BCuP which does NOT require flux Flux has an extremely harmful influence on refrigerant piping systems For instance if chlorine based flux is used it will cause pipe corrosion or in particular if the flux contain...

Page 78: ...nit f Adherence surface To insulate the header and branch pipes standard insulation The header pipes and branch pipes MUST be insulated field supply Make sure that the insulation is properly mounted over the header and branch pipes of the unit as shown in the image below Always use tape field supply to prevent air gaps in the seam between the insulation tubes b e c a d a Insulation tube field supp...

Page 79: ...revent air gaps in the seam between the insulation tubes e d d a b c f a Insulation tube extra thick field supply b Tape field supply c Insulation tube BS unit d Adherence surface e BS unit f Insulation tube for levelling out thickness field supply 1 Install an insulation tube a over the pipe and against the insulation tube c on the BS unit 2 Attach an extra layer of insulation tube f to level out...

Page 80: ... of the following stages 1 Making sure the power supply system complies with the electrical specifications of the units 2 Connecting the electrical wiring to the outdoor unit 3 Connecting the electrical wiring to the BS units 4 Connecting the electrical wiring to the indoor units 5 Connecting the main power supply 16 1 1 Precautions when connecting the electrical wiring DANGER RISK OF ELECTROCUTIO...

Page 81: ...ace redundant cable length into the unit INFORMATION Also read the precautions and requirements in the general safety precautions chapter in the installer and user reference guide 16 1 2 Specifications of standard wiring components Field wiring consists of power supply wiring including earth DIII transmission wiring between units NOTICE Keep the power line and transmission line apart from each oth...

Page 82: ...sheath or cables 2 core wires Maximum wiring length between BS unit and indoor units 1000 m Maximum wiring length between BS unit and outdoor unit 1000 m Maximum wiring length between BS units 1000 m Total wiring length 2000 m a If the total transmission wiring exceeds these limits communication errors might occur Up to 16 branches are possible for unit unit cabling No secondary branchings are all...

Page 83: ... a a Stranded conductor wire b Round crimp style terminal Use the following methods for installing wires Wire type Installation method Single core wire c b c a a A AA A a Curled single core wire b Screw c Flat washer Stranded conductor wire with round crimp style terminal c b b a c a B B a Terminal b Screw c Flat washer Allowed NOT allowed Tightening torques Terminal Wiring Screw size Tightening t...

Page 84: ...f multiple BS units in the system that are connected to the same transmission wiring branch line connect the terminals F1 F2 BS unit on terminal block X2M of the first BS unit to the terminals F1 F2 Outdoor unit on terminal block X2M on the second BS unit Repeat the same procedure for further BS units where each time the terminals F1 F2 BS unit on terminal block X2M on the nth BS unit are connecte...

Page 85: ...nch pipe B of BS unit 1 C Indoor unit C connected to joint branch pipes C and D of BS unit 1 The F1 F2 terminals of the indoor unit only have to be connected to 1 of the 2 F1 F2 terminals inside BS unit 1 Note The DIP switches of each control PCB in the BS unit switch box have to be set accordingly to the transmission wiring See 16 4 To set the DIP switches 487 4 Connect the power supply as follow...

Page 86: ...et lower than the fixation point MAX Leave sufficient spare cable 20 cm additionally for all cables between the fixation point inside the switch box and the fixation point on the side of the BS unit This spare cable is required to lower the switch box a b c a Spare cable b Switch box in upper position c Switch box in lower position 6 Reattach the service cover See 14 3 2 To close the unit 461 CAUT...

Page 87: ... DIP switches To set the DIP switches for branch pipe ports to which NO indoor unit is connected Setting for branch pipe ports to which NO indoor unit is connected a DS1 A1P DS1 A2P DS1 A3P 1 2 3 4 1 2 3 4 1 2 3 4 BS4A Unit A Unit B Unit C Unit D BS6A Unit E Unit F BS8A Unit G Unit H BS10A Unit I Unit J BS12A Unit K Unit L Target branch pipe port a ON NOT connected OFF connected factory default Ex...

Page 88: ...B and D but NOT connecting an indoor unit to branch pipe port C ON DS1 A1P OFF 1 2 3 4 ON DS2 A1P OFF 1 2 3 4 2 When joining branch pipe ports A and B Connecting an indoor unit to the joined branch pipe ports A and B also to branch pipe port C but NOT connecting an indoor unit to branch pipe port D ON DS1 A1P OFF 1 2 3 4 ON DS2 A1P OFF 1 2 3 4 16 5 To connect the external outputs FAN output extrac...

Page 89: ...he BS unit The SVS output must be used when an external alarm is required see 13 3 To determine the required safety measures 441 FAN 1 2 b SVS 1 2 X6M a a SVS output terminals 1 and 2 b Cable to external alarm circuit NOTICE The SVS output is a potential free contact with a limited capacity of 220 240 V AC 0 5 A Do NOT directly use the SVS contact in the alarm circuit Instead use the SVS contact i...

Page 90: ...ion Installer and user reference guide 90 BS4 12A14AJV1B VRV 5 branch selector unit 4P695527 1 2022 02 c b c a BS4 12A X1M X6M a Power supply cable field supply b Output cable FAN cable shown field supply c Tie wrap accessory ...

Page 91: ...omponents Push buttons to give input to the PCB A display to read feedback from the PCB DIP switches Mode 1 and 2 Mode Description Mode 1 monitoring settings Mode 1 can be used to monitor the current situation of the BS unit Mode 2 field settings Mode 2 is used to change the field settings of the system Consulting the current field setting value and changing the current field setting value is poss...

Page 92: ... defined as Mode Setting Value Example Description Default situation Mode 1 Mode 2 Setting 8 in mode 2 Value 4 in mode 2 17 1 4 To access mode 1 or 2 Initialisation default situation NOTICE Turn ON the power 6 hours before operation in order to have power running to the crankcase heater and to protect the compressor Turn on the power supply of the BS unit outdoor unit and all indoor units When the...

Page 93: ...cess push BS1 to return to the default situation no indication on 7 segment displays blank see 17 1 4 To access mode 1 or 2 492 17 1 5 To use mode 1 Mode 1 is used to set basic settings and to monitor the status of the unit What How Changing and accessing the setting in mode 1 1 Push BS1 1 time to select mode 1 2 Push BS2 to select the required setting 3 Push BS3 1 time to access the selected sett...

Page 94: ...alue To quit and return to the initial status Push BS1 Changing the value of the selected setting in mode 2 Push BS1 for more than 5 seconds to select mode 2 Push BS2 to select the required setting Push BS3 1 time to access the selected setting s value Push BS2 to select the required value of the selected setting Push BS3 1 time to validate the change Push BS3 again to start operation with the cho...

Page 95: ...fter the end of the sensor lifetime For more information see the reference guide of the user interface and contact your dealer 17 1 8 Mode 2 field settings 2 0 Setting to define if the BS unit belongs to a cluster or not In case the BS unit belongs to a parallel or series cluster this setting has to be put on 1 to enable it See 13 4 3 Ventilated enclosure 446 This setting must be configured on all...

Page 96: ... if safety measures are required ventilated enclosure or external alarm Choose value 0 if no safety measures are required See 13 3 To determine the required safety measures 441 In case of 0 the output of the R32 sensor in the BS unit will be ignored and there is no system response in case of a refrigerant leak in the BS unit This setting only has to be configured on the leftmost main PCB A1P of th...

Page 97: ...te controller In case supervisor remote controllers are used in the system it is necessary to assign an address value to the BS unit Assign a different address to different BS units Use address values that are NOT used in the system elsewhere e g indoor units Do not use address 00 The supervisor remote controller does not display errors from BS units with address 00 This setting only has to be con...

Page 98: ... 9 is mandatory for all BS units and has to be made on all main PCBs A1P A2P and A3P of the BS unit 2 9 Description 0 default 15 Address for error handling Example d a A3P A2P A1P e e e A2P A1P e e b c A1P e A1P Main PCB 1 A2P Main PCB 2 A3P Main PCB 3 a Outdoor unit b BS8A unit c BS4A unit d BS12A unit e Address value for error handling assigned to main PCB Transmission wiring The table below sho...

Page 99: ...ditional measure During the BS unit test run which is started by setting 2 3 to 1 the external fan and external alarm are both active To disable the external alarm during the airflow rate measurements change setting 2 10 to 1 Once the BS unit test run is finished setting 2 3 changed to 0 setting 2 10 automatically returns to its default value 0 This setting only has to be configured on the leftmos...

Page 100: ...3 2 About airflow requirements 102 18 3 3 About measuring the airflow rate 103 18 3 4 To perform a BS unit test run 104 18 3 5 Troubleshooting during a BS unit test run 104 18 4 System test run 105 18 1 Precautions when commissioning NOTICE Before starting up the system the unit MUST be energised for at least 6 hours to avoid compressor breakdown during startup NOTICE ALWAYS complete the refrigera...

Page 101: ...t field settings are made In case a ventilated enclosure is required the following safety measures are correctly applied The ducting is properly installed and insulated The extraction fan is connected and powered The air inlet damper is not obstructed The correct field settings are made Also follow the outdoor unit s checklist See the installation and operation manual delivered with the outdoor un...

Page 102: ...iguration e BS unit in parallel configuration f BS unit without safety measures g BS unit with external alarm h External alarm i Extraction fan j Outdoor unit Transmission wiring In case the safety measures demand a ventilated enclosure the BS unit test run has to include a measurement of the actual extraction airflow rate to confirm that it meets the legal requirements NOTICE It is very important...

Page 103: ...ves 18 3 3 About measuring the airflow rate It is up to the installer to measure the airflow rate and provide correct data We advise 2 ways in the sections below but the installer is entirely free on how to perform the measurement About measuring with a vane anemometer Where Measure the airflow rate at the air inlet damper of the BS unit Tip Use the duct connection kit EKBSDCK and an anemometer wi...

Page 104: ...gs and visibly 3 In case of a configuration with a ventilated enclosure measure the airflow rate See 18 3 3 About measuring the airflow rate 4 103 for more information 4 In all configurations check if no safety measures are activated that are not intended to activate 5 Change field setting 2 3 to 0 This setting deactivates the test run 6 Change field setting 2 6 to 1 for all BS units of the system...

Page 105: ...tion the field settings of all BS units in a cluster need to be made correctly When in parallel configuration check that no dampers of other BS units in the same cluster have opened When in series configuration check that all dampers of other BS units in the same cluster have opened Flow blocked Remove blocking objects Incorrect fan size Check if the sizing of the fan is appropriate Adapt if neces...

Page 106: ...e the following is clear for the user Make sure that the user has the printed documentation and ask him her to keep it for future reference Inform the user that he can find the complete documentation at the URL mentioned earlier in this manual Explain the user how to properly operate the system and what to do in case of problems Explain the user only a certified installer is allowed to perform mai...

Page 107: ...ce INFORMATION See the service manual for The complete list of error codes A more detailed troubleshooting guideline for each error 20 1 1 Prerequisites Troubleshooting 1 Carry out a thorough visual inspection of the unit and look for obvious defects such as loose connections or defective wiring 20 1 2 Error codes Overview In case other error codes appear contact your dealer Code Description The R...

Page 108: ...nit 4P695527 1 2022 02 21 Disposal NOTICE Do NOT try to dismantle the system yourself dismantling of the system treatment of the refrigerant oil and other parts MUST comply with applicable legislation Units MUST be treated at a specialised treatment facility for reuse recycling and recovery ...

Page 109: ...he wiring diagram on the unit Part numbering is by Arabic numbers in ascending order for each part and is represented in the overview below by in the part code Symbol Meaning Symbol Meaning Circuit breaker Protective earth Connection Protective earth screw Connector A Rectifier Earth Relay connector Field wiring Short circuit connector Fuse Terminal INDOOR Indoor unit Terminal strip OUTDOOR Outdoo...

Page 110: ...t emitting diode HAP Light emitting diode service monitor green HIGH VOLTAGE High voltage IES Intelligent eye sensor IPM Intelligent power module K Contact K R KCR KFR KHuR K M Magnetic relay L Live L Coil L R Reactor M Stepper motor M C Compressor motor M D Damper motor M F Fan motor M P Drain pump motor M S Swing motor MR MRCW MRM MRN Magnetic relay N Neutral n N Number of passes through ferrite...

Page 111: ...r high S NPL Pressure sensor low S PH HPS Pressure switch high S PL Pressure switch low S T Thermostat S RH Humidity sensor S W SW Operation switch SA F1S Surge arrester SEG 7 segment display SR WLU Signal receiver SS Selector switch SHEET METAL Terminal strip fixed plate T R Transformer TC TRC Transmitter V R V Varistor V R Diode bridge Insulated gate bipolar transistor IGBT power module WRC Wire...

Page 112: ...on see the installation manual attached to the product 4 For X15A A1P remove the short circuit connector and connect the air conditioner stop signal optional product when using the drain up kit optional product For details see the operation manual attached to the kit 5 The capacity of the contact is 220 240V AC 0 5A 6 Digital output max 220 240V AC 0 5A To use this output see the installation manu...

Page 113: ...12A14AJV1B VRV 5 branch selector unit 4P695527 1 2022 02 Model DS1 DS2 factory settings BS12A ON DS1 A1P A2P OFF 1 2 3 4 ON DS2 OFF 1 2 3 4 ON DS1 A3P OFF 1 2 3 4 ON DS2 OFF 1 2 3 4 To set the DIP switches DS1 2 and push buttons BS1 3 see the installation manual ...

Page 114: ...t or application explaining how to install configure and maintain it Operation manual Instruction manual specified for a certain product or application explaining how to operate it Maintenance instructions Instruction manual specified for a certain product or application which explains if relevant how to install configure operate and or maintain the product or application Accessories Labels manual...

Page 115: ......

Page 116: ...4P695527 1 2022 02 Copyright 2022 Daikin Verantwortung für Energie und Umwelt ...

Reviews: