13 Unit installation
Installation and operation manual
24
SV1ASV4~8A14AJV1B
VRV 5 safety valve unit
4P709466-1 – 2023.09
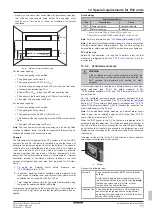
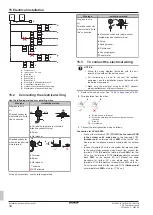
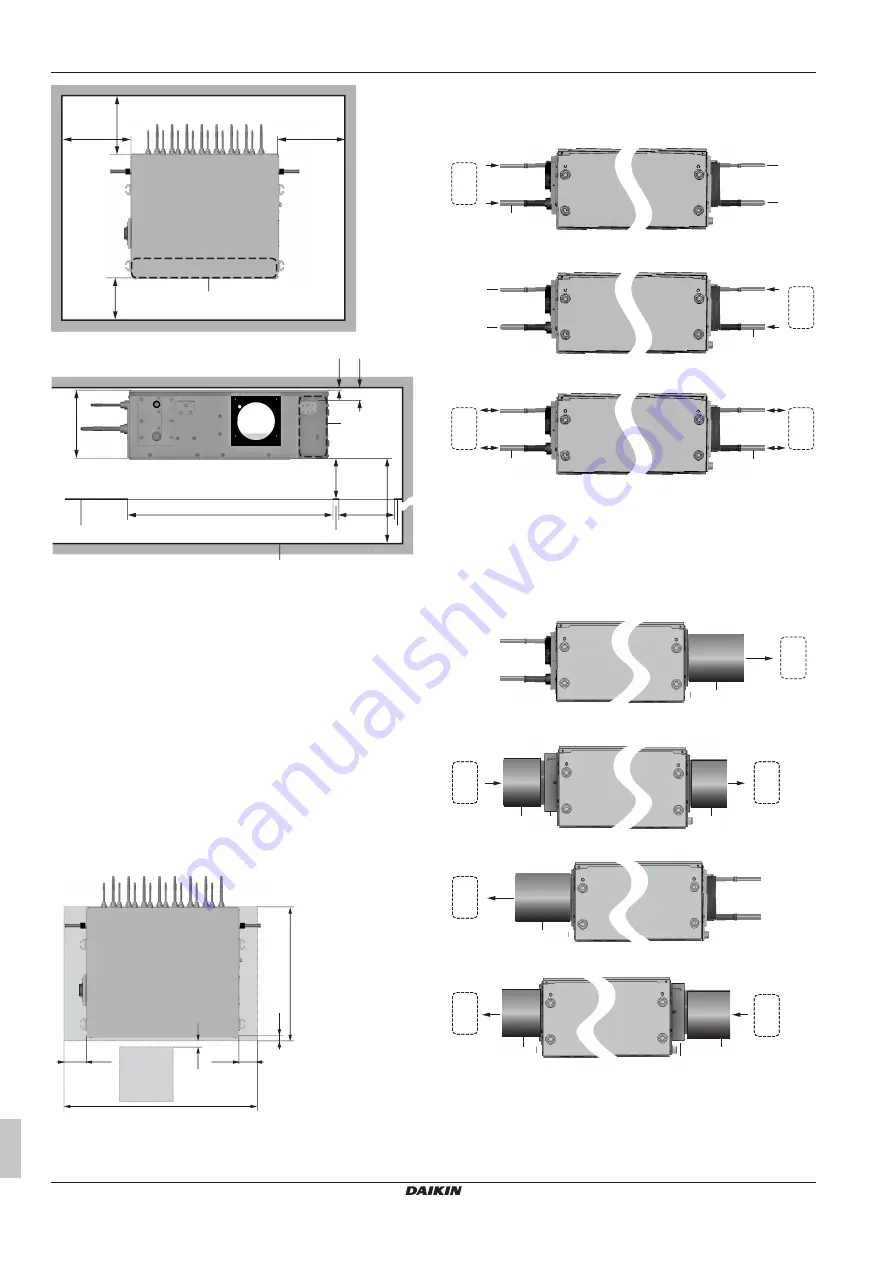
a
[mm]
c
≥
485
c
≥
485
d
≥
500
b
≥
720
(≥
49.5)
291
f: 875
f: 450
A≥
1800
≥
100
a
≥
5
e
e
g
e
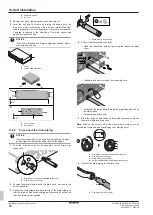
[mm]
A
Minimum distance to the floor
a
Switch box
b
Maintenance space
c
Minimum connection space for refrigerant piping coming
from the outdoor unit, or for piping coming from or going
to another SV unit, drain piping and ducting
d
Minimum connection space for the refrigerant piping to
the indoor units
e
False ceiling
f
False ceiling opening
g
Floor surface
▪
Ceiling strength
. Check whether the ceiling is strong enough to
support the weight of the unit. If there is a risk, reinforce the ceiling
before installing the unit.
▪ For existing ceilings, use anchors.
▪ For new ceilings, use sunken inserts, sunken anchors or other
field supplied parts.
▪
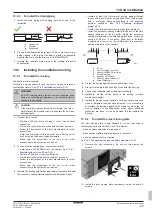
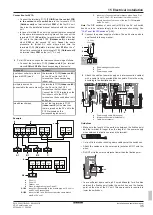
Ceiling openings.
Respect the following sizes and positions for
the ceiling openings:
[mm]
450×450
A
40
30
100
100
875
A
Ceiling opening size:
800 mm (SV1~4A)
1200 mm (SV6~8A)
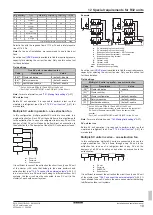
13.2
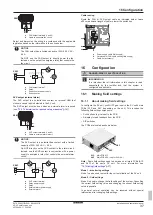
Possible configurations
Refrigerant piping
A
B
C
b
1
a
a
1
a
a
b
2
b
2
b
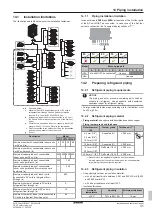
A
Refrigerant piping connected to left side only
B
Refrigerant piping connected to right side only
C
Refrigerant piping connected to both sides (flow-through)
1
From outdoor or from SV unit
2
From outdoor or from/to SV unit
a
Stopper pipes (accessory)
b
Field piping (field supply)
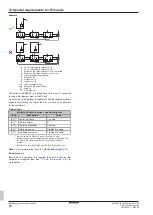
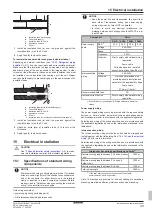
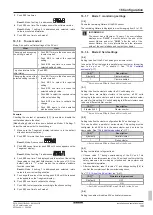
Ducting
A
a
1
A’
a
a
b
1
2
1
B
a
2
1
B’
a
a
b
Summary of Contents for VRV 5
Page 47: ......


