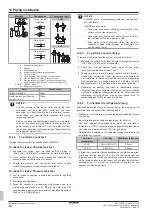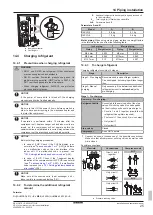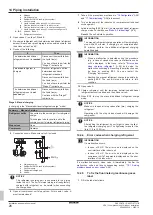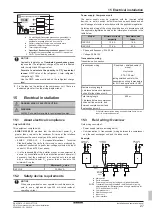
12 About the units and options
Installation and operation manual
17
RK RKXYQ8T7Y1B
VRV IV compressor unit for indoor installation
4P499900-1A – 2020.10
Specification
5 HP
8 HP
Maximum relative
humidity around the
compressor unit and
heat exchanger unit
Heating
50%
(a)
Cooling
80%
(a)
(a)
To avoid condensation and water dripping out of the unit. If
the temperature or the humidity is beyond these conditions,
safety devices may be put in action and the air conditioner
may not operate.
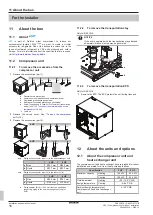
12.2
System layout
NOTICE
Design of the system must not be done at temperatures
below –15°C.
d
d
c
c
a
b
VRV DX
VRV DX
VRV DX
EKEXV
AHU
d
d
1
2
1
In case of VRV DX indoor units
2
In case of VRV DX indoor units combined with an air
handling unit
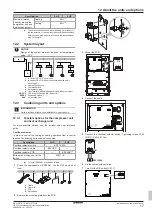
a
Heat exchanger unit
b
Compressor unit
c
Refrigerant piping
d
User interface (dedicated depending on indoor unit type)
VRV DX
VRV direct expansion (DX) indoor unit
EKEXV
Expansion valve kit
AHU
Air handling unit
12.3
Combining units and options
INFORMATION
Certain options might not be available in your country.
12.3.1
Possible options for the compressor unit
and heat exchanger unit
For more possible options, see the installer and user reference
guide.
Cool/heat selector
In order to control the cooling or heating operation from a central
location, the following option can be connected:
Description
5 HP
8 HP
Cool/heat selector switch
KRC19-26A
Cool/heat selector cable
EKCHSC
—
Cool/heat selector PCB
—
BRP2A81
(a)
With optional fixing box for the
switch
KJB111A
(a)
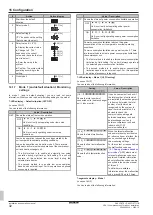
To install BRP2A81, proceed as follows:
1
Check the components of BRP2A81. You do NOT need all of
them.
1×
1×
1×
1×
1×
1×
X
b
c
a
1×
X
X
X
a
Cable
b
Cable tie
c
PCB
X
Not needed
2
Remove the mounting plate from the PCB.
1
1
2
3
Mount the PCB.
X1M
X1A
A B C
A1P
DS1
X66A
4
Connect the cable.
X1A
A1P
DS1
X66A
X1M
5
Connect the cool/heat selector switch. Tightening torque X1M
(A/B/C): 0.53~0.63 N•m
KRC19-26A
X1A
A B C
A B C
X1M
6
Fix the cables with cable ties.
7
Turn ON the DIP switch (DS1‑1).
1 2 3 4
OFF
X66A
ON
DS1
A1P

