SiE33-102
Before Operation
Installation Manual
165
8.2.4
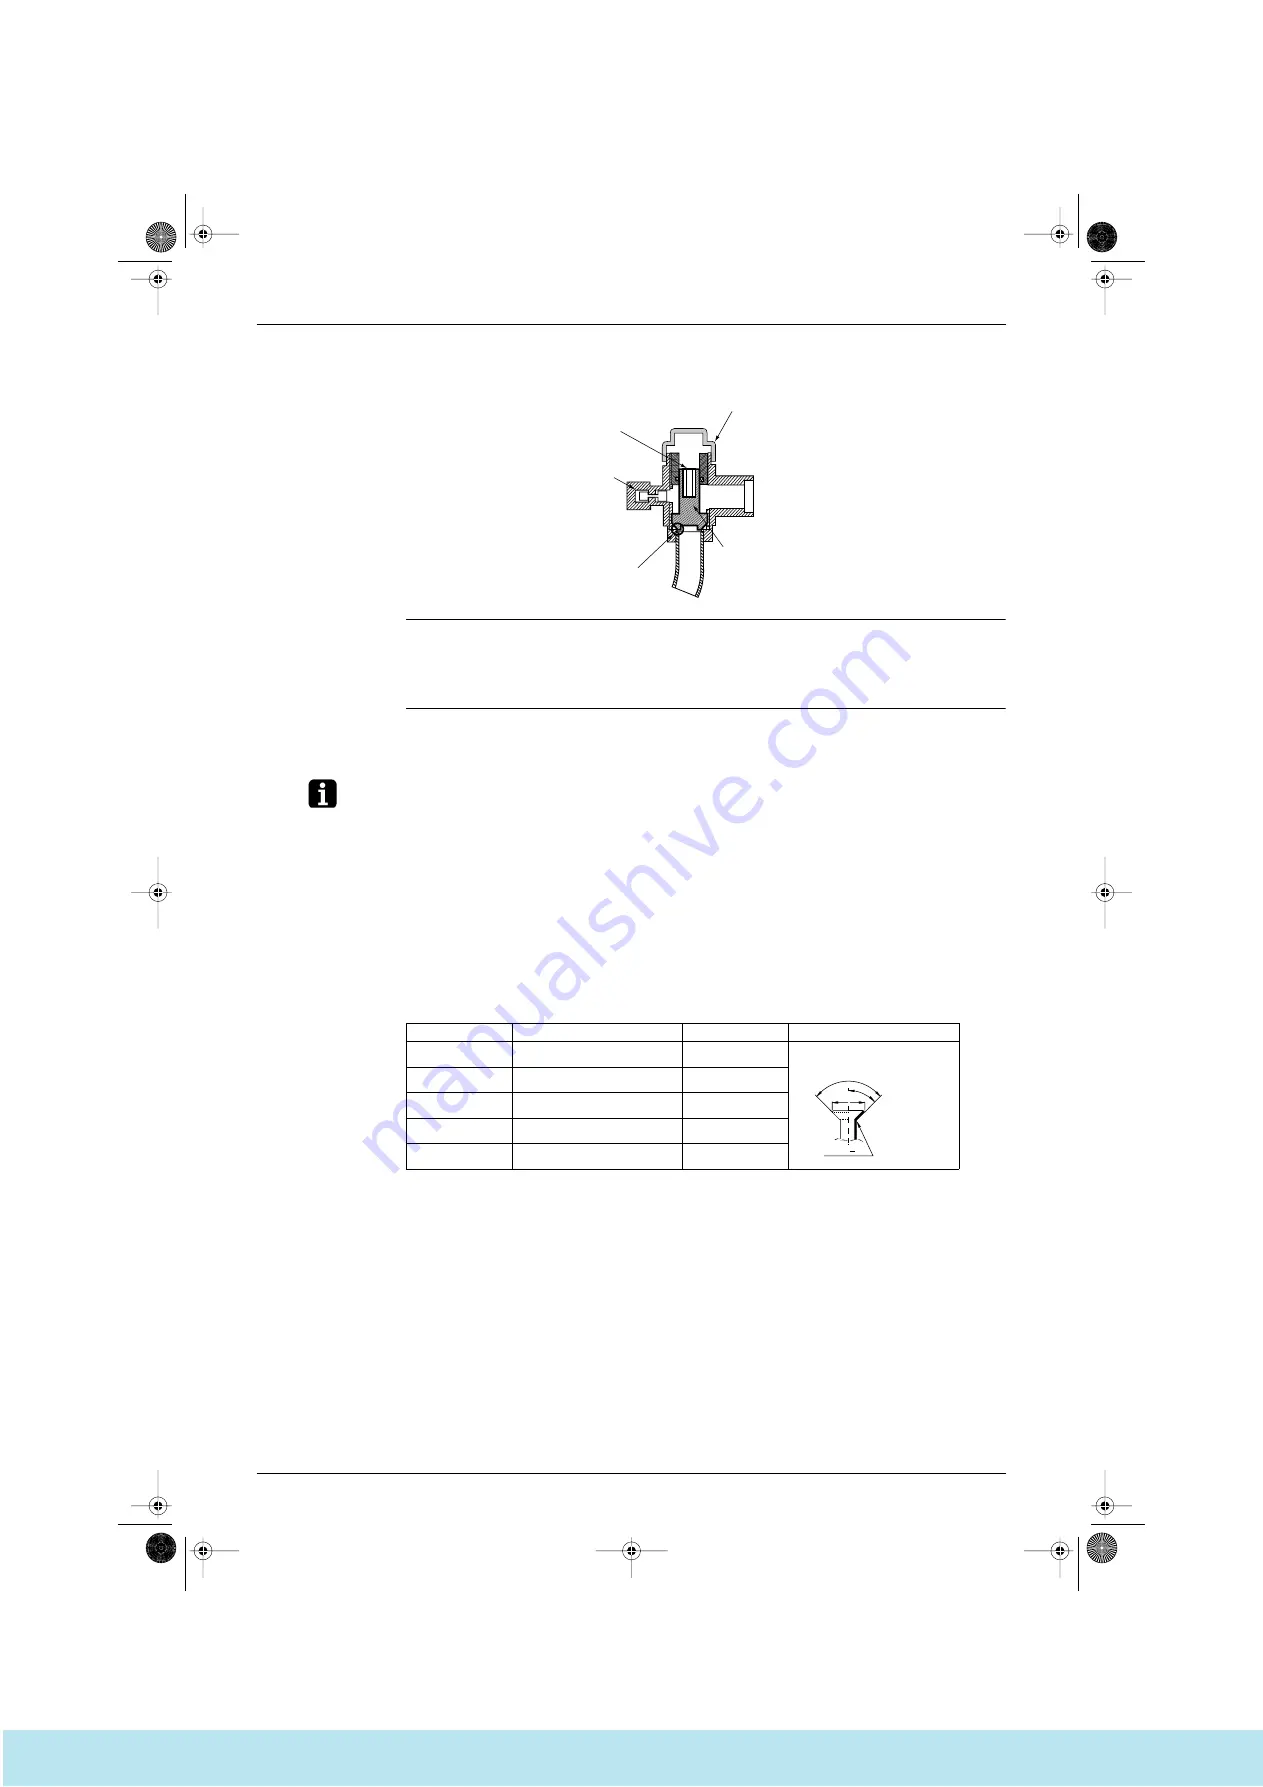
How to Operate Stop Valves
1. To Open
1. Remove the cap (1) and turn the shaft (2) counterclockwise with hexagon socket screw keys (JIS B
4648 nominal size 6 mm and 10 mm).
2. Turn it all the way until the shaft stops.
3. Tighten the cap firmly.
2. To Close
1. Remove the cap and turn the shaft clockwise.
2. Tighten the shaft firmly until it reaches the sealed area (4) of the body.
3. Tighten the cap firmly.
Notes:
Refer to the table at the end of this chapter for tightening torques and dimensions of the flares.
Be sure to use both, a spanner and a torque wrench, when connecting or disconnecting pipes to or from
the unit. (Refer to next page)
When connecting a flare nut, apply ether or ester oil on the flare area (both internal and external face),
and screw it with your hand a few times first.
Use a charging hose with push rod when using the service port (5).
Check for refrigerant gas leakage after tightening the cap.
Make sure to apply the refrigerant oil around the flare portions (both inner and outer face) when
connecting flare nuts, and give 3 turns by hand before applying spanners.
Make sure to keep stop valve open during operation.
FLARE SHAPE and FLARENUT TIGHTENING TORQUE
Not recommendable but in case of emergency
You must use a torque wrench but if you are obliged to install the unit without a torque wrench, you may
follow the installation method mentioned below.
After the work is finished, make sure to check that there is no gas leak.
3
5
1
2
4
(V1869)
Pipe Size
Tightening Torque (N·m)
A (mm)
Flare Shape
φ
6.4
14.2-17.2
8.3-8.7
φ
9.5
32.7-39.9
12.0-12.4
φ
12.7
49.5-60.3
15.4-15.8
φ
15.9
61.8-75.4
18.6-19.2
φ
19.1
97.2-118.6
22.9-23.3
R=0.4 0.8
45 ±
90 ±
A
4
2
(V0905)
Si33-102.book Page 165 Tuesday, June 26, 2001 3:18 PM
Все каталоги и инструкции здесь:
http
:
//splitoff.ru/tehn-doc.html


