SiE33-102
Installation
General Information
47
FXYB-Concealed ceiling unit (small)
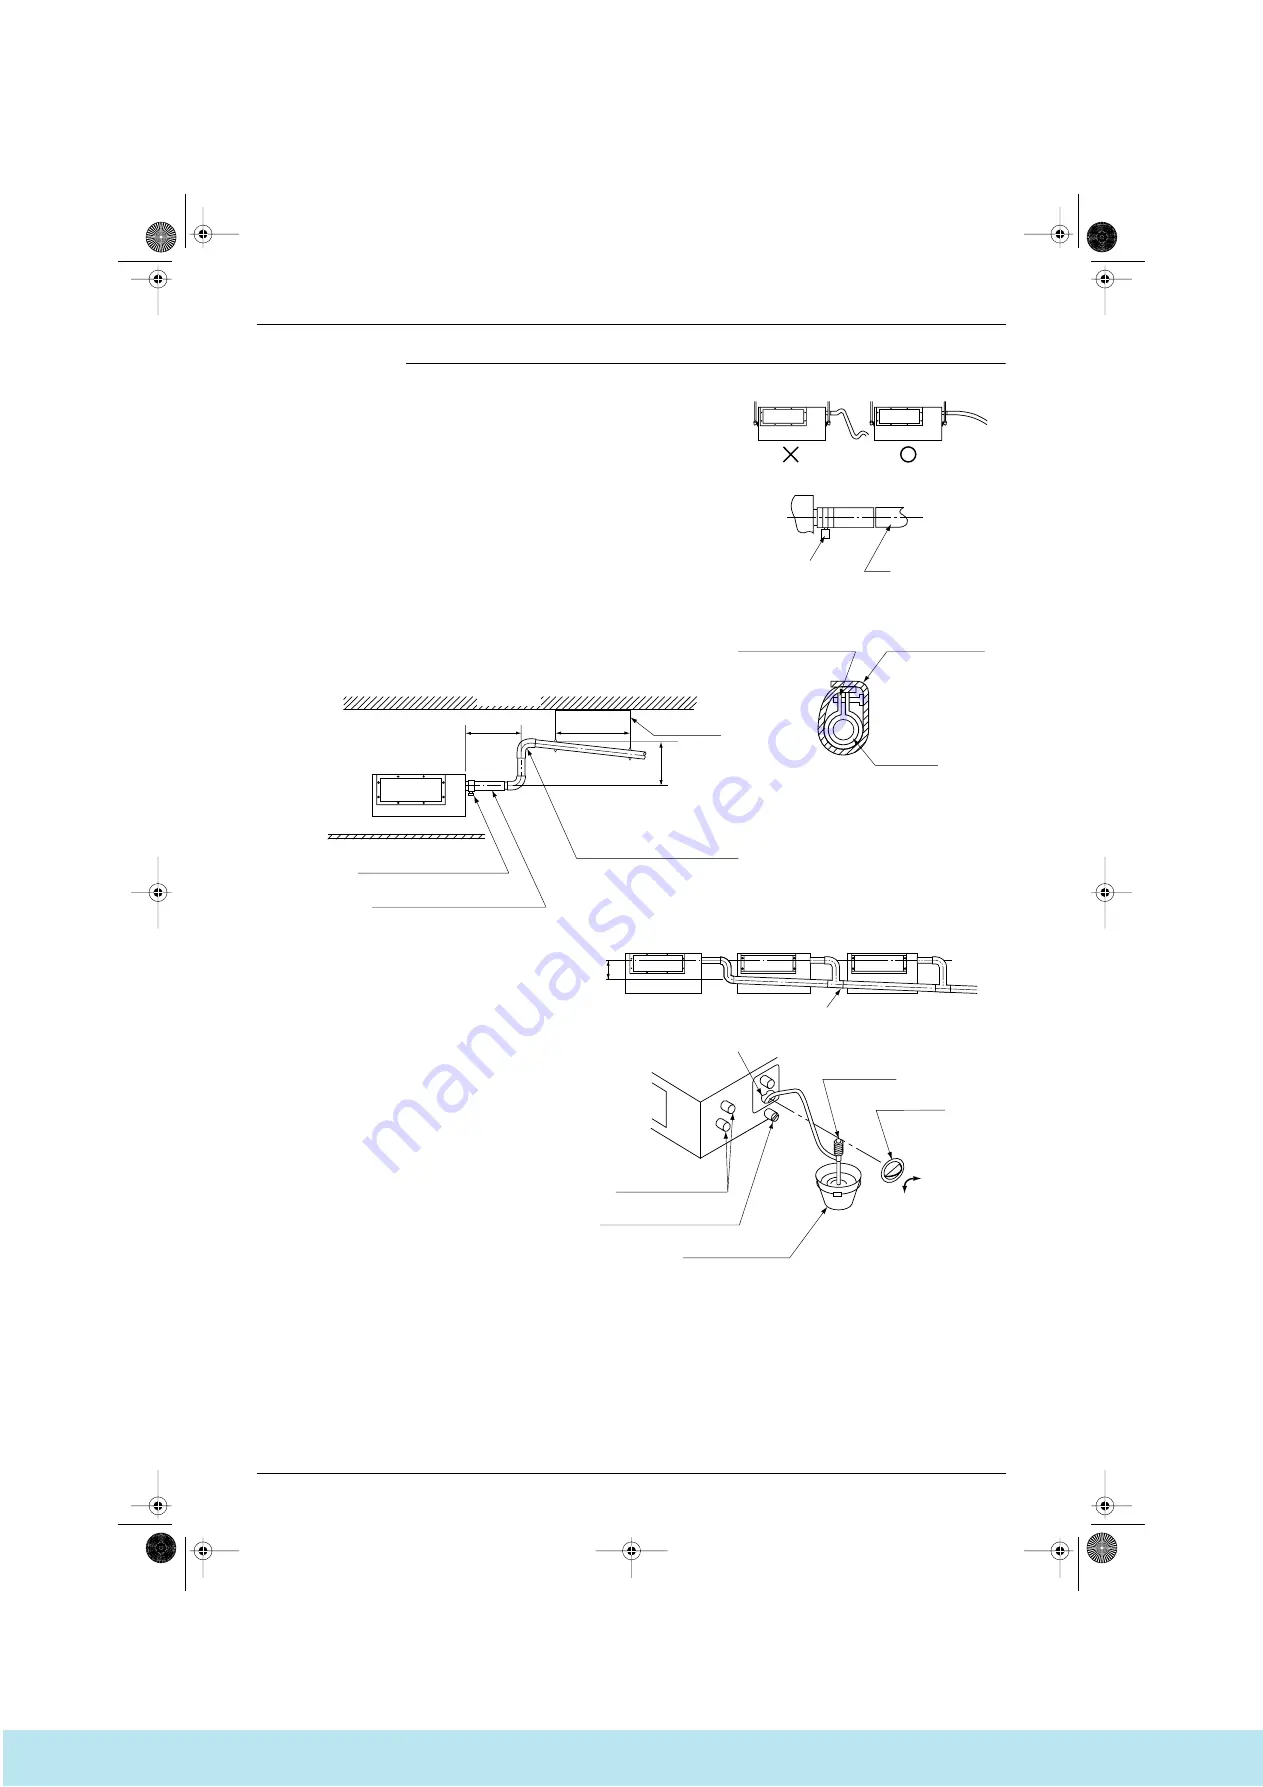
Install the drain pipes.
•
Keep piping as short as possible and slope it downwards so that air may not
remaine trapped inside the pipe.
•
Keep pipe size equal to or greater than that of the connecting pipe (Vinyl pipe of
25 mm nominal diam. and 32 mm outer diam.).
•
Use the attached drain hose and clamp.
Tighten the clamp firmly.
•
Insulate the clamp with the attached sealing pad.
•
Insulate the drain hose inside the building.
•
If the drain hose cannot be sufficiently set on a slope, fit the hose with drain
raising piping as shown in the drawing (part to be procured in the field).
〈
HOW TO INSTALL PIPING
〉
(1) Connect the drain hose to the drain raising pipes, and insulate them.
(2) Connect the drain hose to the drain outlet on the indoor unit, and tighten it
with the clamp.
(3) Insulate both metal clamp and drain hose with the attached sealing pad.
Clamp metal
Drain hose
•
To ensure a downward slope of 1:100, install
hanging bars every 1 to 1.5 m.
•
If unifying multiple drain pipes, install pipes
shown right.
100mm
or more
Multiple drain piping
Clamp metal
(Attached with unit)
Large sealing pad
(Attached with unit)
Drain hose
Adjustable range
(0 ~ 250 mm)
1 ~ 1.5m
Drain raising pipe
(Part to be product in the field)
Ceiling slab
Hanging bar
Drain hose (Attached with unit)
Clamp (Attached with unit)
Less 300mm
3PA60998-15S-6
Note: Use this outlet to drain water
from the drain pan.
Water inlet
Refrigerant pipes
Drain outlet for maintenance
Close
Portable pump
Water inlet lid
Open
(with rubber plug)
Bucket
〈〈
Adding water from
inspection opening
〉〉
After piping work is finished, check drainage flows smoothly.
•
Open the water inlet lid, add approximately 1000 cc of
water gradually and check drainage flow
Si33-102.book Page 47 Tuesday, June 26, 2001 3:18 PM
Все каталоги и инструкции здесь:
http
:
//splitoff.ru/tehn-doc.html


