background image

Installation

www.DaikinApplied.com 11 

IOM 1281-2 • CENTRIFUGAL WATER CHILLERS

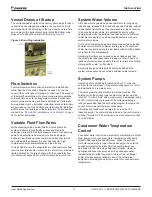
Vessel Drains at Startup

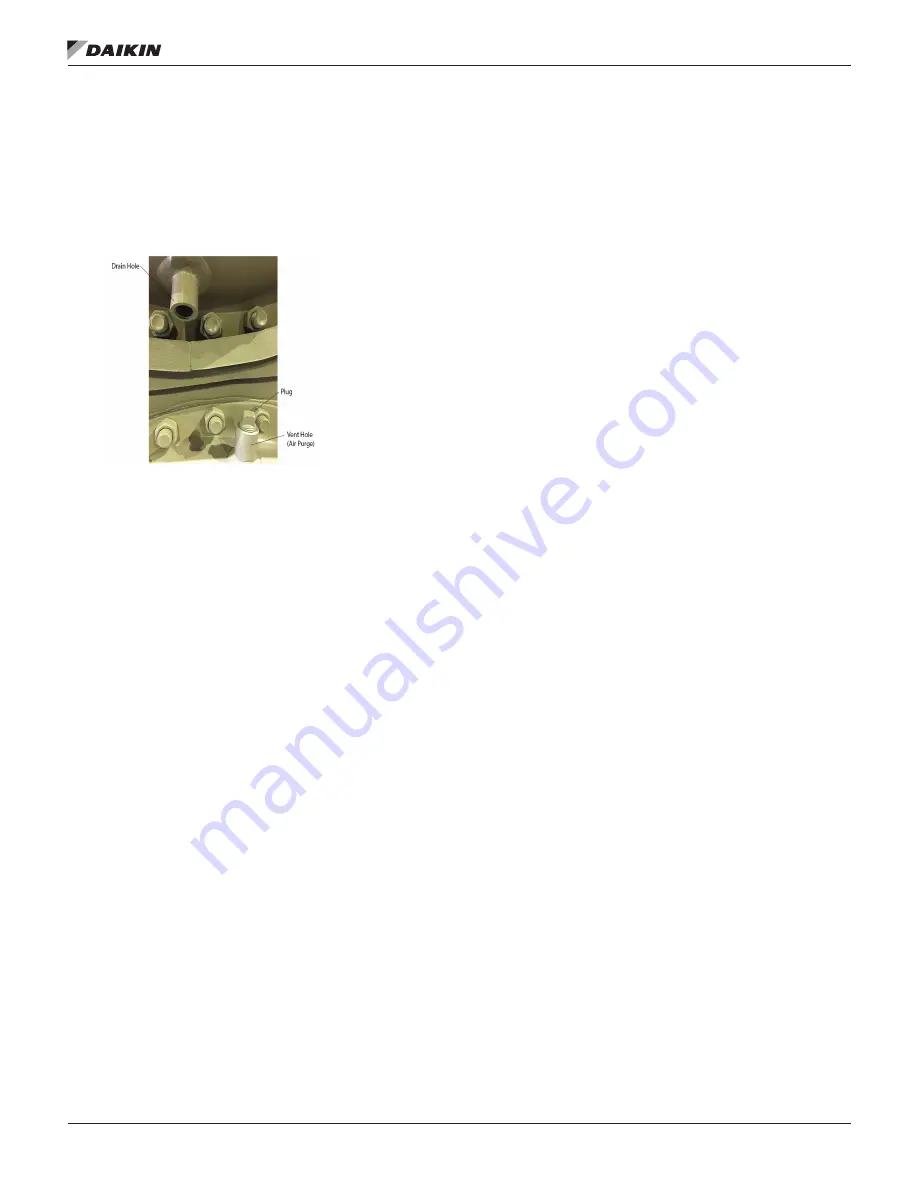
The unit is drained of water at the factory. Drain plugs for each 

vessel head are shipped separately in the control box. Units 

are shipped with the drain plug in the top water box drain hole 

and no plug in the bottom drain hole. Install the bottom drain 

plugs prior to filling the vessel with fluid. See 

Figure 5

Figure 5: Drain Plug Installation    

Flow Switches

Thermal dispersion flow switches are factory-installed and 

wired. See the Field Wiring Diagram on page 32 or on the 

cover of the control panel for proper connections. The purpose 

of the water flow switches is to prevent compressor operation 

until such time as both the evaporator water and condenser 

water pumps are running and flow is established. If alternate 

flow switches must be furnished, water flow interlock terminals 

are provided on the Unit Control Panel terminal strip. Both flow 

switches must be calibrated in the field before the unit can be 

started. See 

“Flow Switch Installation and Calibration” on page 

68 

for further information.

Variable Fluid Flow Rates 

Both excessively high and low fluid flow rates should be 

avoided. Extremely high fluid flow rates and high tube 

velocities will result in high fluid pressure drops, high pumping 

power, and potential tube erosion or corrosion damage. 

Extremely low fluid flow rates and low velocities should also 

be avoided as they will result in poor heat transfer, high 

compressor power, sedimentation and tube fouling. 

If it is decided to vary the evaporator or condenser water flow 

rate, the flow rate should not exceed the minimum or maximum 

limits. Additionally, the rate of change for the evaporator flow 

rate should not exceed 50% of the current value per minute.

System Water Volume

All chilled water systems need adequate time to recognize a 

load change, respond to that load change and stabilize, without 

undesirable short cycling of the compressors or loss of control. 

In air conditioning systems, the potential for short cycling 

usually exists when the building load falls below the minimum 

chiller plant capacity or on close-coupled systems with very 

small water volumes.
Some of the things the designer should consider when looking 

at water volume are the minimum cooling load, the minimum 

chiller plant capacity during the low load period and the desired 

cycle time for the compressors.
Assuming that there are no sudden load changes and that 

the chiller plant has reasonable turndown, a rule of thumb of 

“gallons of water volume equal to three to four times the chilled 

water gpm flow rate” is often used.

A properly designed storage tank should be added if the 

system components do not provide sufficient water volume.

System Pumps

Operation of the chilled water pump can be to 1) cycle the 

pump with the compressor, 2) operate continuously, or 3) start 

automatically by a remote source. 
The cooling tower pump must cycle with the machine. The 

holding coil of the cooling tower pump motor starter must be 

rated at 115 volts, 60 Hz, with a maximum volt-amperage rating 

of 100. A control relay is required if the voltage-amperage 

rating is exceeded. See the field wiring diagram located in the 

cover of control panel for proper connections.
All interlock contacts must be rated for no less than 10 

inductive amps. The alarm circuit provided in the control center 

utilizes 115-volts AC. The alarm used must not draw more than 

10 volt amperes.

Condenser Water Temperature 

Control

Condenser water control is an important consideration in chiller 

plant design since condenser water temperature will directly 

impact chiller operation and efficiency. When the ambient 

wet bulb temperature is lower than peak design, the entering 

condenser water temperature from the cooling tower can 

be allowed to fall, improving chiller performance. However, 

operational issues may occur when the condenser water 

temperatures are either too high or too low. The centrifugal 

chiller provides several options to assist the chiller plant 

designer in providing the optimum control of condenser water 

temperature.

Summary of Contents for WDC

Page 1: ...Operation and Maintenance Manual Centrifugal Chillers Model WDC WCC A Vintage 600 to 2700 Tons 2100 to 9500 kW R 134a or R 513A Refrigerant 60 50 Hz IOM 1281 2 Group Chiller Part Number IOM1281 2 Dat...

Page 2: ...orks LonMark and LonTalk from Echelon Corporation Modbus from Schneider Electric and Windows from Microsoft Corporation Table of Contents Introduction 5 Hazard Identification Information 5 General Des...

Page 3: ...cal Code and local codes See Note 4 Condenser pump starting relay CP1 2 installed and wired See Note 3 Miscellaneous Yes No N A Initials Oil cooled water piping complete Units with water cooled oil co...

Page 4: ......

Page 5: ...ay be present in this Daikin Applied product POE oil if ever in contact with PVC CPVC will coat the inside wall of PVC CPVC pipe causing environmental stress fractures Although there is no PVC CPVC pi...

Page 6: ...efrigerant The controls are pre wired adjusted and tested Only normal field connections such as piping electrical and interlocks etc are required thereby simplifying installation and increasing reliab...

Page 7: ...damage to the control panels and refrigerant piping See the certified dimension drawings included in the job submittal for the weights and center of gravity of the unit If the drawings are not availab...

Page 8: ...ove the top of the chiller The U S National Electric Code NEC or local codes can require more clearance in and around electrical components and must be checked for compliance Mounting The unit must be...

Page 9: ...See Note3 111 43 9 Oil Cooler Entering Fluid 35 1 7 80 26 7 35 1 7 80 26 7 Equipment Room Air 40 4 4 104 40 40 4 4 104 40 NOTES 1 Contact a Daikin Applied representative for performance at specific o...

Page 10: ...o allow vessel isolation The chiller must be capable of draining the water from the evaporator or condenser without draining the complete system Piping must be supported to eliminate weight and strain...

Page 11: ...of the compressors or loss of control In air conditioning systems the potential for short cycling usually exists when the building load falls below the minimum chiller plant capacity or on close coup...

Page 12: ...enser control method is to use a modulating two way control valve located on the outlet connection of the condenser The valve will be nearly closed at startup to restrict water flow which keeps genera...

Page 13: ...must remain closed until startup by the factory service technician Remove plastic shipping plugs if installed from the inside of the valves prior to making pipe connections Whenever vent piping is ins...

Page 14: ...re drop across the evaporator is less than the oil cooler the oil cooler must be piped across the chilled water pump provided that its pressure drop is sufficient The water flow through the oil cooler...

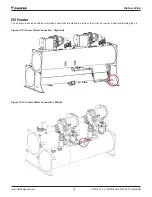
Page 15: ...FUGAL WATER CHILLERS Oil Heater The oil sump is equipped with an immersion heater that is installed in a tube so that it can be removed without disturbing the oil Figure 9 Oil Cooler Water Connection...

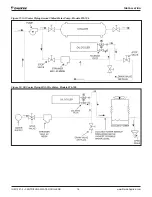
Page 16: ...M 1281 2 CENTRIFUGAL WATER CHILLERS 16 www DaikinApplied com Installation Figure 11 Oil Cooler Piping Across Chilled Water Pump Models 079 126 Figure 12 Oil Cooler Piping With City Water Models 079 12...

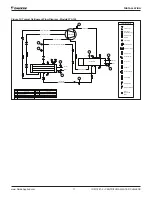
Page 17: ...G WATER TEMPERATURE P104 CONDENSER ENTERING WATER TEMPERATURE P104 CONDENSER LEAVING WATER TEMPERATURE P104 LIQUID LINE TEMPERATURE CHECK VALVE CONDENSER EVAPORATOR SHUTOFF VALVE ELECTRONIC EXPANSION...

Page 18: ...hnician Serious damage can result if the compressor starts in the wrong direction and would not be covered by product warranty The compressor is covered under UL 984 by which its terminal box is deter...

Page 19: ...rs strictly conform to the interoperability guidelines of the LonMark Interoperability Association and BACnet International They have received LonMark certification with optional LonWorks communicatio...

Page 20: ...and 21 and remove wire jumper 6 Evaporator and condenser flow switches are required Thermal dispersion flow switches are installed and wired from the factory as standard 7 Customer supplied 24 to 230...

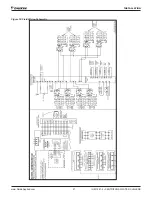
Page 21: ...Installation www DaikinApplied com 21 IOM 1281 2 CENTRIFUGAL WATER CHILLERS Figure 16 Field Wiring Schematic...

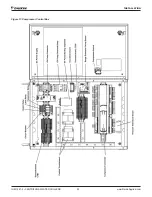
Page 22: ...IOM 1281 2 CENTRIFUGAL WATER CHILLERS 22 www DaikinApplied com Installation Figure 17 Compressor Control Box...

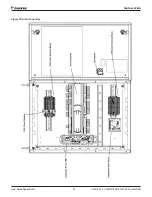
Page 23: ...Installation www DaikinApplied com 23 IOM 1281 2 CENTRIFUGAL WATER CHILLERS Figure 18 Unit Control Box...

Page 24: ...d not yet installed keep it pumped down as shipped from the factory and close all refrigerant valves 5 Keep oil sump valves closed to avoid refrigerant migration to the oil sump Over a long term the r...

Page 25: ...letely assembled with the full refrigerant charge which must be recovered before breaking any refrigerant connection The refrigerant charge must be removed from the unit if the vessels are to be separ...

Page 26: ...them Refrigerant will not be shipped with the chiller and must be procured by others Compressor s and vessels receive an inert gas holding charge that must be released prior to attempting to open any...

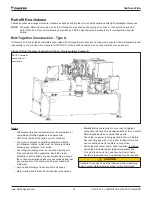
Page 27: ...olling dollies supporting the full length of the compressor may also be used Note component weights and dimensions are listed in Table 7 and Table 8 Figure 21 Vessel Stack Lifting Rigging Setup Figure...

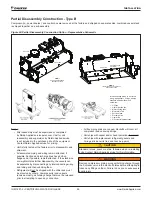
Page 28: ...places to prevent damage 7 Remove oiler cooler lines providing block off caps at the the compressor gear housing connections see Figure 25 Blockoffs will also be needed at the evaporator and condenser...

Page 29: ...t Leave the mounting bolts loose until the suction and discharge lines are in place and aligned Before tightening the couplings position the suction and discharge piping so that the compressor can be...

Page 30: ...IOM 1281 2 CENTRIFUGAL WATER CHILLERS 30 www DaikinApplied com Installation Figure 27 Liquid Line Assembly Figure 28 Oil Sump Oil Cooler Assembly...

Page 31: ...FROM TERMINAL BLOCK LOCATED IN THE COMPRESSOR TERMINAL BOX IF STARTER IS FREESTANDING OR FIELD MOUNTED CLFS FLOW SWITCHES ELFS COMPRESSOR CONTROL BOX CS4 OIL SUMP TEMP CS5 CMPR SUCTION TEMP CS7 CMPR...

Page 32: ...l r oc UNIT BOX CABLES DID DESCRIPTION US2 EVAP ENTERING WATER TEMP US3 COND ENTERING WATER TEMP US4 COND LEAVING WATER TEMP USS LIQUID LINE TEMP US9 OPT HEAT RECOVERY ENTERING TEMP US10 OPT HEAT RECO...

Page 33: ...chilled water sensors must be moved far enough downstream from the last chiller to insure reading a thoroughly mixed water temperature Passing through one or two elbows will usually suffice Series chi...

Page 34: ...Interface HMI switches or BAS interface which ever is selected A method of migration freeze protection needs to be in place when the chiller terminates ice mode This is usually sensed by the liquid l...

Page 35: ...ed at the lower right hand edge of the display panel Screen control buttons are located to either side of it and elicit on screen prompts when pressed The HMI is equipped with a screen saver a blank b...

Page 36: ...ICE and HEAT For example Cool Ice w Glycol is an available mode setpoint but the chiller can only be in either COOL or ICE mode at any given time Compressor Status shown for each unit compressor 1 onl...

Page 37: ...re 35 to Figure 37 Figure 35 Mechanical Switch Source Figure 36 Digital Remote Switch Source Figure 37 BAS Network Source III Additional Home View Trend Data Graphs Entering and leaving evaporator wat...

Page 38: ...IOM 1281 2 CENTRIFUGAL WATER CHILLERS 38 www DaikinApplied com Operation Figure 39 Unit Detail View Screen...

Page 39: ...plied com 39 IOM 1281 2 CENTRIFUGAL WATER CHILLERS Figure 40 Evaporator Information Figure 41 Compressor Details NOTE Chiller data will populate in the Power box if the Full Metering capability has be...

Page 40: ...igure 42 To open the vanes loading compressor solenoid SA is de energized and SB is energized allowing oil flow from port SA to one side of the piston other side drains through port SB To close the va...

Page 41: ...flow and keeps the chiller from short cycling under light load conditions while also reducing surge potential on heat recovery units The factory default setpoint for bringing on hot gas bypass is 20 o...

Page 42: ...IOM 1281 2 CENTRIFUGAL WATER CHILLERS 42 www DaikinApplied com Operation Figure 43 Typical Oil Flow Diagram Models WDC...

Page 43: ...Operation www DaikinApplied com 43 IOM 1281 2 CENTRIFUGAL WATER CHILLERS Figure 44 Condenser Information Figure 45 Expansion Valve Information...

Page 44: ...c 2 MODES selects various unit parameters such as liquid injection timers pump staging control source unit mode etc 3 MOTOR selects power related setpoints such as amp limits 4 TOWER selects the metho...

Page 45: ...r decrease the value displayed Some setpoints are selectable text menus rather than numeric values Select the desired option using the drop down menu that appears on that particular setpoint Toggle be...

Page 46: ...or leaving water temperature in Cool with Glycol or Cool ICE mode When running in the ICE portion of the mode the temperatures limit to the lower range of 15 35 F Leaving Water Temp Ice 25 0 F 15 0 to...

Page 47: ...w Glycol Cool Ice w Glycol Ice Only w Glycol Cool Heat Heat Only M See Water Setpoints Table 12 for control temperature targets for each mode No of Compressors 2 1 to 2 T Models will be set to 2 as a...

Page 48: ...ease is inhibited Min Leaving Water Temp Rate 0 2 F min 0 1 to 5 0 F min M Sets value below which an additional compressor can stage on Demand Limit Enable OFF ON OFF M ON Limits RLA to a value set by...

Page 49: ...D stage or valve SP VFD stage VFD Stage Up 80 0 to 100 T Valve position above which the fans can stage up Tower Valve Fan VFD Strategy Valve Stage VFD speed above which the fans can stage up Tower Val...

Page 50: ...n page 49 Setpoint for Cooling Tower Control on the TOWER Setpoint Screen sets the type of control NONE is selected as default Choose TEMPERATURE for entering condenser water control or LIFT to define...

Page 51: ...Valve Control Error Gain The default is 20 5 Set the Valve Control Slope Gain The default is 1 F If LIFT was selected for Cooling Tower Control set the Valve Target Lift default is 30 psi This setpoi...

Page 52: ...olled See Figure 59 and Figure 60 To set up in HMI The following settings are used for the Tower Fan Staging Only mode 1 Select TEMP if Cooling Tower Control is based on condenser EWT or LIFT if based...

Page 53: ...FD speed reaches the maximum value that was set In addition Figure 62 shows that the default temperature at which the valve opens completely is 65 F This temperature is the Valve SP also called Valve...

Page 54: ...d may need to be lowered if glycol is added to the system Similarly changing setpoint below 30 psi default requires glycol to be added to the system otherwise there is a risk of freezing the evaporato...

Page 55: ...sec 10 to 240 sec T Unload Timer 60 sec 5 to 300 sec T Postlube Timer 30 sec 10 to 240 sec T Figure 66 Settings View Interface Table 18 Unit Interface Settings Description Default Range PW Comments B...

Page 56: ...ory reference the Alarms section Alarms The Alarm information Figure 68 and Figure 69 is accessed by touching the ALARM icon at the bottom of the HMI and then the Active or History tabs at the top of...

Page 57: ...by being indicated in Red on the HMI and will prevent the chiller from running until manually cleared at the HMI or via the BAS Critical Alarms that require external intervention Communication and Se...

Page 58: ...Copy Service Trends is only available with the technician level password Copy Customer Trends is available for all password levels 5 Repeat this process for each desired day of history Each day must b...

Page 59: ...N or UNLOAD Rapid Stop Manual Low Oil Pressure Start Compressor State START for 30 sec Rapid Stop No Start Manual Evaporator Water Flow Loss Evaporator Flow DI No Flow for Evap Flow Loss Delay SP OR N...

Page 60: ...Unload setpoint Unload Auto Evaporator Freeze Protect Evap Sat Refr Temp Evaporator Freeze SP Start evaporator pump and oil pump While unit is not running Auto Condenser Freeze Protect Cond Sat Refr T...

Page 61: ...NTC Thermistor 10k 25 C 40 to 125 C Leaving Heat Recovery Temperature Chiller NTC Thermistor 10k 25 C 40 to 125 C NOTE 1 Sensor Range in Table 21 indicates the range of the input NOT the operating ran...

Page 62: ...tor 10k 25 C 40 to 125 C Table 26 Compressor Controller Digital Inputs Description Signal States Open Closed Compressor Switch Manual Off 0 to 24 VAC Stop Auto Mech High Pressure 0 to 24 VAC High Pres...

Page 63: ...oil analysis at initial startup to provide a benchmark from which to compare future tests The local service office can recommend suitable facilities for performing these tests Oil Analysis on page 66...

Page 64: ...de to operate and their operating points checked A control can shift its operating point as it ages and this must be detected so the controls can be adjusted or replaced Pump interlocks and flow switc...

Page 65: ...heaters and allow 24 hours for heater to remove refrigerant from the oil before starting 2 Check and tighten all electrical connections 3 Replace the drain plug in the cooling tower pump if it was re...

Page 66: ...o a saturated pressure above freezing 4 With a system gas pressure higher than the equivalent of a freezing temperature invert the charging cylinder and elevate the drum above the condenser With the d...

Page 67: ...oisture introduced by the addition of either contaminated oil or refrigerant or improperly handled oil Liquid R 134a has the ability to retain up to 1400 ppm of water in solution at 100 degrees F With...

Page 68: ...plier Figure 70 Thermal Dispersion Flow Switch and Adapter Mounting Figure 71 highlights the position of the electrical connector and indentation mark on flow switch It is required that the flow switc...

Page 69: ...at the velocities indicated below GPM adjustment per or key input Default 20 cm sec 30 cm sec 50 cm sec 75 cm sec 100 cm sec 150 cm sec 200 cm sec 250 cm sec 300 cm sec 2 2 06 6 86 10 3 17 2 25 7 34 3...

Page 70: ...or buttons 3 When power is initially applied to the flow switch all green LEDs light and go out step by step During this time the output is closed The unit is in the operating mode 4 When making manu...

Page 71: ...rt of standard initial warranty service 5 Oil filter change and compressor teardown and inspection should be done based on the results of the annual oil test performed by a company specializing in thi...

Page 72: ......

Page 73: ...above such free labor does not include diagnostic visits inspections travel time and related expenses or unusual access time or costs required by product location 2 Refrigerants fluids oils and expen...

Page 74: ...is sold pursuant to its standard terms and conditions of sale including Limited Product Warranty Consult your local Daikin Applied representative for warranty details To find your local Daikin Applied...

Reviews: