Startup and Shutdown Procedures
www.DaikinApplied.com 61
IOM 1322-1 • WATER-COOLED SCROLL COMPRESSOR
Complete operating instructions are contained in the current
version of Operating & Maintenance Manual found on
.
DANGER
LOCKOUT/TAGOUT
all power sources prior to starting, pressurizing,
de-pressuring, or powering down the Chiller. Failure to follow this warning
exactly can result in serious injury or death. Be sure to read and understand
the installation, operation, and service instructions within this manual.
NOTE:
Installation and maintenance are to be performed
only by qualified personnel who are familiar with local
codes and regulations, and experienced with this type
of equipment.
NOTE:
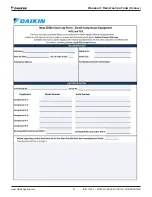
Return the “Scroll Compressor Equipment Warranty
Form” on
within 10 working days to
Daikin Applied as instructed on the form to obtain full
warranty benefits.
CAUTION
Dyes used for refrigerant leak detection are not tested or recommended for
use in Daikin chillers. Use of these products may damage and/or degrade
the performance of the equipment and will void the manufacturer warranty.
Pre Start-up
1.
The chilled-water system should be flushed and cleaned
Proper water treatment is required to prevent corrosion
and organic growth.
2. With main disconnect open, check all electrical
connections in control panel and starter to be sure they
are tight and provide good electrical contact. Although
connections are tightened at the factory, they can loosen
enough in shipment to cause a malfunction.
3.
Check and inspect all water piping. Make sure flow
direction is correct and piping is made to correct
connection on evaporator and condenser.
4.
Open all water flow valves to the condenser and
evaporator.
5. Flush the cooling tower and system piping to be sure the
system is clean. Start evaporator pump and manually
start condenser pump and cooling tower. Check all piping
for leaks. Vent the air from the evaporator and condenser
water circuit, as well as from the entire water system.
The cooler circuit should contain clean, treated, non-
corrosive water.
6. Check to see that the evaporator water thermostat
sensor is securely installed.
7.
Making sure control stop switch S1 is open (off) and
pumpdown switches PS1 and PS2 are on “manual
pumpdown,” place the main power and control
disconnect switches to “on.” This will energize the
crankcase heaters. Wait a minimum of 12 hours before
starting the unit.
8. Check compressor oil level. Prior to start-up, the oil
level should cover at least one-third of the oil sight glass
located in the equalizing line between the compressors
or on the compressor.
9. Check water pressure drop across evaporator and
condenser, and see that water flow is correct (beginning
) per the design flow rates.
10. Check the actual line voltage to the unit to make sure it
is the same as called for on the compressor nameplate,
/- 10%, and that phase voltage unbalance does
not exceed 2%. Verify that adequate power supply and
capacity is available to handle load.
11. Make sure all wiring and fuses are of the proper size.
Also make sure that all interlock wiring is completed per
Daikin Applied diagrams.
12. Verify that all mechanical and electrical inspections by
code authorities have been completed.
13. Make sure all auxiliary load and control equipment is
operative and that an adequate cooling load is available
for initial start-up.
14 . Start-up
1.
Open the compressor discharge shutoff valves until
backseated. Always replace valve seal caps.
2.
Open the two manual liquid line shutoff valves.
3. Leak test the unit.
4.
Check to see that the unit circuit breakers are in the “off”
position.
5. Check to see that the pumpdown switches, PS1 and
PS2, are in the “manual pumpdown” position and the
control system switch S1 is in the “off” position.
6. Put the main power and control circuit disconnects to the
“on” position.
7. Verify crankcase heaters have operated for at least 12
hours prior to start-up. Crankcase should be warm to the
touch.
8. Check that the MicroTech II controller is set to the
desired chilled water temperature.
9. Start the system auxiliary equipment for the installation
by turning on the time clock, ambient thermostat and/or
remote on/off switch and water pumps.
10. Check resets of all equipment protection controls.
11. Switch on the unit circuit breakers.
12. Set pumpdown switches PS1 and PS2 to “auto” for
restart and normal operation.
13. Start the system by setting the system switch S1 to on.
14. After running the unit for a short time, check the oil level
in each compressor crankcase, rotation of condenser
fans (if any), and check for flashing in the refrigerant
sight glass.
15. After system performance has stabilized, it is necessary
that the “Compressorized Equipment Warranty Form”
(Form # SF-990007) be completed to establish
commencement of the warranty period. Be sure to list
the pressure drop across both vessels. This form is
shipped with the unit and after completion should be
Startup and Shutdown Procedures
Summary of Contents for WGZ030DW
Page 4: ......
Page 57: ...Unit Controller Operation www DaikinApplied com 57 IOM 1322 1 WATER COOLED SCROLL COMPRESSOR...
Page 71: ...Unit Maintenance www DaikinApplied com 71 IOM 1322 1 WATER COOLED SCROLL COMPRESSOR...
Page 74: ...IOM 1322 1 WATER COOLED SCROLL COMPRESSOR 74 www DaikinApplied com Troubleshooting Chart...
Page 75: ...Troubleshooting Chart www DaikinApplied com 75 IOM 1322 1 WATER COOLED SCROLL COMPRESSOR...
Page 76: ...IOM 1322 1 WATER COOLED SCROLL COMPRESSOR 76 www DaikinApplied com Troubleshooting Chart...
Page 77: ...Troubleshooting Chart www DaikinApplied com 77 IOM 1322 1 WATER COOLED SCROLL COMPRESSOR...
Page 78: ...IOM 1322 1 WATER COOLED SCROLL COMPRESSOR 78 www DaikinApplied com Troubleshooting Chart...


