background image

1

1.

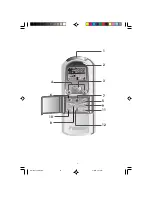
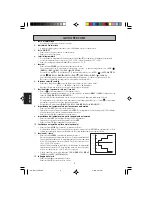
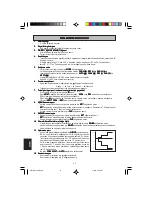
Transmission source

The source where the signal will be transmitted.

2.

Signal transmission indication

Blink to confirm that the last setting has been transmitted to the unit.

3.

“ON/OFF” Button

Press once to start the air conditioner unit.

Press again to stop the unit.

4.

Temperature setting

To set the desired room temperature, press the 

 or 

 button to increase or  decrease the set temperature.

The temperature setting range is from 16°C to 30°C (Optional setting 18°C to 30°C.)

Press both buttons simultaneously to toggle 

 and 

 from °C to °F setting.

5.

Operation mode

Press the 

MODE 

button to select the type of operating mode.

For cooling only unit, the available modes are: 

COOL (

)

DRY ( )

 &

 FAN (

)

.

For heat pump unit, the available modes are: 

AUTO (

)

COOL ( )

DRY ( )

FAN (

)

 & 

HEAT (

)

.

The Auto mode is unavailable for Chilled Water (CW) 2 pipe system.
It is available for Chilled Water (CW) 4 pipe system.

6.

Fan speed selection

Press the 

 button continuously will toggle the fan speed in the following order:

Low  –––

:

  Med –––

:

  High –––

:

 Auto

Stop pressing when the desired fan speed appears on the display screen.

7.

Turbo function (optional - only applicable to Inverter unit)

Press   for fast cooling or heating operation.

The temperature will be increased internally if it is in 

HEAT

 mode, decreased if in 

COOL

 or 

DRY

mode.
Fan speed will be increased if it is not at maximum speed.

The temperature & fan speed will resume to user setting if   is pressed again or after 20 minutes.

Available under 

HEAT

COOL

 & 

DRY

 modes only.

8.

ON timer setting

Press the 

SET

 button will activate the on timer function.

Set the desired on time by pressing the 

SET

 button continuously. If the timer is set to 7.30am, the air

conditioner will turn on at 7.30am sharp.

Press the 

CLR

 button to cancel the on timer setting.

9.

OFF timer setting

Press the 

SET

 button will activate the off timer function.

Set the desired off time by pressing the 

SET

 button continuously.

Press the 

CLR

 button to cancel the off timer setting.

10. Automatic air swing (optional)

Press the 

SWING

 button to activate the automatic air swing function.

To distribute the air to a specific direction, press the 

SWING

 button and wait

until the louver move to the desired direction and press the button once again.

11. Sleep mode setting

Press the 

SLEEP

  button will activate the sleep mode function.

This is an energy saving option. When the unit is operating under cooling
mode, the set temperature is increased by 0.5°C after the first half an
hour, another 0.5°C after the second half an hour and 1°C after the
following 1 hour.

When the unit is operating under heating mode, the set temperature
is decreased by 1°C after the first half an hour, another 1°C after the
second half an hour and 1°C after the following 1 hour.

This function is available under 

COOL

HEAT

 &

 AUTO

 mode.

12. Clock time setting

Press 

 button to increase the clock time.

Press 

 button to decrease the clock time.

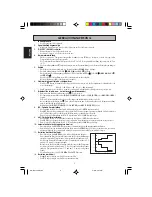
OPERATING GUIDE

+2 C

+1 C

- 1 C

- 2 C

0

0.5

1

1.5

2

- 3 C

ENGLISH

ENGLISH

OM-G8-1206-Daikin

3/6/07, 3:27 PM

1

Summary of Contents for WRC-COA

Page 1: ...ais Mode D emploi Combin C bl Nederlands Bedieningsaanwijzing Bedraad Handapparaat Espa ol Manual De Instrucciones Auricular Al mbrico Italiano Manuale Di Funzionamento Ricevitore Cablato Portugues M...

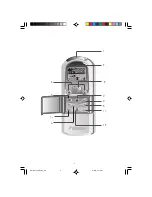
Page 2: ...i AUTO ON OFF AM PM MIN HR F C CLOCK SLEEP OFF TIMER SWING ON TIMER SET CLR MODE SET CLR 1 2 3 7 5 9 11 4 10 6 8 12 OM G8 1206 Daikin 3 6 07 3 27 PM 13...

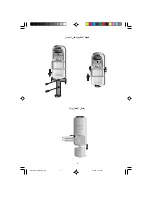
Page 3: ...TAKILIR HOW TO MOUNT ONTO THE WALL ANBRINGEN DER FERNSTEUERUNG AN DER WAND COMMENT INSTALLER SUR LE MUR MONTAGE OP DE MUUR MONTAJE SOBRE LA PARED COME FISSARE L ASTUCCIO DEL TELECOMANDO ALLA PARETE FI...

Page 4: ...ng if is pressed again or after 20 minutes Available under HEAT COOL DRY modes only 8 ON timer setting Press the SET button will activate the on timer function Set the desired on time by pressing the...

Page 5: ...nuten Erh ltlich nur f r HEAT W RME COOL K HL und DRY TROCKEN betrieb 8 EIN Zeitschalter einstellung Die Funktion des EIN Zeitschalters wird durch Bet tigen des SET Knopfes aktiviert Den SET Knopfsola...

Page 6: ...si si vous appuyez de nouveau sur le bouton ou au bout de 20 minutes Disponible seulement sur le mode HEAT CHAUD COOL FROID et DRY SEC 8 Programmer la minuterie de mise en marche Appuyez sur le bouton...

Page 7: ...de door de gebruiker ingestelde waarden indien opnieuw op wordt gedrukt of na 20 minuten Alleen beschikbaar in de HEAT COOL en DRY functies 8 Instelling ON timer Druk op de SET toets om de inschakelti...

Page 8: ...va a continuar al ajuste del usuario si se aprieta de nuevo o despu s de 20 minutos V lido s lo en los modos de HEAT CALOR COOL FRIO y DRY SECO 8 Ajuste del temporizador en ON Presione el bot n SET a...

Page 9: ...ll utente se il tasto verr premuto nuovamente oppure dopo che sono intercorsi 20 minuti Disponibile solo nelle funzioni HEAT CALDO COOL FRESCO e DRY SECCO 8 Impostazione del temporizzatore per l accen...

Page 10: ...TO COOL DRY FAN HEAT CW CW 6 7 Inverter HEAT COOL DRY 20 HEAT COOL DRY 8 SET SET 7 30 7 30 CLR 9 SET SET CLR 10 SWING SWING 11 SLEEP 5 0 5 C 0 5 C 1 C 1 5 1 C 1 C 1 C 1 COOL HEAT AUTO 12 2 C 1 C 1 C 2...

Page 11: ...onfigura o do usu rio se pressionar de novo ou ap s 20 minutos Dispon vel apenas nos modos HEAT COOL e DRY 8 Configura o para ligar o temporizador Pressionando o bot o SET activa a fun o para ligar o...

Page 12: ...O COOL DRY FAN HEAT 2 CW 4 CW 6 7 HEAT COOL DRY 20 HEAT COOL DRY 8 SET SET 7 30 7 30 LR 9 SET SET LR 10 SWING SWING 11 SLEEP 0 5 C 0 5 C 1 C 1 1 C 1 C 1 C 1 COOL HEAT AUTO 12 2 C 1 C 1 C 2 C 0 0 5 1 1...

Page 13: ...e fan h z kullan c ayar na d necektir Yaln zca HEAT HEAT HEAT HEAT HEAT COOL COOL COOL COOL COOL ve DRY DRY DRY DRY DRY modlar nda kullan labilir 8 8 8 8 8 A ILMA zaman ayar A ILMA zaman ayar A ILMA z...

Page 14: ...nde Belgium Umeda Center Bldg 2 4 12 Nakazaki Nishi Kita ku Osaka 530 8323 Japan Tokyo office JR Shinagawa East Bldg 2 18 1 Konan Minato ku Tokyo 108 0075 Japan http www daikin com global Part No R080...

Page 15: ...stende Belgium Umeda Center Bldg 2 4 12 Nakazaki Nishi Kita ku Osaka 530 8323 Japan uO u V J JR Shinagawa East Bldg 2 18 1 Konan Minato ku Tokyo 108 0075 Japan http www daikin com global e r R08019029...

Page 16: ...d c OM G8 1206 Daikin_AR 6 3 07 3 12 PM 3...

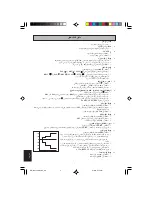
Page 17: ...W d d W U r u WIO d bF d d U w d u HEAT COOL DRY jI X R W ON ON e jG SET qOGA X R WHO jOAM jGC dL U u d qOGA X j SET vK X R j 7 30 U U W U w uN WHOJ qG A u 7 30 U U j CU e jG CLR qOGA X R W ON UG X R...

Page 18: ...b vK XO WOHO AUTO ON OFF AM PM MIN HR F C AUTO ON OFF AM PM MIN HR F C U UD U ii OM G8 1206 Daikin_AR 6 3 07 3 11 PM 1...

Page 19: ...i AUTO ON OFF AM PM MIN HR F C CLOCK SLEEP OFF TIMER SWING ON TIMER SET CLR MODE SET CLR OM G8 1206 Daikin_AR 6 3 07 3 11 PM 2...

Page 20: ...VO qOGA AUTO ON OFF AM PM MIN HR F C d WRC COA WRC HPA WRC HPA wzUIK l l w d VO d VO d U nK W d b OM G8 1206 Daikin_AR 6 3 07 3 12 PM 6...

Reviews: