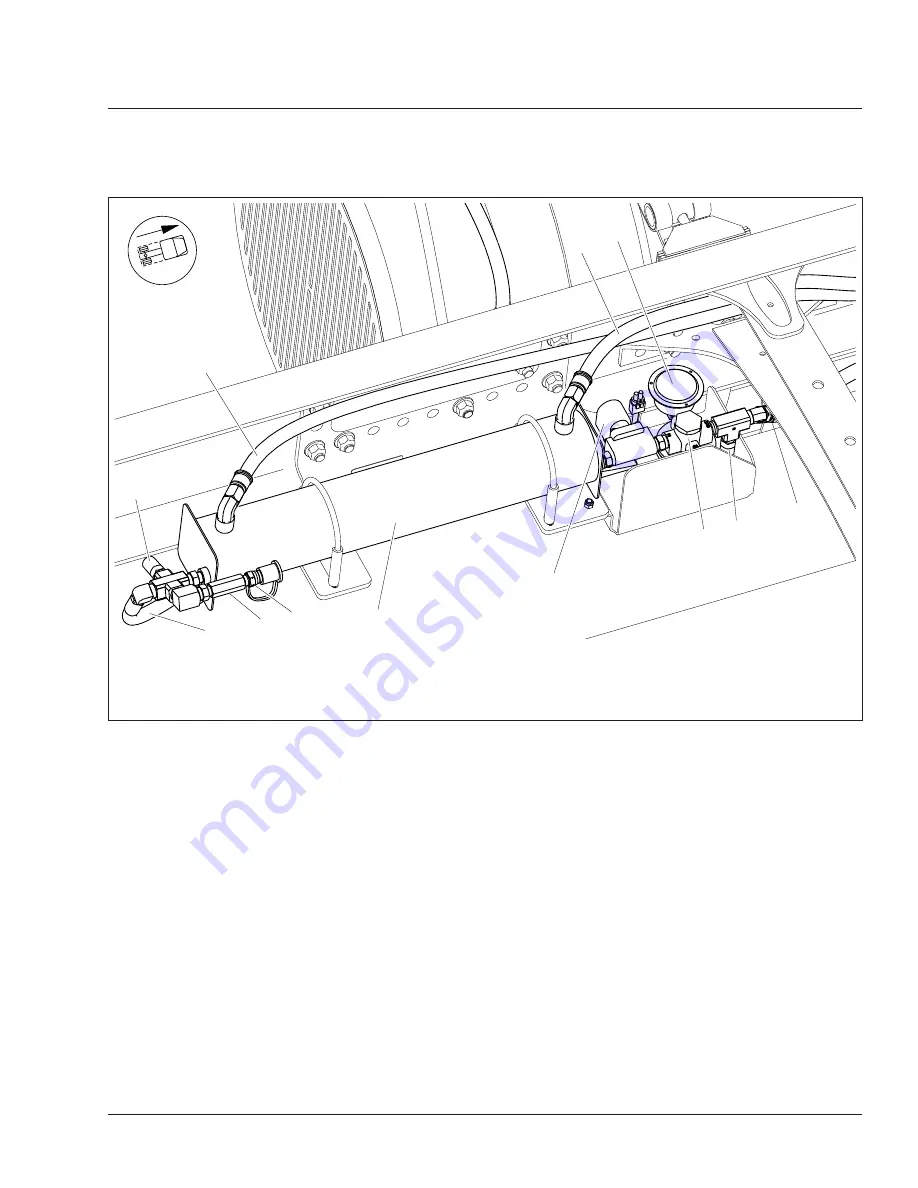
1.
Ensure the fuel tank is between 50 and 75 per-
cent full.
2.
Check the fuel tank pressure gauge (
, Item
8) to ensure that pressure is within the normal
range of 120 to 150 psi (827 to 1034 kPa).
3.
Inspect the fuel tank for signs of frost spots or
outer surface sweating. Frosting or condensation
on the outer surface of the fuel tank may indicate
a loss of vacuum.
4.
Check for a large variance in temperatures be-
tween the fuel tank and the fuel tank shroud. A
large variance in temperatures between the fuel
tank and the shroud may indicate a loss of
vacuum.
5.
Operate the vehicle for ten minutes. Shut down
the engine, apply the parking brakes, and note
the time.
6.
Wait fifteen minutes after shutting down the en-
gine, then record the fuel tank pressure and note
the time.
7.
Allow the vehicle to stand for at least eight
hours, then record the fuel tank pressure again.
8.
Use
to determine whether the pressure
increase is within an acceptable range.
06/29/2009
f470536
2
5
6
7
8
9
10
11
12
1
3
4
1.
Pressure Relief Device
2.
Fuel Inlet Line
3.
Check Valve
4.
CNG Quick-Connect Port
5.
Coolant Inlet Line
6.
Vaporizer
7.
Fuel Shutoff Solenoid Valve
8.
Coolant Outlet Line
9.
Pressure Gauge
10. Overpressure Regulator
11. Pressure Relief Valve
12. Fuel Outlet Line
Fig. 6, LNG Vaporizer Assembly
Fuel
47
Business Class M2 Maintenance Manual, August 2015
47/7
Property of American Airlines


