Installation Guide
Daintree
®
Networked Wireless Fixture Adapter (WFA100-SN)
2
2
3
Occupancy Sensor Time Delays
Wiring
If an occupancy sensor is connected to the WFA100-SN,
the time delay must be set for minimum. When Daintree
Networked is commissioned, time delays are set in the
Daintree DCS web application. These DCS “Off delays” start
counting down after the sensor’s internal time delay expires.
Therefore, set the occupancy sensor for the minimum time
delay during the WFA100-SN installation.
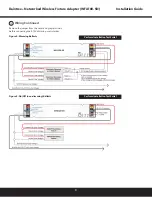
Figure 2: WFA100-SN Features
Figure 3: WFA100-SN Terminals
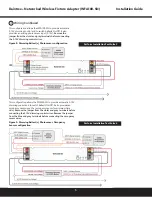
Line voltage wiring connects to the electrical supply circuit
and to the ballast(s). Low voltage terminals provide connections
for 0-10VDC dimming control signals to dimming ballasts.
The WFA100-SN low voltage terminals also supply low voltage
power and carry control signals from low voltage occupancy
sensors and photocells.
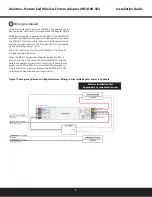
While the WFA100-SN is in Installation Test mode, the low voltage
devices directly control the lights wired to the same WFA100-SN.
After you exit Installation Test mode, the lights turn On and are
NOT controlled by the devices connected to the WFA100-SN.
After joining the wireless network, the control signals from the
low voltage devices pass through the WFA100-SN and are sent
wirelessly to Daintree Networked. Depending on the zone and
device configuration in DCS, wireless signals from the WAC to
the WFA100-SN determine operation of the light(s).
Design Caution
Do not install a wireless adapter such as the WFA100-SN to
control an electrical circuit that provides power to other wireless
devices or adapters. If power to wireless adapters or devices is
shut off, control and communication with them is disabled.
Reducing noise on low voltage (0-10V) wiring
• Keep wiring as short as practical
• Keep signal lines separate from mains voltage
lines.
• Reduce the area created by the signal lines and
the GND return (i.e., keep them close together).
• If possible twist the signal line with the GND return.
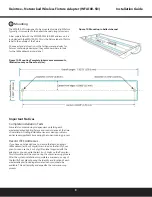
Must be installed inside a light fixture, or in an
enclosure to protect people from high voltage.
Risk of electrical shock. Disconnect all power before installation.
All installation and maintenance of line voltage equipment must be
performed by a qualified electrician. The WFA100-SN must be installed
in accordance with all local, state, and national electrical codes and
requirements. Wiring connectors are not supplied. UL recognized wiring
connectors must be used in the installation. Each terminal can accept
one conductor only. Connect only one 4AWG to 16AWG (0.2-1.5 mm)
wire to any terminal.
CLASS 2 WIRING:
All field wiring shall be suitable for Class 1. Electric Light
and Power, or Class 2, 3 wirings are routed separately
and secured to maintain separation between:
1.
Class 2 wiring and all other class wiring, and
2.
Limited energy circuit conductors from unlimited
energy circuit conductors.
CAUTION


