5
4. After operating:
(1) After-use care
①
Carefully remove loose dirt and dust after stopping the engine. In particular, remove debris from the air cleaner
and cooling fins. If debris remains, it might, cause engine trouble later on.
②
Check that the clamp screws of each part are not loose and that the blade is not damaged. If necessary, tighten the
screws or replace the blade with the genuine spare as specified by the manufacturer.
③
Check that the gear case fuel or grease does not leak. If necessary, repair the part.
④
Before repairing or adjusting the machine, stop the engine and unplug the secondary cord.
⑤
When exchanging parts, be sure to use genuine spare parts as specified by the manufacturer.
(2) Storage
①
Clean each part thoroughly. Apply a thin layer of oil to the metal parts in order to prevent rust.
②
Empty the fuel tank and carburetor.
③
Remove the spark plug. Put a little engine oil (about 3-5cc) in the cylinder through the plug hole. Slowly pull the
recoil starter several times so that the oil is applied thoroughly to the inner surface. Replace the plug.
④
Pull the recoil starter until it feels to be on the compression stroke (heavy).
⑤
If the machine is damaged, be sure to repair the part before storing it.
⑥
Be sure to put the blade cover on the machine for safety, when either storing or moving the machine to another site.
⑦
Store it in a dry an dust/dirt
–
free place.
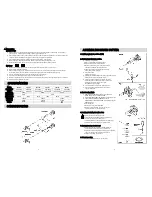
SPECIFICATIONS
MODEL
SBX24W
SBX24L
SBX26W
SBX26L
SBX28W
SBX28L
DRY WEIGHT
5.5
〜
5.7kg
5.3
〜
5.6kg
6.7
〜
7.3kg
6.4
〜
6.9kg
7.8
〜
8.0kg
7.5
〜
7.8kg
MEAS
’
T
1750×770×480mm
1750×350×230
1800×770×480mm
1800×350×290mm
1800×770×480mm
1800×350×290mm
HOUSING DIA
24mm
26mm
28mm
DRIVE SHAFT
6mm
8mm
HANDLE TYPE
TWIN
LOOP
TWIN
LOOP
TWIN
LOOP
MITSUBISHI
TLE26
TLE33
TLE43
KAWASAKI
TJ27E
TJ35E
TJ45E
HONDA
GX25
GX35
-
CONSTRUCTIONS
6
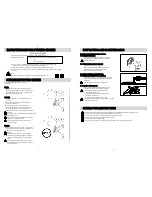
ASSEMBLING BRUSH CUTTER
1. Install the engine to the machine. (Fig
①
)
Fitting bolts (M6
×
30)
×
4
2. Attaching the handle to the machine.
①
Throttle lever installation:
・
Remove the throttle lever retaining bolts.
・
Insert the throttle lever into the handle.
・
Make the handle fixing hole to that of the throttle
and tighten both parts together with a bolt.
・
Tighten the screw on the throttle lever retaining
band. (Fitting bolts
×
2) (Fig
②
)
②
Attach the handle
Fitting bolts 4 (Fig
②
)
③
Passing the throttle wire/lead wire through the main pipe grip,
attach the assembly to the engine. (Fig
③
)
④
Fasten the lead wire with the round terminal to the
clutch case with a bottom bolt at the air cleaner side
which fixes the clutch case on the engine.
(with HONDA engine) (Fig
④
)
⑤
Turn the throttle wire round from the muffler side.
⑥
Secure the lead wire/throttle wire to the machine,
using the wire band.
3. Blade Mounting (Fig
⑤
)
①
Attach the PREVENTION PLATE to the bottom of the
GEAR CASE using the CROSS SCREW.
②
Install the BLADE CLAMPING PLATE A onto the gear shaft.
③
Tightly fasten the BLADE CLAMPING PLATE B,
STABILIZING PLATE and WASHER WITH BLADE using the
HEXAGON NUT
・
Use the spanner.
・
Be careful of injury from the BLADE.
・
When mounting the blade, bear in mind that the
direction of rotation is counterclockwise.
4. Mounting of Scattering Prevention Cover
Mount the safety cover to the gear case rib.
Caution: Wear gloves during assembly.
Caution: Make sure the blade is attached properly by
revolving the cutter before starting work.
If it vibrates abnormally, adjust and attach the blade more
securely to the machine before proceeding further.
5. Attaching/removing shoulder band
・
Put the shoulder band over the shoulder. Raise the
brush cutter and hook the machine onto the belt.
・
Adjust the shoulder band length according to the operator
’
s
height, so that the cutter is level with the ground.
・
To remove the band, pull the knob.
6. Notes when moving
・
Be sure to put the blade cover on the cutter.


