33
MAN# 650814
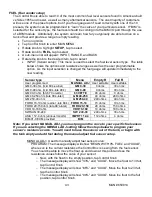
There is also a BACKSPACE and a RESET selection available at the bottom of the character
list to aide in the label entry as well.
After selecting the LABEL to edit, the left most character will be flashing. Rotate the Control
Knob to the desired character, and then tap the knob to select. The next character position to
the right in the label name will start to flash, so repeat the character selection process. Take
notice
the “|” symbol in the eighth position of the label name. Even if less than 8 characters
are desired in the new label,
enter empty spaces (“ “) in the label name to clear this “|”
character.
Clearing this “|” symbol will act as a line terminator, and the new label will now be
displayed as entered. Some experimenting may be needed, so use the BACKSPACE and
RESET to help get the label as desired.
Note: If the label names are changed, the EXTRA LABEL menu list will still indicate
EX+, EX-, WAIT, and 4X4. These factory default names remain in the list to indicate
which terminal pin on the Control Box is associated with the item being configured.
Note: By default from the factory, the WAIT and 4x4 inputs will display an associated
symbol on the GRAFIX Instrument Cluster if triggered (see INDICATOR section below).
If the ‘LABEL’ name is changed as described above, the associated symbol will not
appear on the Instrument Cluster, but the WARNING or INFO message (as configured by
TYPE below) will appear in the Message Area.
DISPLAY (Message display duration)
The duration the message is shown can be changed. The ALWAYS setting will keep the
message displayed as long as the terminal is active. The ON CHANGE setting will show the
message briefly for a few seconds when it is activated and the message along with the word
OFF for a few seconds when it is released. The DISPLAY option is not available for the WAIT
or 4x4 inputs unless their respective label has first been changed.
TYPE (Message type)
The message shown in the Message Center can be either an information type (INFO) or a
warning type (WARN), and a warning message will be shown in
‘red’. The TYPE option is not
available for WAIT or 4x4 unless their respective label has first been changed.
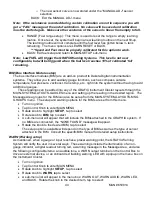
DOOR OPEN (Door Open input trigger)
The options for this are: NONE, EX+, EX-, WAIT, 4X4, and BACK. If an input is selected to
operate as the door input trigger, it cannot be used as a Message Area display input. When
DOOR OPEN is configured and triggered, the GRAFIX will display the splash screens (as
configured), and then display the odometer mileage and the clock time in the Menu box area.
The DOOR OPEN is typically connected to a dome light wire.
BACK (Return to MAIN-SYSTEM-DISPLAY menu)
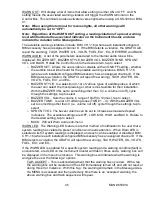
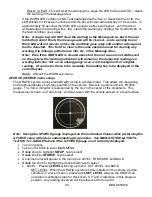
START IMAGE: menu
On power up of the GR
AFIX, the ‘DAKOTA DIGITAL’ logo and the factory installed ‘GRAFIX’ logo
will be displayed on the Instrument Cluster. A
‘CUSTOM’ image can be displayed in place of the
GRAFIX logo at startup (key on) by selecting the CUSTOM setting in the MAIN-SYSTEM-
DISPLAY-START menu list. To download a custom image to the GRAFIX via a thumb drive
inserted in to the UPDATE port on the Control Box, see the MAIN-SYSTEM-UPDATE for details
and the image format required.
BACK: Exit EXTRA LABEL and return to MAIN-SYSTEM menu


