GLUING THE SOUNDBOARD
_____21. Be sure to keep the spac-
er block firmly clamped to the frame
for this operation! This will help
hold the shape of the body as you
apply clamps.
Test-fit the frame on top of the
soundboard without glue first, to see
how the braces fit inside the kerfing.
Trim the braces as necessary.
NOTE: If you plan to cut pockets
into the kerfing for the ends of the
main X braces, this will take some
time for trial and error fitting.
Plan out your clamping method and
assemble enough clamps (or Bun-
gee cording) to do the job before
you begin.
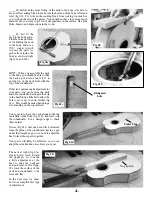
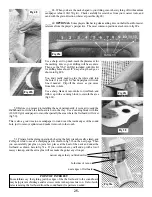
We show two ways to clamp the
body down against the soundboard:
20 clamps, as shown in fig 21a, or 20 feet of light bungee cord-
ing (available from Musicmakers), as shown in fig 21b.
If using the Bungee cord method, put screws around your flat
work surface at an angle, about 2-3” apart, for wrapping the
cord. If you didn’t make a 22” X 28” clamping board, you can
put the screws in the edge of your smaller plywood instead of
4” away from the guitar as shown.
Fig 21a
spacer block
Fig 21b
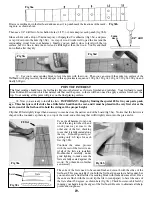
When ready, spread glue all around the edge of the guitar frame
(including the kerfing), and put the frame back on the sound-
board, making sure there are no obstructions preventing a nice
flat fit.
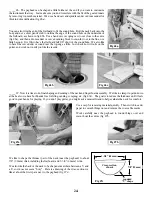
If using Bungee cord, tie a loop at
one end, hook it on a nail and work
your away cross the instrument in
spider web fashion to press the
entire frame down firmly against
the soundboard (fig 21b).
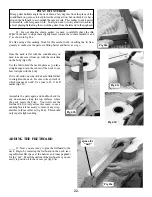
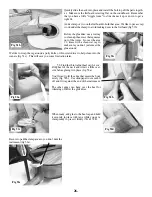
_____22. When the soundboard is dry, remove the clamps and
turn the instrument over so you can start working on kerfing
for the back edge. Begin by leveling the edges of the ribs and
corner blocks, using your long flat sanding block (fig 22).
The goal is to eliminate glue blobs and other irregularities that
will interfere with a good fit of the back panel. You’ll be sand-
ing more after the kerfing is installed, but you’ll use a curved
sanding block next time.
HINT: Leave the spacer block in to stablize the frame as you
sand, until you get to the heel and tail blocks. You’ll need to
remove the clamps in order to sand those areas.
PREPARING THE BACK
Fig 22
11.
Summary of Contents for PARLOR
Page 36: ......


