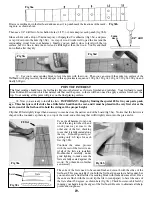
_____5. While the corner blocks are drying, you can work on
the tail end of the body. Use tape to hold the tail ribs together
as shown in fig 5a.
Find the center of the tail block
and mark it clearly (fig 5b).
Smear glue on the flat face of
the tail block (fig 5c) and place
it inside the seam, as shown in
fig 5d. Find a scrap of wood
to use as a clamping pad for
the outside of the joint, and add
clamps, making sure the block
is oriented correctly and nicely
centered on the seam (fig 5e).
IMPORTANT: Make sure the free
ends of the tail ribs can be pushed down
to the work surface (fig 5e). If not, then
you may have to release the clamps and
slide the parts into better alignment.
Fig 5a
Inside surface
of tail block
Fig 5c
Fig 5d
Fig 5e
_____6. Now you can move to the heel
end of the instrument. Mark the center of
the heel block, on the end marked “Back”
(fig 6a).
Glue this heel block to one heel rib for
now, aligning it to the centerline, as shown
in fig 6b.
Clean up excess glue with a wet rag, as
usual.
IMPORTANT: Leave the other heel rib
for later. That will be the last step in clos-
ing the frame.
Fig 6a
Fig 6b
4.
QUESTION
Have you checked to make sure you are still gluing the parts in the correct positions? If you fi nd a corner block
glued to the wrong end of a rib, you’ll need to correct it now, before proceeding further. You can soft en the dried
glue by getting the seam wet to allow the parts to be separated without breaking anything. Be patient with this
process. It may take 10-20 minutes for water to penetrate far enough into the seam to soft en the glue.
Fig 5b
Tail
Block
Summary of Contents for PARLOR
Page 36: ......


